Simple Tomato Soup

Simple Tomato Soup

There’s something about nostalgia that clouds judgement quite a bit. I have the absolute fondest memories of watching Jim Henson’s “The Dark Crystal” when I was little (vital essence! HISSSS), but I caught a snippet of it on tv in recent years and what. the. actual. hell. That movie is dark. And straaange. Probably affected my development in some deep way – but that’s neither here nor there. I’m really talking about canned tomato soup. I’ve gone back to it since growing up and it’s just never as good as I remember. Combine that with the fact that I no longer trust canned condensed soup and obviously there needs to be an update, in the form of a recipe. I can’t go back and make The Dark Crystal not weird, but I can grow up some soup for adult consumption.

Simple Tomato Soup

I feel like a mad scientist-thief for bastardizing this tomato sauce recipe (even more than I already have) but it’s just the perfect foundation for a smooth, slightly sweet, simple and nostalgic tomato soup. Marcella, you’re a genius, please don’t hate me.

Simple Tomato Soup

So basically you take Marcella’s famous tomato sauce, cook it down until the pot is almost dry when you scrape your spoon across the bottom, add chicken stock, a judicious bit of seasoning and heat, and buzz it up with a hand blender. I feel like this is how tomato soup is supposed to taste. And what’s a trip down memory lane without a proper sloppy grilled cheese? But maybe with a little gruyere mixed into the cheddar, because we’re grown ups.

Simple Tomato Soup

Simple, Nostalgic Tomato Soup
serves 3-4

Ingredients:
-2 14.5 oz cans diced or crushed tomatoes
-3-4 Tbsp. butter
-1 onion, cut in half and peeled
-2 cups chicken stock
-a few dashes of tabasco
-salt, to taste
-optional: 1 tsp. sugar

Method:
1. Put canned tomatoes (undrained), butter, onion, and a pinch of salt in a medium-sized pot. Bring everything to a simmer over medium-low heat. Reduce heat to low and cook, stirring occasionally, until the onions are very soft and the tomatoes are cooked down enough that the pot is dry when you scrape your spoon across the bottom. This will take at least 30 minutes, so you don’t have to watch it too carefully. If you’re dying to eat, you can turn the heat up to medium, but you’ll need to monitor and stir to keep things from burning.

2. Add chicken stock to the pot and use an immersion blender to blend the soup until it’s smooth. Add tabasco and salt to taste.

3. I think the soup is good with or without sugar, but if you want more of that nostalgic sweetness, add up to a teaspoon of sugar. Taste again, see what you think (add more salt or tabasco as you like – sugar will change the flavor slightly so you may want to adjust) and eat up.

*For a grown-up grilled cheese, get two slices of your favorite bread, butter one side of each slice, and grate up equal parts of sharp cheddar and gruyere cheese. Heat your pan on medium-low, put the bread in butter-side down, pile the cheese on both sides and wait for it to melt. When it’s melted, slap the two sides together (cheese in, obviously) dip it in your soup, and eat it.
  1. I still have random flash-backs about The Dark Crystal! Not sure I want to revisit it - especially after what you wrote about it :) And the soup... nothing better than a bowl of homemade tomato soup. I love the technique you used - so creative :)

    April @ Girl Gone Gourmet — March 13, 2015
    1. April I'm so glad to know there are more of us Dark-Crystal-exposed people in the world. We probably need to form a support group. Have you made the famous Marcella sauce before? It's so mild I thought it would be the perfect thing for a sweet-ish, creamless tomato soup.

      courtney — March 17, 2015
    2. reply
  2. This soup looks fabulous! Love the photos :)

    marla — March 18, 2015
    1. Thanks Marla! It's all about that bright red color and that obscene grilled cheese :)

      courtney — March 18, 2015
    2. reply
cancel reply

Roasted Sweet Potato Salad with Goat Cheese and Bacon

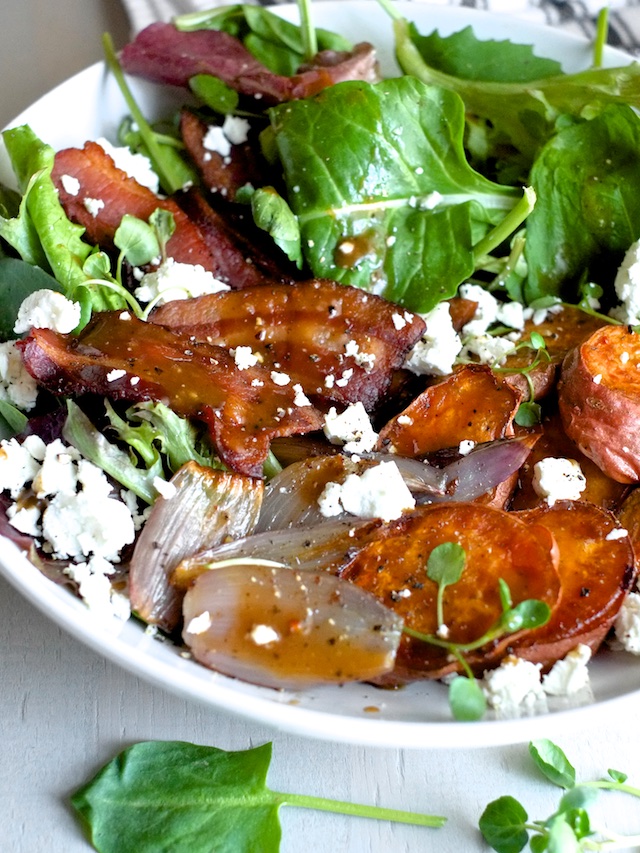
Roasted Sweet Potato Salad with Goat Cheese and Bacon

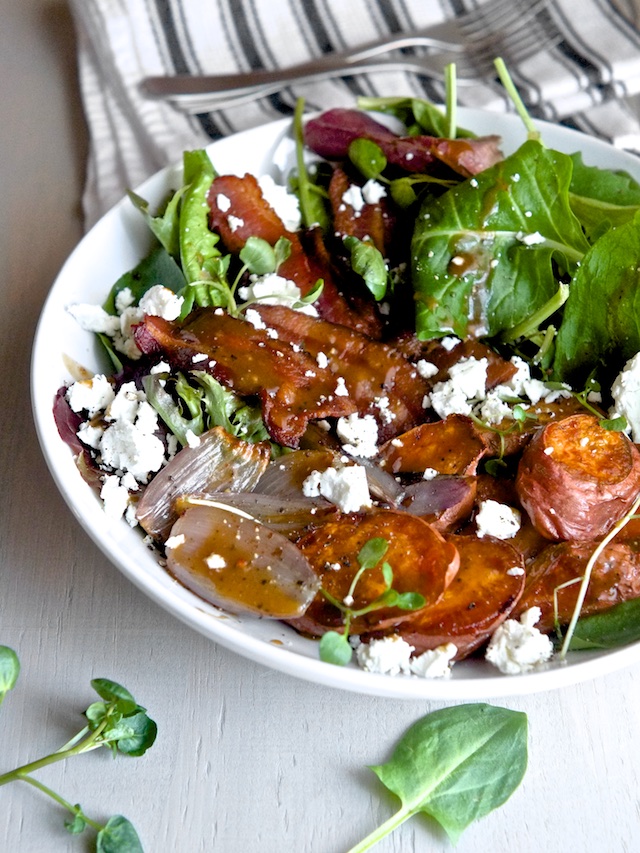
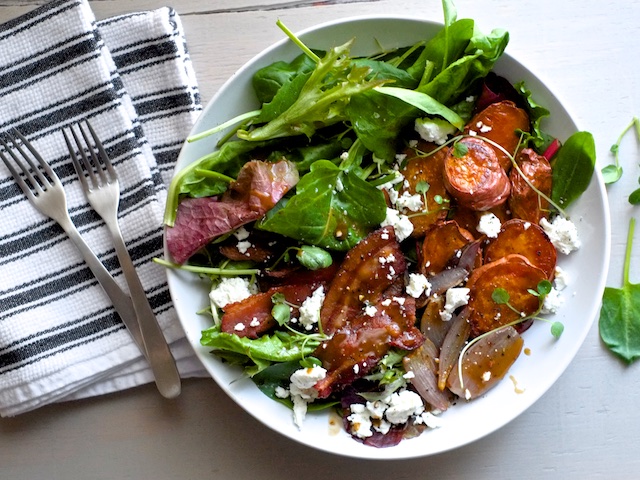
This is a substantial salad. Dinner-worthy, even. And yeah, it’s been done before on this here interweb, but have you made it yet? Because you should. You really should.

Roasted Sweet Potato Salad with Goat Cheese and Bacon

The flavors of this salad are so well-anchored in sweetness with the roasted root vegetables and balsamic dressing that it’s almost too much, but the bacon and goat cheese lend brightness and smoky-salty complexity that manage to keep it all very nicely balanced. It’s really a winning combination – one that you need to try if you haven’t already.

Roasted Sweet Potato Salad with Goat Cheese and Bacon

Roasted Sweet Potato Salad with Goat Cheese and Bacon
serves 3-4

Ingredients:
-1 lb uncooked bacon strips
-2-3 medium sweet potatoes, cut into cubes or slices
-3-4 shallots, peeled and cut in half (or one medium onion cut into wedges)
-a small roll of goat cheese (they are 3 oz, you’ll use about half a roll)
-1 small box or bag salad greens (spring mix, arugula, baby kale, spinach, whatever)
-1 Tbsp balsamic vinegar
-1 tsp honey
-1 tsp dijon mustard
-1 clove garlic, grated or minced
-2-3 Tbsp olive oil
-salt and pepper

Method:
1. Start by cooking your bacon on a baking sheet in a 350F oven for 20-30 minutes or until browned and crispy, stopping at least once to turn the pan.

2. Remove the bacon to a paper towel lined plate and set aside. Drain most of the fat from the baking pan, add sweet potatoes to the pan with salt and pepper, toss to coat the potatoes in bacon fat, and return the pan to the oven.

3. Roast sweet potatoes for 15 minutes, add your shallots or onions to the pan and return it to the oven for another 15-20 minutes or until the potatoes and onions are cooked through and nicely caramelized.

4. Combine balsamic vinegar, mustard, honey, and garlic in a small bowl with a whisk. Slowly drizzle olive oil into the vinegar while whisking to emulsify the dressing. Taste the dressing and add salt and pepper to your liking.

5. Assemble the salad with greens on the bottom, roasted veggies and bacon on top, followed by goat cheese, balsamic dressing, and a final sprinkle of salt and pepper (if you like).

The warm vegetables will wilt the tender greens, so assemble just before eating.

  1. Great recipe. Top marks, we really enjoyed this. Thanks for sharing. Simon

    plasterers bristol — August 5, 2015
    1. reply
cancel reply

Crispy English Roasted Potatoes

Crispy English Roasted Potatoes

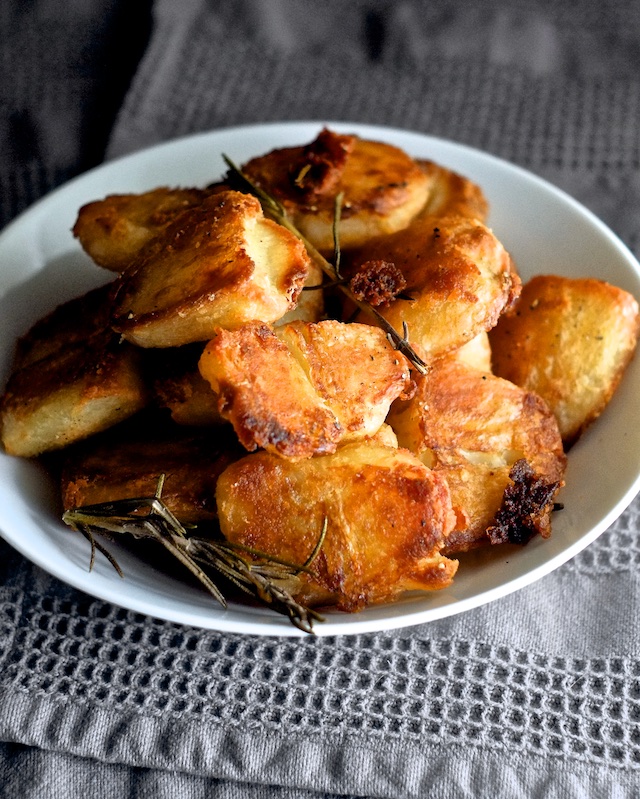
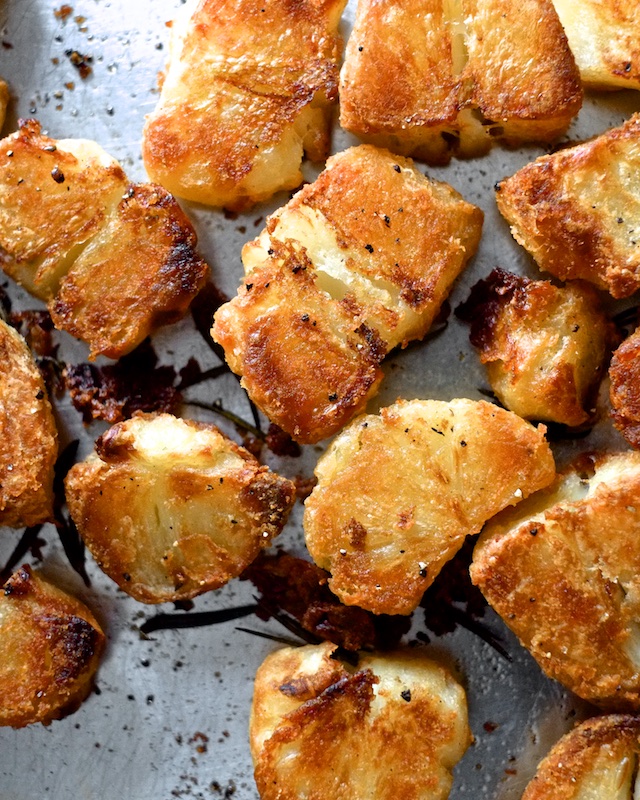
Crispy potatoes are my kryptonite. I live for spuds that crunch so loud I can’t hear myself think, like twice-cooked Belgian frites, Utz ripple chips, and these English roasted potatoes. Cody lived in England for a bit before we met and told me about the potatoes they made with their Sunday roasts. I thought they sounded like more work than they were worth, and tried to replicate them by blasting raw potatoes in the oven until they turned to leather. I was a fool. I have since experienced properly crisp yet creamy English potatoes, no corners cut, and they are a revelation.

These potatoes are made in two steps. It’s a bit of work, but worth it. They’re also not so much roasted as fried in the oven but let’s not get hung up on semantic trifles. 

Crispy English Roasted Potatoes

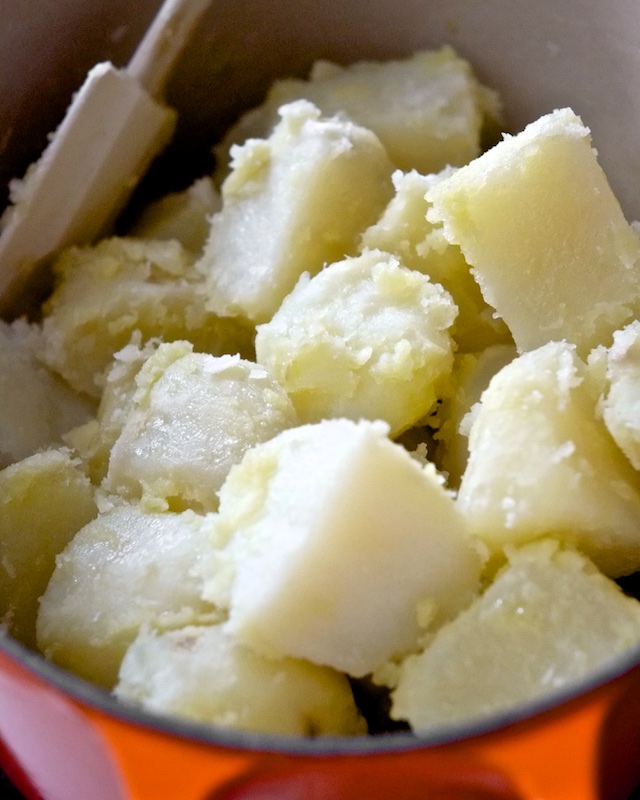
The trick to creating such shattering crisp outsides is boiling the potatoes before you roast them. Then you do what Jamie Oliver describes as “chuffing up” the outsides of the potatoes by banging them around the pot until they’re, well, chuffed. I blogged about this once before, but with actual deep-fried potatoes and I have to say, oven-roasted potatoes are so much crispier, it’s not funny.

Crispy English Roasted Potatoes

The price you pay for such glorious potatoes is time. You have to give yourself at least an hour, maybe an hour and a half to get these properly done, so plan accordingly. They don’t re-heat very well, but they can be held in a warm oven for thirty minutes or so. I should also mention that they go quite well with steak.

Crispy English Roasted Potatoes

Crispy English Roasted Potatoes
Adapted from Jamie Oliver’s perfect roasted potatoes

Ingredients:
-large russet potatoes, at least one per person (preferably one and a half)
-2-3 tablespoons olive oil
-1/4-1/3 cup peanut oil (or other high smoke point oil)
-kosher or sea salt
-optional; black pepper, rosemary, thyme

Method:
1. Peel and cut potatoes into large chunks, about 6-8 pieces per potato, around 2×2 inches in size.

2. Put potato chunks in a large pot and cover with water. Season water with a good pinch of salt and bring to a boil slowly over medium-high heat.

3. While your potatoes are boiling, preheat your oven to 500F.

4. When the potatoes are not quite cooked through (but quite soft on the outside, about 15 minutes for such large pieces), cover the pot with a slightly offset lid and drain the water from the pot. Holding the lid tight, shake the pot once or twice to rough up the surface of the potatoes.

5. Pour olive oil over potatoes and gently stir them (preferably with a rubber spatula) to coat with oil.

6. Pour peanut oil in a rimmed baking sheet or roasting pan and let it preheat in the hot oven for 2-3 minutes.

7. Remove the baking tray from the oven and pour your potatoes into the hot oil. It will sizzle – that’s good. Spread the potatoes out in a single layer, sprinkle with salt, and put them in the oven. Do not crowd the pan – if your potatoes are piling on top of each other, get out another pan and do two batches.

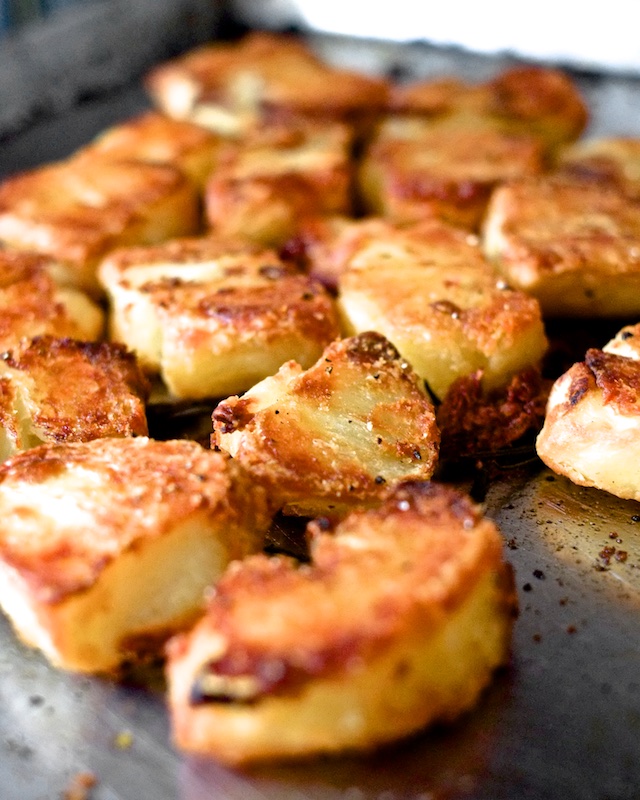
8. Roast the potatoes for about 15 minutes, then take them out and squish them slightly with the back of a metal spatula. This increases the flat surface area and means extra crunch.

9. After squishing the potatoes, return them to the oven for another 15 minutes, then take them out and flip them over. The first side should be gorgeously brown.

10. Add pepper, rosemary, or thyme (if you’re using it, though if these are your first crispy roast potatoes I’d leave simply salted) and return the potatoes to the oven to roast for a final 10-15 minutes or until they are nicely brown on both sides and very crispy. If for whatever reason they aren’t as brown as mine in the photo, leave them in the oven a few more minutes. Then just taste them, add more salt if necessary, and serve.

  1. making these tonight and i can't wait! i'm also a sucker for crispy potatoes. but i'm pretty sure my version of crispy potatoes is the leathery hard ones you described in your earlier years, haha. wa wa waaaaa

    miranda — March 5, 2015
    1. Yay! You'll have to tell me what you think! And like I said in the post, if they aren't brown enough, give 'em more time :)

      courtney — March 5, 2015
    2. reply
  2. My boyfriend is English and LOVES these kinds of potatoes. We made them together for the first time this past Christmas and I agree that they are totally worth the hassle and time - super crispy on the outside and soft and fluffy on the inside. He had talked about them forever, but it wasn't until we made them that I understood why he loves them so much. Yours look amazing!

    April @ Girl Gone Gourmet — March 6, 2015
    1. Thanks April! It pains me to admit when my husband is right about cooking (MY domain), but this was the best bit of humble pie ever. Brits know their potatoes!

      courtney — March 9, 2015
    2. reply
  3. These look sooo amazing! Bring on the crisp. I'm coming off a weekend of french fry making (I just got a new mandoline) and getting the perfect potato crisp is easier said than done. Your blog is lovely, Courtney! Your brother-in-law Jordan sent me your way. Keep up the awesome work!

    Karen @ The Food Charlatan — March 10, 2015
    1. Thanks Karen! And french-fry making is a beast. My first attempt left me dumping a smoking hot, nigh-to-exploding pot of oil out in my backyard. A thermometer eventually saved me, but I am forever scarred. Love your blog btw!

      courtney — March 10, 2015
    2. reply
  4. These look sooooooo gooooood! I want some right now!

    Amy — March 11, 2015
    1. reply
  5. These were incredible! Thanks for the great recipe. We will absolutely make this over and over again.

    Sarah — August 6, 2015
    1. reply
  6. I learned to make these from my English son-in-law; he doesn't do the 'squishing' part, but I bet that makes them even better! (And he calls it 'roughing them up', but 'chuffing' is so very descriptive...)

    margaret — November 28, 2015
    1. The English are onto a good trick with the chuffing, aren't they?

      courtney — December 6, 2015
    2. reply
cancel reply

Pan-Seared Butter-Basted Steak

Pan-Seared Steak

Sometimes there needs to be meat. And sometimes grilling just isn’t going to happen.

Pan-Seared Steak

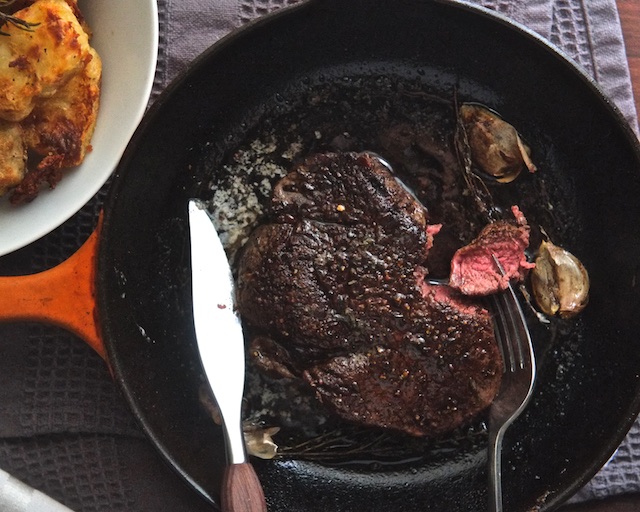
It took me more than a few tries to perfect the art of indoor steak, but my struggle was well worth it. Grills are wonderful in their season, but what a pan-seared steak lacks in flame-kissed smokiness, it makes up for in pristine caramelization. Then there’s the fact that you can baste a pan steak in butter – which is no small matter.

Pan-Seared Steak

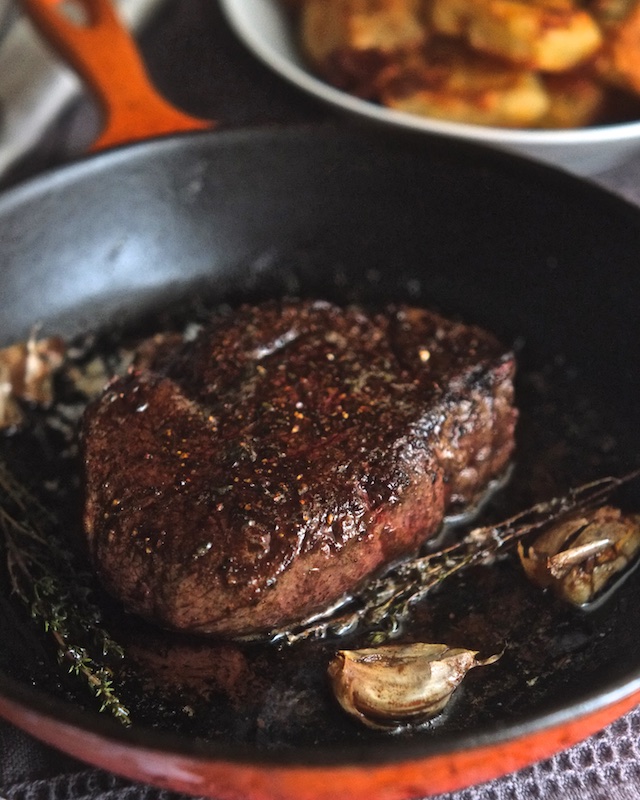
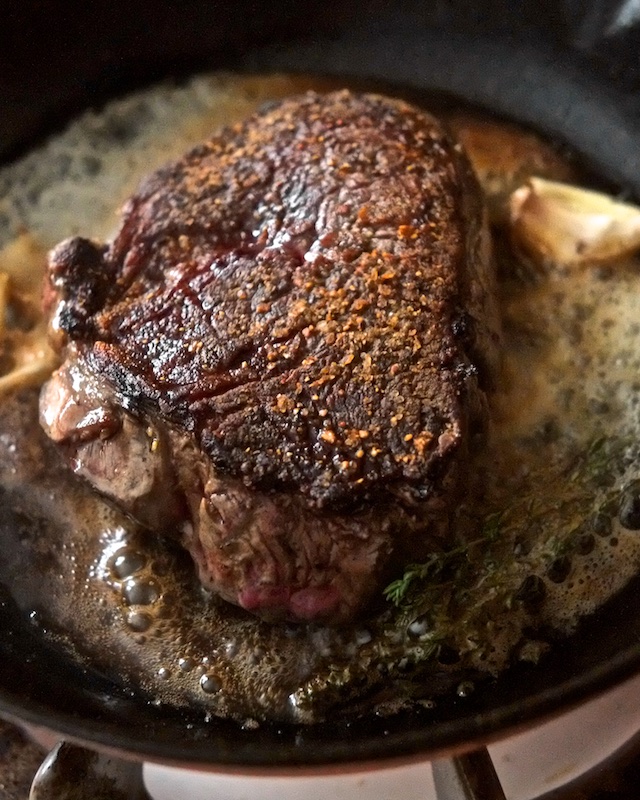
About butter-basting a steak: it’s not the same as cooking steak in butter. Steak needs high heat and butter has a low smoke point, so cooking a steak 3-5 minutes per side in butter is a mistake. Searing an oil-coated steak in a dry cast iron pan and then nudging the heat down and adding butter at the end (with a few flavor enhancers) gives you a deeply caramelized steak, flavor infused brown (not burned) butter, and a virtually smokeless kitchen. This is the one true pan-seared steak.

Pan-Seared Steak

The One True Pan-Seared Butter-Basted Steak

Ingredients:
-your favorite cut of steak
-peanut oil (or some other high smoke-point cooking oil)
-sea salt or kosher salt
-fresh cracked black pepper
-2-3 tablespoons butter
-1-2 cloves garlic, crushed but whole
-a few sprigs of thyme (or some other woody herb like rosemary)

Recommended equipment:
-cast iron skillet or griddle
-meat thermometer

Method:
1. A half hour before you plan to cook your steak, take it out of the fridge and let it rest on a plate at room temperature. Steak cooks quickly, so use this time to prepare your sides so you will be ready to serve a few minutes after your steaks come off the heat.

2. 4-5 minutes before you are ready to cook, pre-heat a cast iron pan over medium heat (if you don’t have cast iron, regular shiny metal is ok but won’t need to preheat more than 2 minutes. Avoid nonstick because it’s not made for high temperatures). Make sure your pan is large enough to accommodate the steaks you plan to cook. You’ll need about a 2 inch buffer between the steaks (if you’re cooking multiples) for a proper sear. If your pan is too small, use two or (if you must) cook the steaks one at a time.

3. About a minute before you’re ready to cook, turn your pan up to medium-high heat (high if you have an electric coil stove) . Coat your steaks in oil and season liberally with salt and pepper.

4. Put your oiled and seasoned steaks in your hot pan and don’t touch them for at least 3-5 minutes (more if your steaks are very thick). When they are properly seared, they will lift off the pan very easily. Flip them once and let them cook another 3-5 minutes.

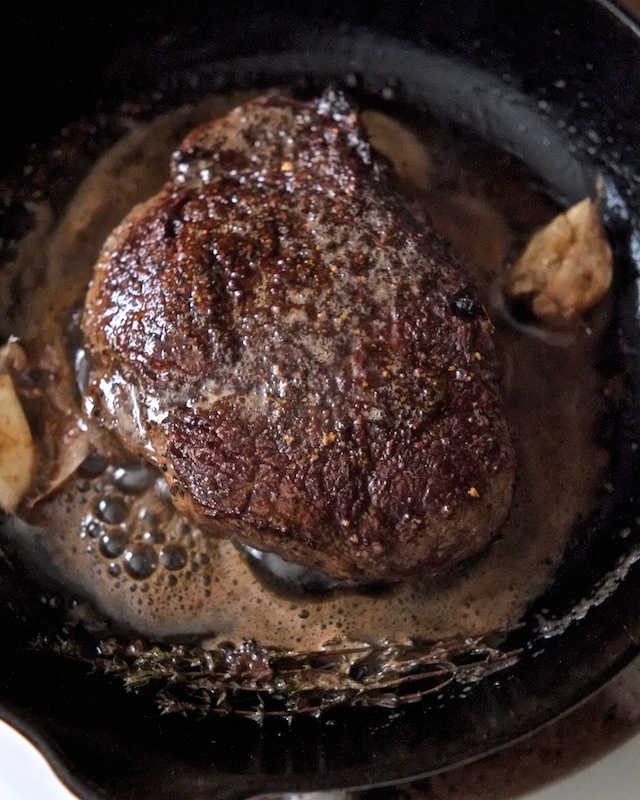
5. When your steaks are nearly done, turn the temperature to medium-low and drop in the butter, thyme, and garlic. Tilt the pan and scoop the melted butter over the steaks to baste. Let the steaks cook in the butter until they reach the temperature you like. This timing will vary hugely depending on the shape of your steaks and how you like them done, so if you have a thermometer, use it. If you don’t, you can make a small slit in the fattest part of the steak to check it’s doneness.

6. When the steak is cooked to your liking, remove it to a fresh plate to rest for at least 5 minutes, pretty-side up to preserve the caramelization. Use the last five minutes of rest time to set your table or finish up making a side dish. Then get ready to eat the greatest indoor steak of your life.

  1. You did that steak so well, it looks like filet mignon!

    rick — March 13, 2015
    1. Thanks Rick! It's a tenderloin steak, so almost a filet mignon, just not quite as pretty.

      courtney — March 17, 2015
    2. reply
  2. This is now my go-to indoor steak recipe, Have made it a few times now, changing spices etc and it never fails. Thanks!

    Katharine — April 12, 2015
    1. Katharine! You made my day with that comment. I'm so glad it works for you. Thanks for the return and report!

      courtney — April 12, 2015
    2. reply
  3. Using this tonight, finally a solid indoor steak recipe! can't wait to see how this turns out!!

    Kristen — March 5, 2016
    1. Thank you Kristen! I hope it works for you! If you need any help troubleshooting, let me know.

      courtney — March 14, 2016
    2. reply
  4. We struggled to find a steak recipe that both the adults and kids enjoyed, but this one really makes everyone's mouth water. Even my pickiest eater LOVES this steak, and requests it whenever the word "meat" is mentioned. XD I don't see myself making steak any other way for quite a long time, if ever!

    Bonnie — March 5, 2016
    1. Thank you Bonnie! I'm so glad you like the recipe! I think so many people default to grilling when they think steak (which is delicious), but pan-seared steak is something special in my opinion, especially with butter.

      courtney — March 14, 2016
    2. reply
  5. I've never been able to cook steak properly - this recipe is the first time I've nailed it. So good! Thank you!

    Bobo — April 4, 2016
    1. So glad it worked for you! Thanks for giving the method a try!

      courtney — May 22, 2016
    2. reply
  6. very nice riff on Momofuku Ssam Bar's large format steak.

    Blain — April 12, 2016
    1. I did see David Chang's chef friend making a giant steak this way on the "Mind of a Chef" documentary series (which I LOVED), but to be fair I've seen steak done this way for ages, both on TV and in culinary textbooks. A good method is a good method though!

      courtney — May 22, 2016
    2. reply
cancel reply

Black Bean Soup

Black Bean Soup

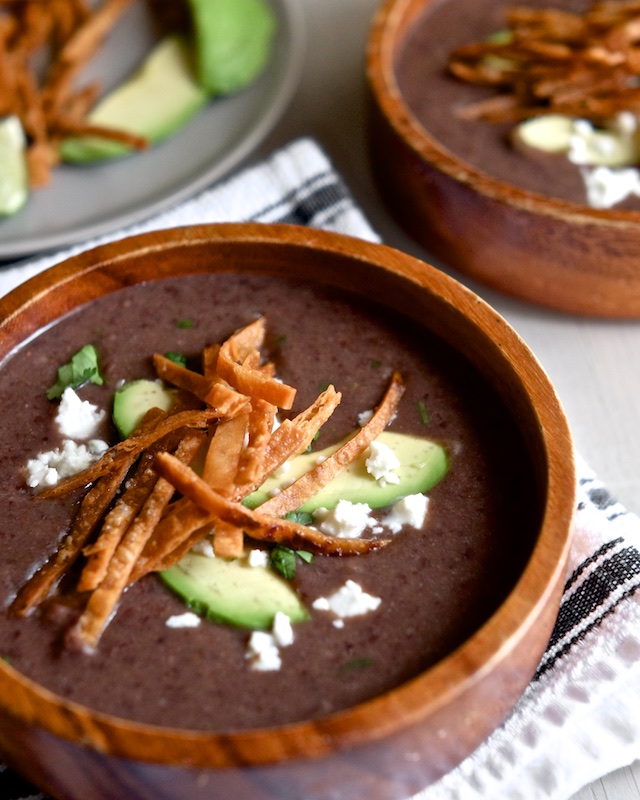
Black bean soup is one of the things that I don’t use a recipe for anymore. I had to reverse-engineer this for sensical public consumption, but you’ll see how intuitive it is once you get the concept. There are many different iterations of black bean soup, but this one is the most stripped-down and versatile. The soup itself is vegan if you use vegetable broth, but you could easily add chicken or chorizo or sour cream and they would play nicely together. I’ve decided to use canned beans here, just for the sake of ease.

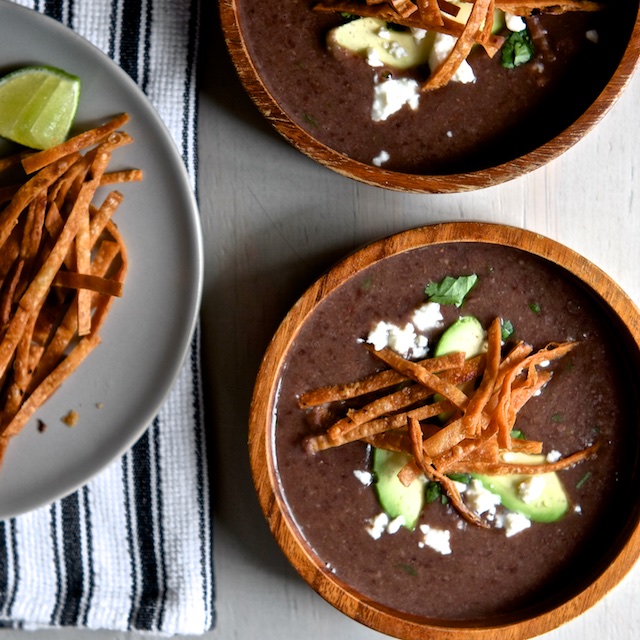
The recipe starts with aromatics and olive oil, as most good soups do. Garlic and onion (of course) and there must be peppers – I usually use a bell pepper for flavor and a couple of jalapeños for heat, but these can be swapped out with your favorites, whatever they are (Anaheim, poblano, habanero – go nuts). From there it’s just cumin, salt, beans, broth, cilantro, and lots of lime. On it’s own it’s comforting without being boring, but it’s too fun to not dress it up a bit. I like tortilla strips, avocado, and queso fresco or sour cream, but you can put anything on it that would feel at home in a taco.

Black Bean Soup

Black Bean Soup
serves 6-8 

Ingredients:
-1 large onion, diced
-1 bell pepper, diced (I use green for this)
-2 jalapenos, seeded and diced
-2 cloves garlic, minced or grated
-about a tablespoon of olive oil
-2 tsp ground cumin
-3 cans black beans, drained of most of the liquid (but not all)
-3 cups vegetable or chicken broth
-salt, to taste (kosher or sea salt please)
-a handful of cilantro, chopped
-juice of one lime
-a few dashes of your favorite hot sauce (optional)
-toppings (use your imagination)

Method:

1. In a large pot over medium-low heat, sweat onion, bell pepper, jalapeño and garlic in olive oil until onion is translucent and peppers are soft.

2. Add cumin and a pinch of salt to the pot and stir until cumin is fragrant.

3. Add black beans and broth to the pot and stir. Increase heat to medium-high and allow soup to simmer for a few minutes.

4. Blend soup with an immersion blender until it’s as smooth as you like. I like it pretty smooth, but if you want to blend only part of the soup and leave some beans whole, that’s allowed. If you don’t have an immersion blender or a conventional blender (or you just don’t want to get it dirty) get a potato masher and mash the beans in the soup until it’s thickened to your liking, (it won’t get smooth this way, but it will get thicker) call it rustic.

5. Add cilantro and lime and taste the soup. You may not need to add salt if the broth you used was salty, but I usually do. Add a few dashes of hot sauce (my favorite is cholula).

6. Top with garnishes and serve.

-If you wanted to add chorizo or chicken to this (or bacon!), I’d recommend cooking the meat in the pot alone before adding the veggies, then transferring the meat to a plate while you make the soup and stirring it back in before you add the cilantro and lime. Chipotles are also a really good addition if you’re in the mood for something smoky – just dice one or two and throw them in with the rest of the veggies.

cancel reply

Kale and Romaine Salad with Shortcut Caesar Dressing

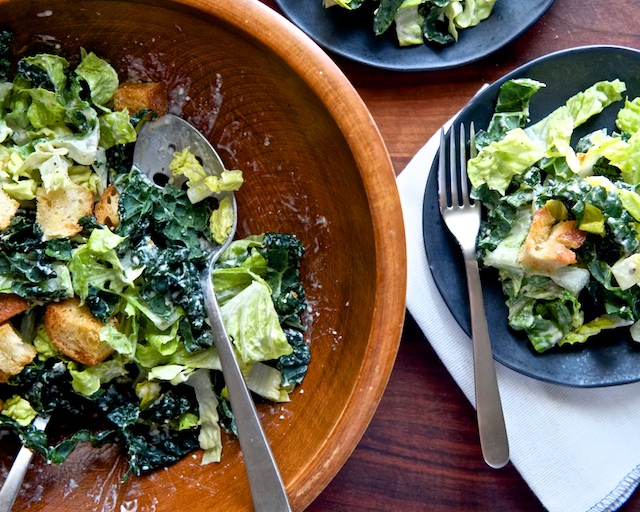
Kale and Romaine Salad with Shortcut Caesar Dressing

I didn’t realize how much I’ve been eating and talking about kale lately. I think kale’s 15 minutes of faddishness is about over, but hopefully it won’t be completely forgotten when the next “it” vegetable inevitably eclipses it, because I actually really like it. The nice thing about food (unlike fashion) is, even if it’s not “in” it doesn’t stop tasting good or being good for you – so it doesn’t ever really go “out” unless maybe you own a really cutting-edge or trendy restaurant, in which case, I’m sorry.

Kale and Romaine Salad with Shortcut Caesar Dressing

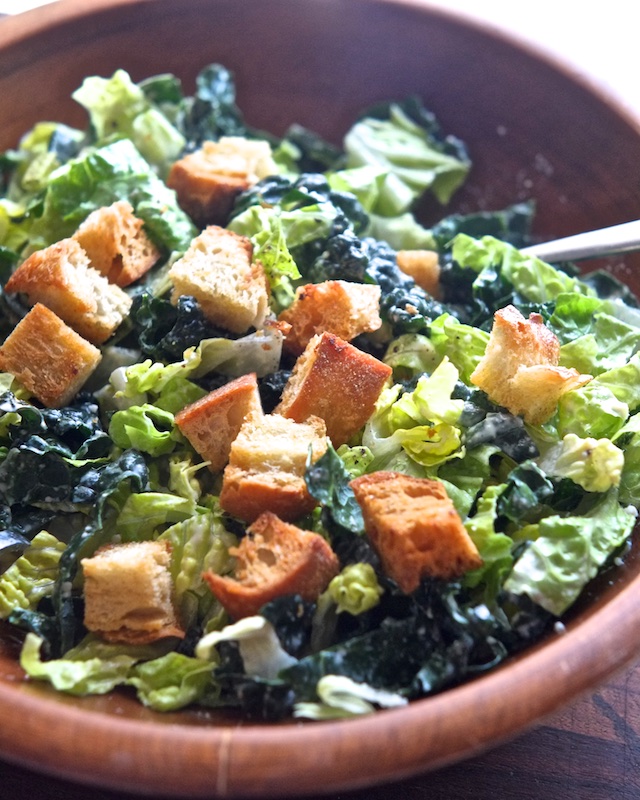
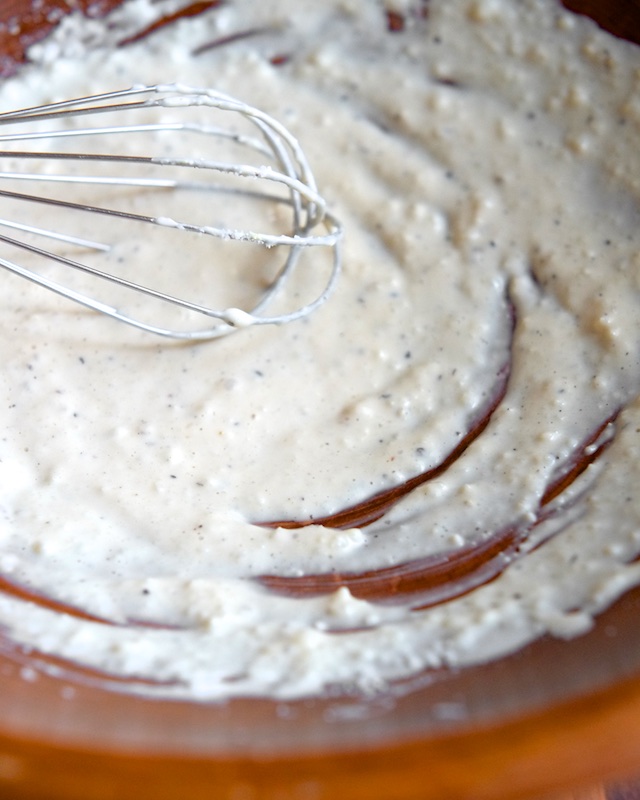
I’ve also posted about caesar dressing before, back during my sauce series. I always prefer to make my own dressing, but sometimes I’m not up for breaking out my food processor and making a big batch of perishable salad sauce. When these moments of laziness strike (liiike 80% of the time) I mix up a little something in the bottom of whatever salad bowl I’m using. And if I’m honest, I kind of like this particular caesar better than the full-on “real” caesar. It’s a little bit healthier and even punchier in flavor, so it dances well with kale’s assertive green-ness and doesn’t totally negate the wholesomeness of salad. Plus, I almost always have everything I need to throw it together at the last minute, which isn’t the case with real caesar dressing (sorry, anchovies).

Kale and Romaine Salad with Shortcut Caesar Dressing

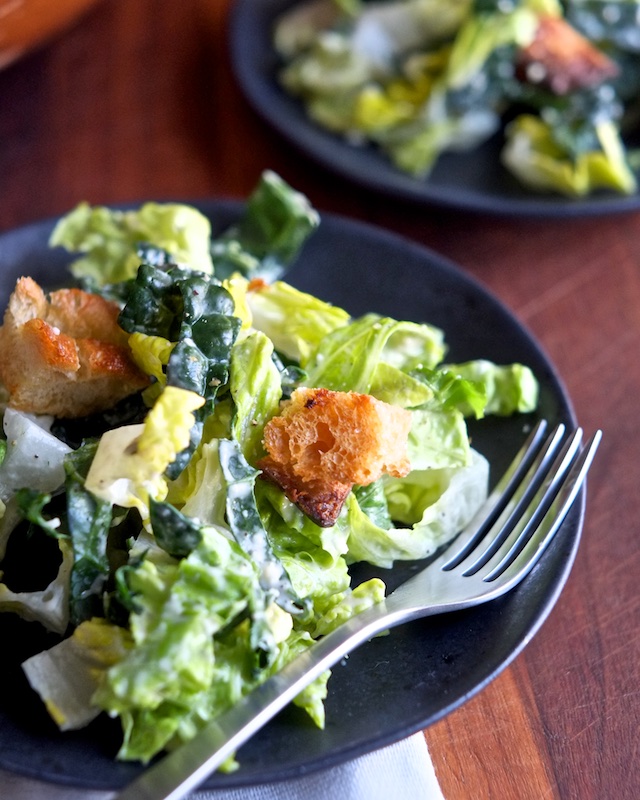
I even made fun of kale salads in my last soup post. All the chewing! But if you use the right kale (tuscan/lacinatno/dino – not curly), and you cut it with a bit of romaine, it’s actually really nice and no more trouble than a normal salad. Kale’s hardiness even makes this salad more filling than the average bowl of leaves. With some homemade garlic croutons, maybe a tomato and a few olives, it’s almost lunch.

Kale and Romaine Salad with Shortcut Caesar Dressing

Kale and Romaine Salad with Shortcut Caesar Dressing
serves 4-6 as a side, 2-3 as a main

Ingredients:

for the dressing:
-2 Tbsp mayo
-1 small clove garlic, grated or finely minced
-1 tsp worcestershire
-1 tsp white wine vinegar
-1/2 to 1 tsp dijon mustard (depending on how strong yours is)
-2 Tbsp grated parmesan or pecorino cheese (parm is classic, but I like pecorino)
-1/4 tsp kosher salt or fine sea salt
-lots of fresh cracked black pepper

for the salad:
-1 small bunch lacinato/dino/tuscan kale (it’s all the same, just stay away from curly)
-1 “heart” of romaine (they usually come in packs of 3)

for the croutons (if you’re going there):
– crusty bread, preferably stale
-olive oil (enough to lightly coat the bread)
-1 clove garlic, minced or grated
-salt

Method:

1. If you’re making croutons, start with that. Cube up your bread and spread it on a baking tray. In a small dish, combine garlic with a few tablespoons of olive oil and pour it over the bread. Mix with your hands and sprinkle with salt. Bake at 350 F until golden and crispy, about 15 minutes. (Kind of like making crostini, but cubic instead of flat)

2. Wash and chop your kale and romaine and dry it as well as possible.

3. In the bottom of your salad bowl, combine mayo, garlic, vinegar, worcestershire, mustard, cheese, salt and pepper. Whisk together and taste. It will be very strong – that’s good – it needs to be strong to stand up to the kale. Add salt or make adjustments now if you like (more cheese, more vinegar, whatever).

4. Pile salad greens in your bowl on top of your dressing and use tongs or a spoon and fork to toss the greens until they are coated with dressing. (Lift from the bottom of the bowl to make sure all the dressing gets incorporated). Top with fresh croutons and serve. Also, it’s not properly caesar-y, but I do like to add tomatoes.

cancel reply

Salted Brown Butter Vanilla Bean Crispy Treats

salted brown butter vanilla bean crispy treats

{GIVEAWAY CLOSED, winner announced below}

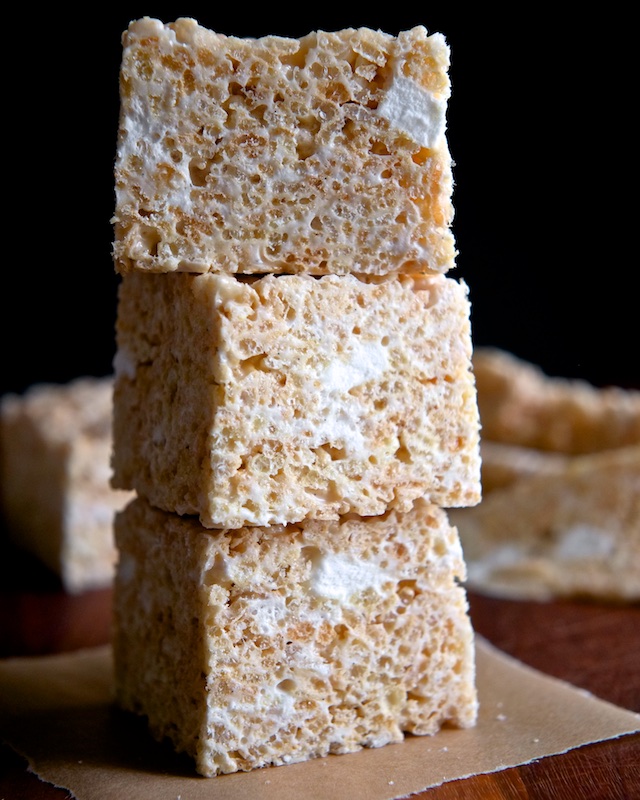
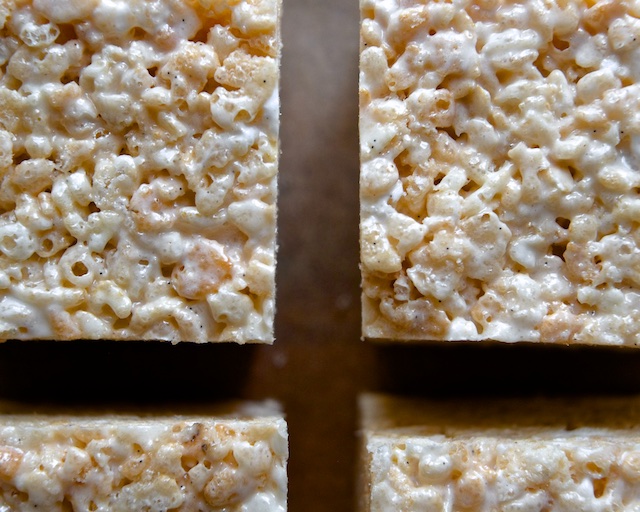
It seems flippant that the the ultimate expression of crispy rice, chewy marshmallow, and melted butter is called, simply: a treat. But then the assembly is almost absurdly easy, and the intended consumer usually below the age of 6. So I decided to grow them up, give them a flowery name, a more well-rounded flavor profile, and some textural contrast. I have to admit, they’re pretty great – like maybe the Platonic ideal of the original.

brown butter vanilla bean treats 2

Salted Brown Butter Vanilla Bean Crispy Treats

Ingredients:
-1 stick butter (1/2 cup – I used salted, but you can use unsalted and just add more salt later)
-1 1/2 bags mini marshmallows (they come in 10 oz bags)
-2-3 teaspoons vanilla bean paste (or the scraped-out insides of one bean)
-6 cups crispy rice cereal
-1/4 tsp kosher salt (salted-ness can be subjective – if you used salted butter, start with 1/4 tsp, add more if you like more)

Method:
1. Pre-grease a baking pan so you can mold the marshmallow cereal mix as soon as it’s ready. It will firm up quickly as it cools, so taking this step at the beginning will make transferring everything from the pot to the pan easier. If you want thicker squares (like mine), use a 9×9 pan, if you want normal squares use a 9×13.

2. In a large pot (preferably light colored so you can monitor the color of the butter) over medium heat, melt butter and wait for it to brown. When it begins to foam and darken in color, lower the heat to medium-low and stir it until it reaches a medium brown color and smells somewhat nutty. Watch it carefully because it can turn from brown to burnt pretty quickly. Here’s a proper brown butter visual for reference.

3. Add one whole bag of marshmallows and stir until they are melted. Add vanilla bean paste and salt and stir to combine.

4. Stir crispy rice cereal into melted marshmallows along with half a bag of whole marshmallows. Stir until the cereal is well coated and taste – it should be sweet with a hit of salt that brings out the buttery flavor with some toasty complexity (because you took the time to brown the butter). Now is the time to add more salt if you want it.

5. Transfer marshmallow cereal mix into your greased pan and spread into an even layer. There should be some whole or partially-melted marshmallow pockets running through the cereal (there’s the textural contrast – yum!) Allow to cool and slice into squares.


::AND NOW THE GIVEAWAY:: (CLOSED)

Cast iron pans are the workhorses of the kitchen, enameled cast iron is the easiest cast iron to take care of, and Le Creuset makes the best enameled cast iron out there. Pans like this are instrumental in all the best recipes (liike my pan-seared, butter-basted steak and my favorite cheeseburgers). Everyone should have a good cast iron pan. That’s why I want to give a 10 1/4 inch enameled Le Creuset skillet to one of you resplendent readers. (It should probably be you.) And no, this giveaway isn’t sponsored, I’m just feeling generous.

To enter: leave a comment below and follow me on Instagram (@sweet_salty_tart). I don’t post very often but when I do it’s usually pictures of food.

I’ll close the giveaway at midnight on Friday 4/24/15 and contact the winner on Saturday via Instagram or email. Good luck lovelies!

Update 4/25/2015: we have a winner! I numbered the 49 entries from earliest to most recent, not including my own comments, and used a random number generator to pick the winner, who I then verified through Instagram.


The 12th commenter was Kelsey A! Congrats lady! I’ll be in touch to work out the details soon!

Huge thanks to everyone to participated and all the awesome comments. I’m feeling the love, and wish I was rich enough to get you all a Le Creuset!

  1. I am borderline obsessed with your website haha! whenever I feel like procrastinating from studying I find a recipe and whip up something delicious, and it always works! :) Pick me for the Le Creuset please!! I've had my heart set on a cast iron pan and a KitchenAid for so long but I'm such a broke student :')

    Anne — April 15, 2015
    1. Hey Anne! Thank you so much for the comment. I'm sooo happy to hear that my recipes work for you. I always test my recipes and try to write them in a way that's easy to follow, but I don't have a team of reviewers or editors so comments like yours are sooo nice to hear. And I'm glad you found the giveaway! I set it up in anticipation of an influx of traffic to this post, but it looks like that influx is going to be delayed until the weekend. So, I'm changing the dates for the giveaway, but your entry will still definitely count. Thank you again!

      courtney — April 15, 2015
    2. reply
  2. It's a rainy, snowy, cold day outside. These crispy treats look awesome. I'm so tempted to make them today

    Anna — April 18, 2015
    1. reply
  3. I've been craving for rice krispy squares and I think this recipe will hit the spot. I also have been going through your instagram and your pictures are amazing. Food pictures are the best. I've been wanting to get a LA creuset, hopefully I can win one!!

    Cindy — April 18, 2015
    1. reply
  4. I have been looking for the perfect brown butter rice krispy treat recipe and this has taken it to a whole other level! I am counting down the days until I can make this! I can't wait to make these for my friends! Thanks for the recipe! I certainly wouldn't mind having a beautiful cast iron pan! <3

    Nina Monet Reynoso — April 18, 2015
    1. reply
  5. Drooling over every recipe on your site --- can't wait to whip up a few!

    Kelly — April 18, 2015
    1. reply
  6. I definitely need to make these yummy looking treats!

    Geraldine — April 18, 2015
    1. reply
  7. this recipe looks amazing! thank you so much for sharing, I cannot wait to try this one out. I just recently found your website and am now following you on instagram as well (itswhit). really cool of you to do an unsponsored give away as well, pay it forward.

    whitney mclaughlin — April 18, 2015
    1. reply
  8. can't wait to try and make these! I just found your website off of buzzfeed and now i'm a total fan! (claraismora)

    Clara Mora — April 18, 2015
    1. reply
  9. Those sound amazing! I think I'm going to have to make them very soon.

    Melinda — April 18, 2015
    1. reply
  10. Drolling over these! Can't wait to make them! Brown butter makes everything better!

    Jasmine — April 18, 2015
    1. reply
  11. Looking forward to making this for my baby shower!

    Gretl — April 19, 2015
    1. reply
  12. i LOVE rice krispies! i always have the ingredients on hand and they're one of our favorite treats that I can whip up in 10 min. now you've inspired me to class them up a bit!

    kelsey a — April 19, 2015
    1. reply
  13. These look fantastic! What a great idea to add vanilla!

    Sharon DeSize — April 19, 2015
    1. reply
  14. These look like such a sophisticated take on the original Krispy Treat!

    Myra Key — April 19, 2015
    1. reply
  15. These look soooo good. I love crispy treats, and the combo of brown butter and marshmallow sounds heavenly!!! I can't wait to make them for a friend's birthday soon! (anna_sanders20)

    Anna — April 19, 2015
    1. reply
  16. You had me at brown butter. I seriously cannot wait to make these. I'm embarrassed to admit that a plain RK treat is a favorite guilty pleasure. The usual doctored up versions of the original recipe don't interest me at all...chocolate chips-bleh...peanut butter- no thanks. But these seem to be the absolute perfect tweak. Thanks for posting this recipe!

    kim — April 19, 2015
    1. reply
  17. Rice Krispie treats are my favorite, so much so that a friend brought a tray of them to me at the hospital after having baby #2. I don't care for the caramel/peanut butter/fruity pebbles craziness that people do, but this seems like just the right enhancement to something that is pretty much perfection anyway. I can't wait to try them!

    Kristal — April 19, 2015
    1. reply
  18. Congrats on being featured on Buzzfeed! Love your recipes!

    Shelby M — April 19, 2015
    1. reply
  19. I'm so excited to try this recipe!

    Rory Beckett — April 19, 2015
    1. reply
  20. I have just recently stumbled on to your website and browsing through your recipes make my mouth water (lol). The recipes are quite easy and delicious. Thank you so much for the mouth-watering recipes that I can't help looking at during class, wondering what I should make next for dinner! My favorite so far is the Asparagus Carbonara! I've been always wanting a cast iron pan, as I truly love to cook and I would honestly use that kind of pan all the time for a lot of delicious recipes! Although I am a college student, I still very much love to cook good, wholesome food!

    Nicholle — April 19, 2015
    1. reply
  21. Love your recipes and love the photos! You are so talented!! Could you recommend a way to make the rice krispies dairy free? And Would love to win your contest 

    Amber — April 19, 2015
    1. Thanks so much Amber! I'll have to get back to you about the dairy free thing, the brown butter is pretty important for flavor here, but it might be possible to make a different take with coconut oil. I'll see what I can figure out!

      courtney — April 19, 2015
    2. reply
  22. I have loved all the recipes of yours I've tried! Keep them coming! Thanks for the fun giveaways you do, too.

    Sara W — April 19, 2015
    1. reply
  23. I just barely bought my first enameled cast iron piece and would love to add a skillet to my collection!

    Allison Fajardo — April 19, 2015
    1. reply
  24. You are so talented! I love this twist on rice crispy treats! Im so excited to read ur blog for more ideas!!

    Ani — April 19, 2015
    1. reply
  25. Now a happy Instagram follower!! Your recipes are amazing- I always busy them out for a special occasion :) would love a new skillet to add to the mix!

    Helena — April 19, 2015
    1. reply
  26. Looks delicious!

    Elisha Wiggins — April 19, 2015
    1. reply
  27. So excited to try your recipes. They look amazing!

    Julie — April 19, 2015
    1. reply
  28. I stumbled across this recipe and it led me here; what a wonderful discovery. Beautiful blog!

    Jess — April 19, 2015
    1. reply
  29. Love love love this! My study group and I have been using recipies here all semester. Nothing inspires people to show up like treats! These are a great update on classic Rice Krispies

    Same — April 19, 2015
    1. reply
  30. I went to make Rice Krispie Treats tonight to find I didn't have enough cereal *sad face* but maybe it was because I needed to see this recipe first so I can try something new. Quick question, does it make a difference if you use the large marshmallows for melting and use the small for the mixing in? I already have the large ones and don't want to buy if I don't have to.

    Anne A — April 19, 2015
    1. Hi Anne! I don't think it matters, as long as the volume of the bag is similar. If there's any doubt, I'd say err on the generous side. Hard to have too much marshmallow!

      courtney — April 19, 2015
    2. reply
  31. Le Creuset is the best, I found a pot at HomeGoods for cheap and am never going back! Love your blog, just bought some miso paste so trying those radishes this week!

    Caitlin — April 19, 2015
    1. reply
  32. I absolutely love brown butter and I am always thrilled when I find a dessert that requires it. Thanks for the lovely update on a classic. And what a marvelous give-away, I got my first Le Creuset from an ex-boyfriend and I have never gone back :)

    Evyn — April 19, 2015
    1. reply
  33. I am a (will be on April 21st) 79 year old great gramma who, just yesterday, made a batch of krispie squares as a thank you to a young gentleman who packed my repaired easy chair up two floors to my apartment! I shall use your brown-butter, vanilla bean recipe soon. I have been using the same old cast iron fry-pan for the last 60 years.....I would absolutely die for a brand new Le Creuset, enamelled at that...so modern! I hope you get this before April 24th. Take care and special thanks for all your delicious recipes and hints. Eldie Smith

    Ellie Smith — April 20, 2015
    1. reply
  34. Looks amazing!

    Ruth — April 20, 2015
    1. reply
  35. Courtney. So, Hamlet taught me a new word..."quintessence"...I feel like the archaic version of that word could very easily be embodied by everything you bring forth into existence on this blog. Like these treats, for example = DIVINE to the point of being the VERY ESSENCE OF HEAVEN. They are the golden, buttery cherubim of my sweet-sweat-induced fantasies...only, in them there is also a ballet sequence performed by your pan-seared steak. Keep being beautiful.

    Catherine — April 20, 2015
    1. reply
  36. i don't have a cast iron skillet (I KNOW) so i'm kinda dying to win this. and do i get brownie points for having actually made these treatsies!?? (they're good, everyone!!)

    hannah — April 20, 2015
    1. reply
  37. I need a cast iron skillet! I told my grandma I wanted hers after she dies but she'll probably live forever. :)

    Lauren — April 20, 2015
    1. reply
  38. Yum! Can't wait to try this recipe!

    Mary — April 20, 2015
    1. reply
  39. You're the coolest! Look at all your friends! I still do not have a Le Creuset in my arsenal of cooking-ware! I SO need to win this. No one takes me seriously without one.

    Tricia Layton — April 20, 2015
    1. reply
  40. First time checking out your website but I am already excited by this recipe. Hoping to make it for the coworkers soon! Thanks :)

    Bethany Bois (ig: wooitsbethany) — April 20, 2015
    1. reply
  41. I love finding new recipes to try for the adult sweet-tooth, and this hits the spot! Your recipes find that wonderful balance both healthy and comfort variety.

    Arielle — April 20, 2015
    1. reply
  42. So stoked for your fame!

    Lea — April 20, 2015
    1. reply
  43. These look soooo amazing! Can't wait to follow you and see what else you come up with! (Would die to own a Le Creuset... Fingers crossed!)

    Sophi — April 21, 2015
    1. reply
  44. Toasted rice treats have been a favorite of mine since I was very little. Now that I have a family of my own, the love has been passed down. I can't wait to make your recipe with the vanilla bean and brown butter. Thanks for the chance to win, as well!

    Deirdre — April 21, 2015
    1. reply
  45. planning to make these for my sister's 30th birthday in May, they look great!

    Shannon — April 21, 2015
    1. reply
  46. I can't wait to make these once finals are over! Or maybe when I procrastinate during finals, I'll be making this!

    Lara Balajadia — April 22, 2015
    1. reply
  47. I'm obsessed with this rice crispy treat recipe and can't wait to make them this weekend! Just followed you on Instagram... please consider me for the Le Creuset!

    Maya Misra — April 23, 2015
    1. reply
  48. My roommate just showed me your blog today! I love all you simple but delicious looking recipes! I'm always a fan of dishes I can whip up quickly without buy a lot of fancy expensive ingredients that I'll rarely use again. I'll definitely be making these treats this weekend for the office!

    Christine Houston — April 23, 2015
    1. reply
  49. Perfect for finals!

    tasha — April 23, 2015
    1. reply
  50. […] spiced almonds  /  sweet potato chips with white bean + basil dip  /  zucchini chips  /  salted brown butter rice crispy treats  /  picnic salami sandwiches  /  dark chocolate trail mix […]

    The Perfect Picnic // Portable Picnic Recipes | South On Broadway — June 23, 2016
    1. reply

Get A Thermometer

thermapen

This post contains affiliate links, but it was not solicited and I stand by my words completely. I’m just super serious about thermometers.

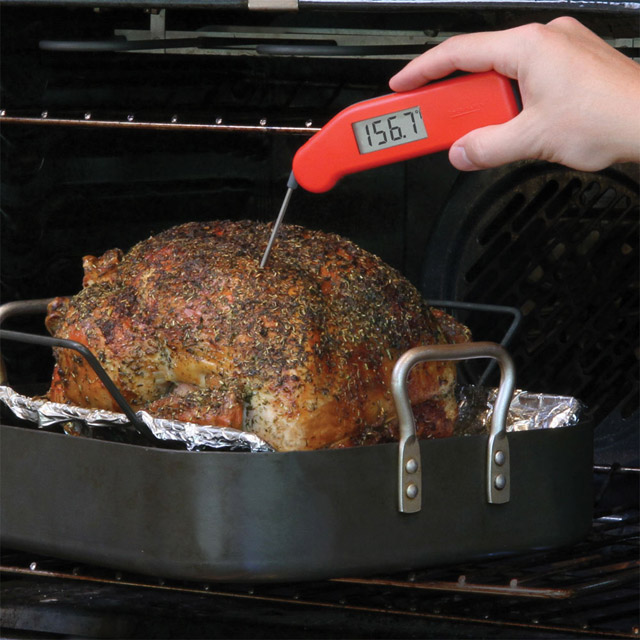
We are a month into 2015 – how are those resolutions going? Uh huh. That’s too bad. Why don’t you try an easier one: get a thermometer and stop overcooking your meat.

Meat is just better when it’s cooked properly. Safer too, obviously, but it’s so much more delicious it will probably blow your mind, because (unfortunately) most people overcook meat pretty significantly. But it doesn’t have to be this way, and it really shouldn’t. The nice thing about resolving to stop overcooking meat is it’s more a problem of awareness and equipment than about making a deep personal change (like “getting in shape” or whatever).

For me, this is actually a moral matter too, because I believe meat deserves to be delicious. I’m obviously not a vegetarian, but I believe that most Americans take meat for granted, to the point of being wasteful and disrespectful. We don’t like to be reminded of the fact that, when we sit down to a bowl of chicken curry or a juicy cheeseburger – an animal died for it. I think that’s why so many people like white meat chicken – it’s consistently textured and barely reminiscent of animal muscle. But guess what – it’s a dead bird. Let’s respect that fact.

I love that our collective American food culture is moving more toward slow and sustainable and caring that livestock be treated well (like actual animals instead of future-food).  I also agree that we should all probably be eating less animal products in general and that we should definitely be shopping with our hearts instead of just our wallets and stomachs.

I think the logical extension of grass-fed, free-range, ethical meat movement is learning how to cook it properly. Properly cooked meat is more flavorful, more tender, and therefore much less likely to go to waste than mishandled meat. And be honest, last time you roasted a chicken, did you do your best to eat every last scrap? When meat is cooked properly, making use of every bit is a delicious joy rather than a chore. If we are going to be omnivores, I think making the absolute most of the meat that we buy and eat is the least we can do.

Buying a thermometer changed my cooking drastically and immediately and it will for you too. I think the Thermapen is the best, most versatile and most accurate on the market right now, but any thermometer is better than nothing. I’ve also appreciated having a probe thermometer which allows me to monitor the temperature of roasts while they are in the oven, making overcooking those expensive cuts almost impossible.

The easiest change you can make this year: be a better cook and a more responsible omnivore. Familiarize yourself with proper meat temperatures and get. a. thermometer.

cancel reply

Green Soup With Cream

Green Soup With Cream

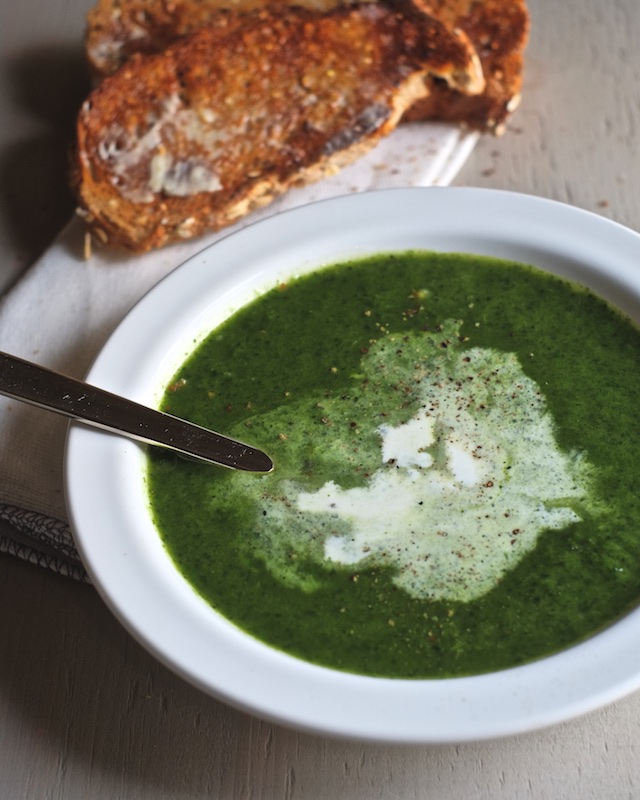
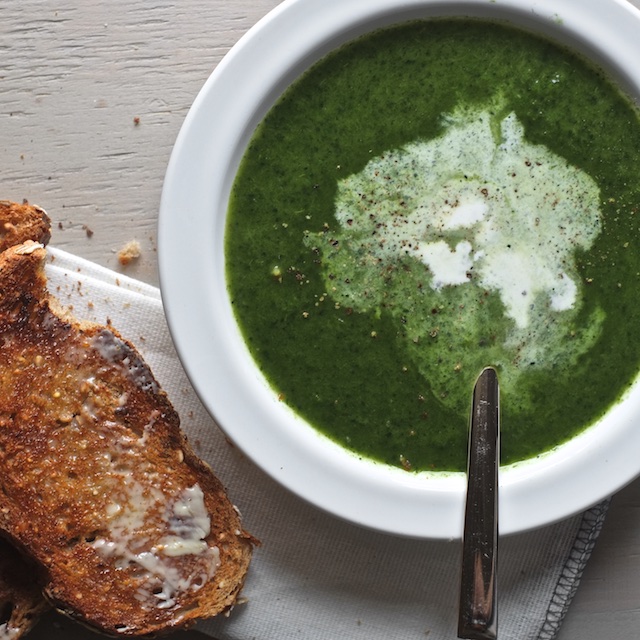
When I say green, I mean greeeen. I love this soup because it is the antithesis of cold, leafy salad but it serves the same wholesome, vitamin-packed purpose. Yes, it contains a couple of naughty dairy products, but the amounts are pretty minuscule and they make this soup thoroughly delicious without negating the awesome benefits of the kale, leeks, and spinach. Plus you can finish an entire bowl! Of actual kale! Without feeling like a cow in a pasture, chewing and chewing and chewing.

A word of caution to those of you with super-blenders. Don’t skip the cooking part of this soup process. The fact that your blender can heat soup doesn’t mean it will cook it, and raw, blended kale is inconceivably bitter. I know because I tried it. Use your vitamix or blendtec if you want, but cook the veggies first. Trust me.

Green Soup With Cream

Green Soup With Cream
makes about 4 servings

Ingredients:
-2 small leeks (about 2 cups chopped)
-small bunch kale (about 2-3 cups chopped)
-2 tsp butter
-about 3 cups chicken or vegetable broth (enough to cover cooked veggies and achieve a blendable consistency)
-1/2 cup frozen spinach (in a bag, not frozen into a brick)
-1/4 tsp white pepper
-pinch nutmeg
-salt, to taste
-1/3 cup heavy cream
-black pepper for garnish

Method:

1. Trim root ends and tough, dark green tops from leeks, slice and separate layers and drop into a bowl of water to wash away any grit. Prep kale by removing stems from leaves and chopping the leaves into ribbons.

2. In a saucepan over medium heat, melt butter and cook leeks until tender. Add chopped kale and cook until soft.

3. Add chicken broth, spinach, white pepper and nutmeg. Use an immersion blender (or transfer to a normal blender) and blend until smooth. Taste and add salt as needed.

4. Finish soup with cream and serve. Garnish bowls with black pepper if you like.

  1. Can't say that I use kale in soup that often - but after seeing this post it is definitely something I need to try. Love how healthy, hearty and delicious this green soup is!

    Thalia @ butter and brioche — January 23, 2015
    1. reply
cancel reply

Citrus Salad With Toasted Almonds and Sliced Onion

Citrus Salad

I love how in the middle of the dark, cold, snowy winter, citrus season is at it’s peak. It’s like the universe is throwing us a bone – or lots of small, sunny, oddly round, and delicious bones to get us through the season. My enthusiasm for citrus is such that I actually put together a citrus tasting and had plans to do a post about the varieties at my local supermarket (it’s pretty impressive actually), but in the hurricane of holiday prep and activity, my tasting notes were lost. I can’t even remember the names of all the fruits, so…sorry.

However, I do remember one very important thing about the grapefruits I tried. Common wisdom dictates that ruby grapefruits are best and least bitter, but not this time!  The Rio Star red grapefruit was less sweet and had thicker, more bitter membranes than the white variety I tried. Maybe it’s just this year’s batch, but if you can get your hands on Indian River white grapefruits, give them a go. Their flavor was more complex, more sweet, and the membranes were thinner with less bitterness than the red and pink varieties I’m used to.

Citrus Salad

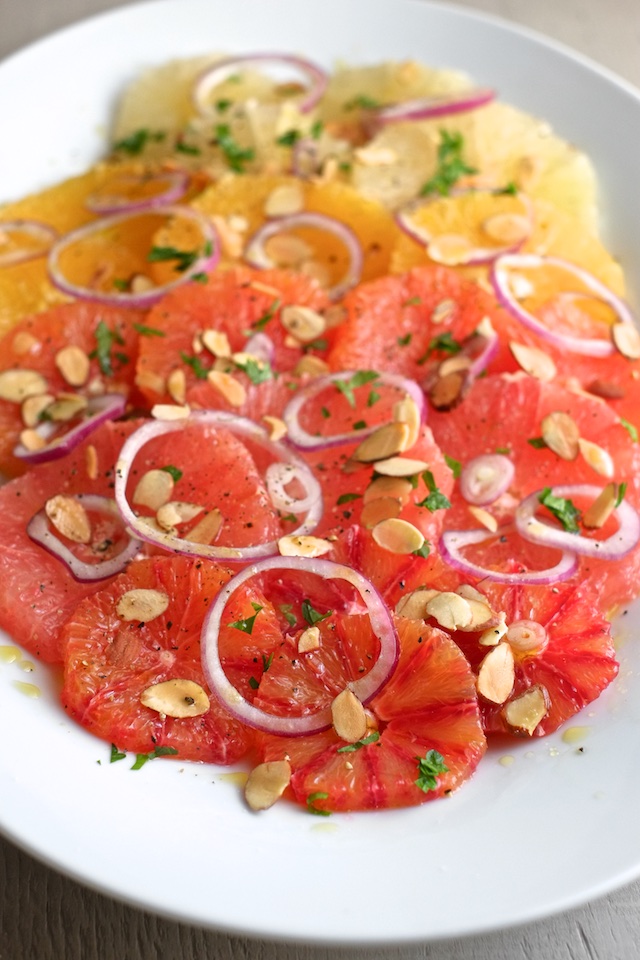
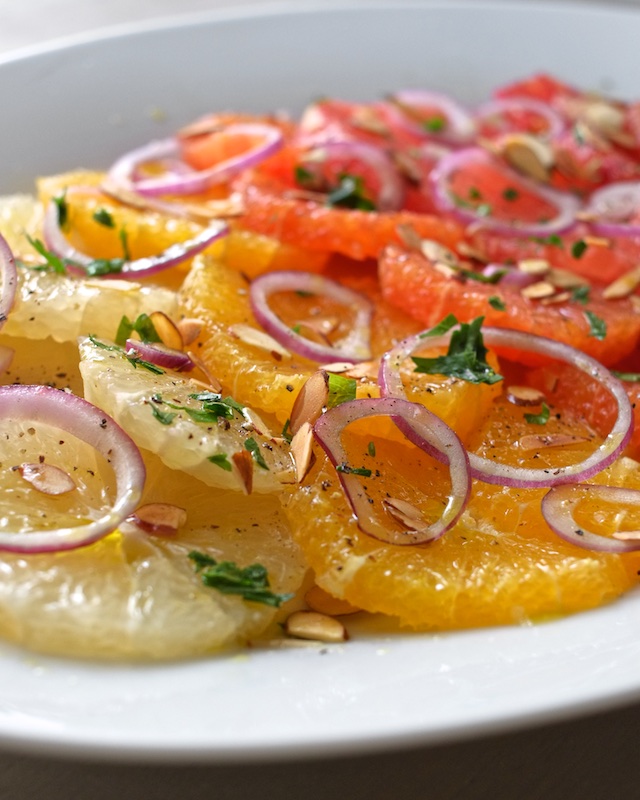
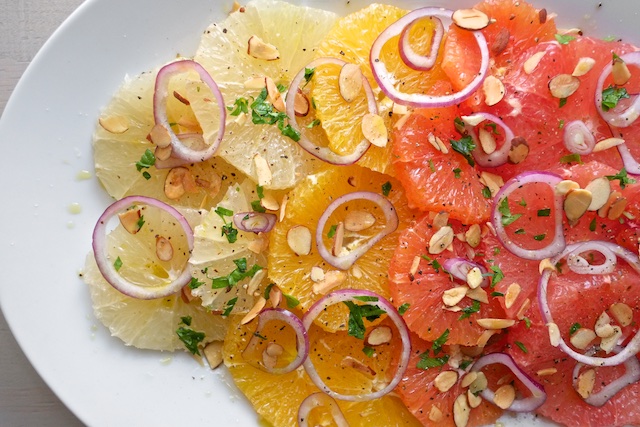
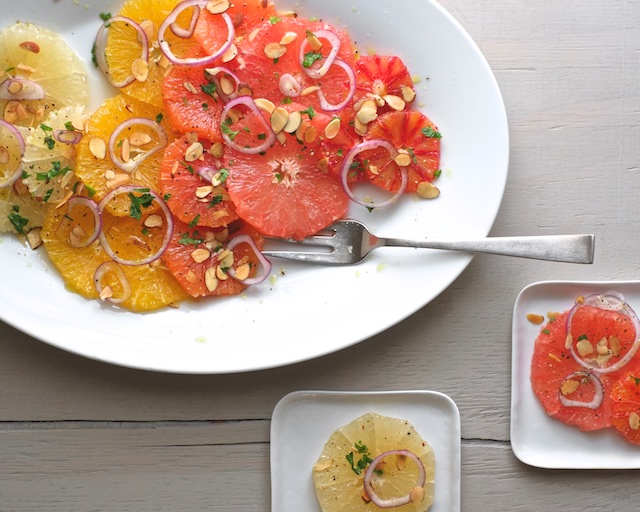
So this salad is sort of an offbeat combination, but I’m really into it. If you like your citrus and you like the flavor of onions, you should definitely try them together. This salad is sweet and savory with sharpness from the onion, toasty richness from the roasted almonds, and heat from the copious amounts of black pepper added at the end. It’s complex and sophisticated, but in a totally approachable and delicious way.

Citrus Salad

By way of disclaimer, I should mention that my Iowa farm born-and-raised grandpa was the only person in the house who did not care for this salad. But he also regards things like avocado with suspicion, so make of that what you will.

Citrus Salad

Speaking of avocado, this dish is extra-amazing with a few buttery wedges tucked between the citrus and onion.

Citrus Salad

And is this salad resolution-friendly or what? Downright virtuous. Not to mention pretty. Throw it together this week and tell me what you think.

Citrus Salad

Citrus Salad With Toasted Almonds and Sliced Onion

Ingredients:
– 2-5 types of your favorite citrus – I used white grapefruit, red grapefruit, naval oranges, tangerines, and blood oranges. If you have at least one type of orange and one type of grapefruit, you’re set. Plan on 1 to 1 1/2 fruits per person
-about half of a small red onion
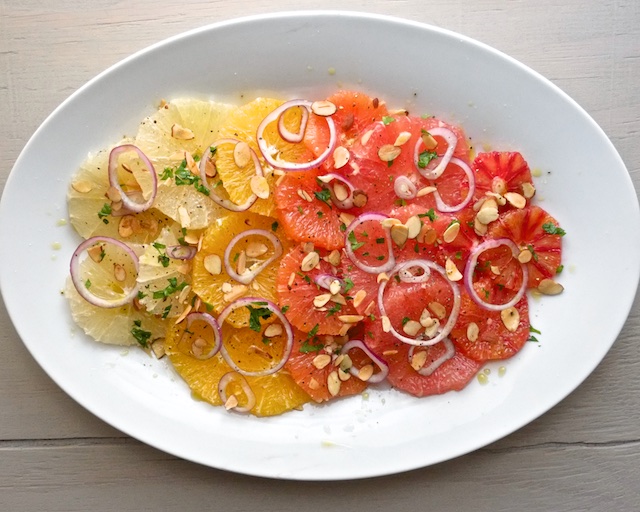
-1/4-1/2 cup sliced almonds (depending on how much you like them and how big you’re going with the salad (I added more after taking the photos – couldn’t stand to cover up the ombre!))
-a few sprigs of parsley, chopped
-a drizzle of extra virgin olive oil
-salt and plenty of fresh-cracked black pepper

Method:
1. Start by toasting your almonds (if they aren’t already) on a baking tray in a 350 degree oven until lightly brown and fragrant (5-10 minutes – keep an eye on it because they can go from toasted to scorched quickly).

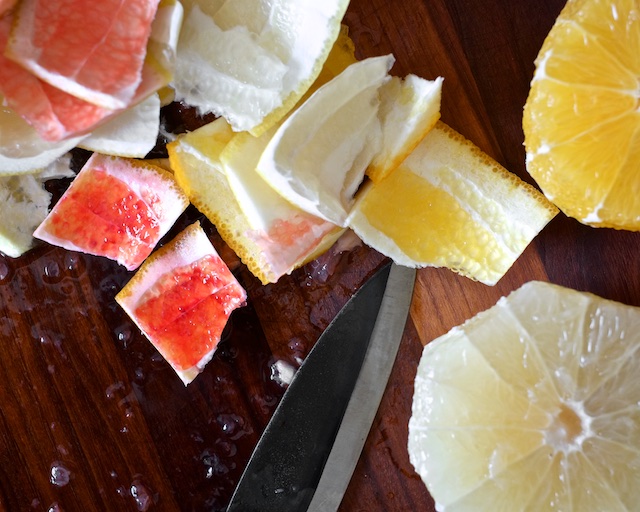
2. Peel and slice your citrus into 1/3 to 1/2 inch thick slices. I like to peel them with a knife and remove all of the exterior pith, but if you peel them by hand that’s ok too.

3. Peel and slice red onion as thin as you possibly can. Rings are good, but half-moons work too, or even a tiny tiny dice.

4. Assemble salad by layering your citrus on a large platter, scatter onion slices, parsley, and almonds on top, drizzle with olive oil, and finish with a light sprinkle of salt and lots of pepper.

This salad improves in flavor as it sits, so if you can, prepare it up to a couple of hours before you serve it and let it sit at room temperature for the flavors to mingle. I like to make it before I start making my main course, so it has plenty of time to get good.

  1. OMG! A recipe I can try! I'm so excited!!

    Caitlin — January 6, 2015
    1. HA! Pretty shameful that I don't go plant-based more often. Cheese though, ya know? Anyway, tell me what you think if you get a chance to make it!

      courtney — January 6, 2015
    2. reply
  2. Beautiful! This salad is just what I need to brighten up a drab winter day - so bright and happy looking!

    April @ Girl Gone Gourmet — January 6, 2015
    1. Thanks April! I know right? Those citrus colors are hard to beat.

      courtney — January 6, 2015
    2. reply
  3. Wow, what beautiful color combinations! Just what we need during the winter =)

    Lauren @ A Nerd Cooks — January 7, 2015
    1. Thank you Lauren! I agree - it's like sunshine on a plate :)

      courtney — January 10, 2015
    2. reply
  4. Thanks for including how many oranges/pieces of fruit serve one person. This ombré salad is completely gorgeous. I think I might add a little fennel to the mix, since I have it on hand, and it goes so nicely with citrus.

    Jayme — January 24, 2015
    1. reply
  5. This looks like the painting of a beautiful sunset! Onions and citrus - an unusual combination. I'm curious to try it :-)

    The Steaming Pot — March 18, 2015
    1. Thanks! I agree about the colors here - pretty cool what citrus can do. And it's definitely a weird combo, but I've come to love it. Don't skip the toasted almonds, salt, or pepper - they really help the citrus and onion make sense. Thanks for stopping by!

      courtney — March 18, 2015
    2. reply
  6. […] pretty and seasonal. I’ve done almost the exact same flavor combination before, in a pretty ombre citrus salad without greens, but I feel like I need to remind people that it is a thing: citrus with onions and […]

    Winter Salad with Citrus and Avocado | Sweet Salty Tart — January 22, 2016
    1. reply
cancel reply