Orange Nectarine Frozen Fool

orange nectarine frozen fool

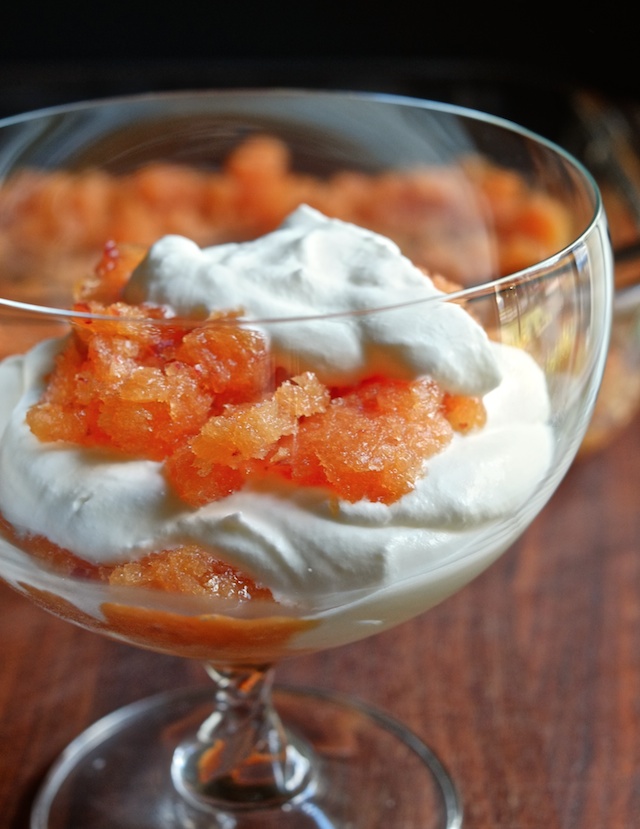
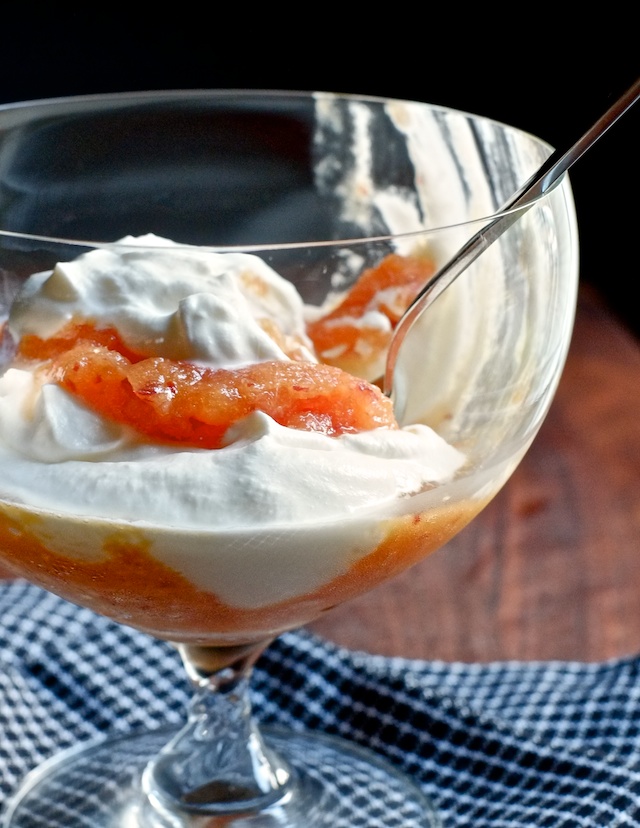
A fool is probably the cutest-named dessert I’ve ever found. Traditionally, fools are made from stirring stewed fruit into whipped cream, making pretty, streaky ribbons of color in the cream.  But with the abundance of perfect summer nectarines, I thought freezing just made more sense than stewing. So instead of stewed fruit, we have a fresh nectarine granita.

orange nectarine frozen fool

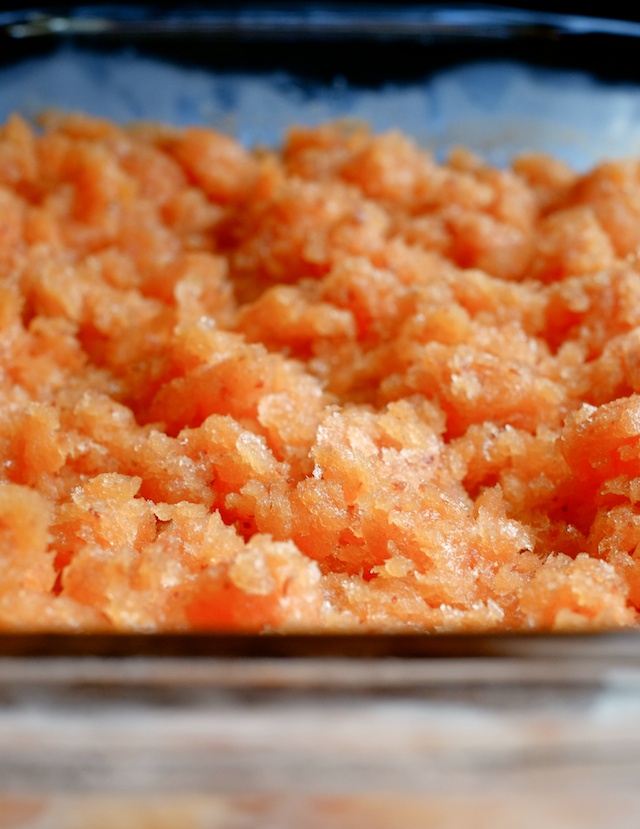
Granitas are really easy to make if you have a 9×13 pan and enough freezer space to store it for a few hours. You just make a thin fruit purée in a blender or food processor (thinner than your average smoothie), pour it into a wide, shallow pan, and stash it in the freezer for about two hours – checking on it every half hour or so to stir the frozen edges into the middle. When it’s done it turns into a craggy sort of slush.

orange nectarine frozen fool

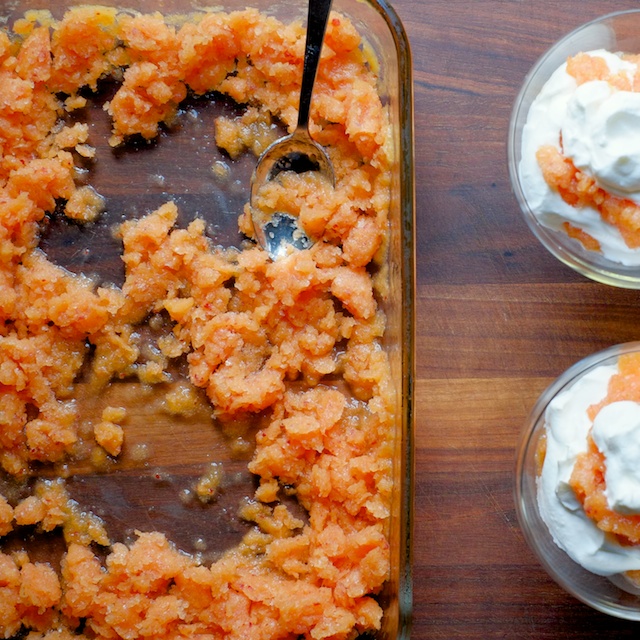
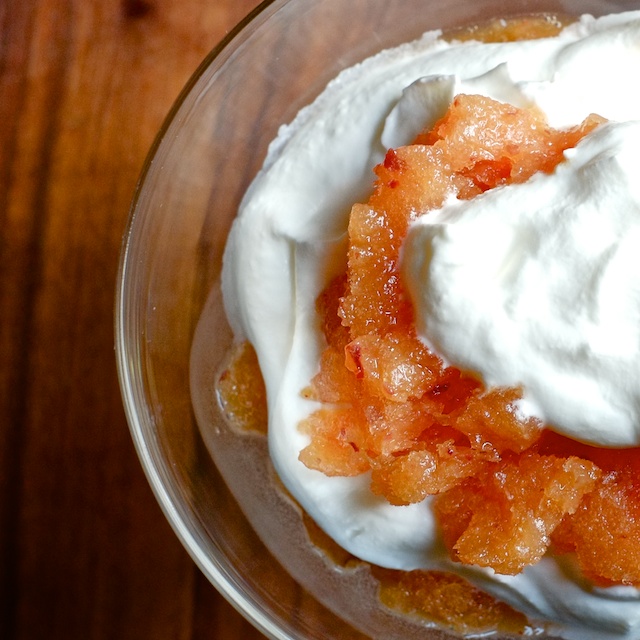
And you can always serve a granita topped with whipped cream, but because this is a fool, our ratios are more like one part whipped cream to one part granita. This is no time to be bashful or stingy with the whip, so make a foolish amount.

orange nectarine frozen fool

orange nectarine frozen fool

Orange Nectarine Frozen Fool
makes 4 generous servings

Ingredients:
2 medium nectarines (or peaches if you have them instead)
1 cup orange juice (fresh squeezed if you can manage it)
1/4 cup sugar, plus two tablespoons
2 cups heavy cream

Method:
1. Heat orange juice in a small sauce pan until steaming, and add 1/4 cup sugar (the point is just to make sure the sugar dissolves well). You can use less sugar if your nectarines and orange juice are already very sweet, or more if they are tart.
2. Add orange juice and pitted, diced nectarines to a blender or food processor and pulse until smooth. Taste the purée and add more sugar if you want it to be sweeter. (Salvage a too-sweet puree with a squeeze of lemon and a few tablespoons of water.)
3. Pour the nectarine and orange juice puree into a 9×13 or similarly shallow and wide pan, and store it in the freezer for about two hours. Set a timer for every half hour to check on it and stir the frozen edges into the middle of the pan.
4. When the granita is flaky and thoroughly frozen, whip your cream with two tablespoons of sugar (or more if you want it to be sweeter).
5. Layer granita in serving dishes with whipped cream and enjoy.

cancel reply

Chilled Avocado Cucumber Soup

chilled avocado cucumber soup

I spent this past weekend hanging out in New York with a darling, fabulous friend. And between the excellent girl talk, sushi, bagels, and flea market strolls I felt something – I felt the sun getting lower, the shade getting cooler – I felt the promise of fall. And it was glooorious. I love that fall means layers and boots and hot drinks and cozy socks, and I know lots of you agree, but we need to chill right out for a minute. We have three weeks of summer left to enjoy, during which all the best things about the season will likely be at their peak levels of awesomeness – including tomatoes, cucumbers, corn on the cob, barbecues, and those elusive, perfectly hot but not horribly sweltering afternoons.

chilled avocado cucumber soup

This chilled soup is the perfect thing for a sun-speckled, early-evening, late-summer meal, maybe as a prelude to pasta or grain salad. It’s light, yet rich, and easy to throw together if you have five minutes and a blender. Plus it makes the most of late summer cucumbers, which can be a little much after two months of unrelenting bounty.

Normally when I make a puréed hot soup, I use chicken stock or vegetable stock to thin out the purée, but here that didn’t seem right, (I didn’t want that slow-cooked broth flavor) so I used water to keep it tasting fresh. Adding water to a soup sounds like kind of a dumb thing to do, but it works if you season the soup really well to make up for the gap in flavoring. The essential ingredients to make this soup flavorful are lots of salt, a generous squeeze of lemon juice, and a touch of raw garlic.

chilled avocado cucumber soup

Let’s not put away our sandals just yet. These last weeks of summer are probably the best.


Chilled Avocado Cucumber Soup

Ingredients:
2 avocados, skinned, pitted, and diced
1 small English cucumber, peeled and diced (or one regular hot house cucumber, seeds removed)
1-2 cloves garlic, grated or minced (start with one, add another after tasting if you want more zing)
juice of 2 small lemons (if you are unsure about size, start with one and add more if the soup is blah)
1- 1 1/2 cups water
salt, to taste (start with 1 tsp)
sour cream, for topping
chopped chives, for topping
black pepper, for topping

Method:
1. Put diced avocados, cucumber, garlic, lemon juice, and salt in a blender with 1 cup water. Pulse until smooth. If you want to serve this soup immediately, use cold water.
2. Taste soup and add more garlic, lemon, or salt as needed. If the soup is very thick, add more water and pulse again until it is incorporated. Repeat tasting process until the soup is well seasoned. Trust your taste buds here – this soup should be light and refreshing but not bland at all, don’t be afraid of heavy-handed seasoning/lemoning etc.
3. Chill soup for 20 minutes (up to overnight). Taste it again once it is cold (flavors will develop as the soup sits and will taste slightly different cold). Serve topped with sour cream, chopped chives, and a grind of black pepper.


  1. Beautiful colors in your pics!!!

    Amy — September 5, 2014
    1. Thank you Amy! Natural light is the best.

      courtney — September 10, 2014
    2. reply
cancel reply

Honey Almond Baked Ricotta with Goat Cheese and Lemon

honey almond baked ricotta with goat cheese and lemon

This recipe might be the greatest thing I’ve ever invented.  It’s rich and creamy, and sweet enough to be a dessert without being cloyingly so. The goat cheese keeps it interesting (trust me, it goes really well with sweet things), and the lemon zest cuts through all the richness in the best way. It’s just really good.

honey almond baked ricotta with goat cheese and lemon

Baked ricotta is one of those dips that you don’t see very often, but it’s so delicious it really needs to make a comeback.

honey almond baked ricotta with goat cheese and lemon

I used some of my fancy naked roasted almonds to top off this dip, but if you aren’t into peeling your own almonds (I get it), you can definitely use regular roasted, salted almonds.

honey almond baked ricotta with goat cheese and lemon

There she is, above, ready to go into the oven. And below, the finished, golden-brown and delicious product.

honey almond baked ricotta with goat cheese and lemon

Yaaaahm.

honey almond baked ricotta with goat cheese and lemon

Serve with crostini (obviously).

honey almond baked ricotta with goat cheese and lemon


Honey Almond Baked Ricotta with Goat Cheese and Lemon

Ingredients:
1 lb carton of whole milk ricotta cheese
1/2 small roll of goat cheese (about 2 ounces)
2-3 tablespoons of honey (depending on how sweet you like it)
zest of 1 small lemon
juice of 1/2 small lemon
small pinch of salt
roasted, salted almonds (enough to cover the top of your baking dish)
extra honey, for drizzling

Method:
1. Put your ricotta into a strainer over a bowl, cover with paper towels and another, heavy-ish bowl (just to speed the process a bit). Allow the ricotta to drain for about an hour. (This step isn’t utterly mandatory, but ricotta will let off some water when it’s warm, so the more you strain it, the less liquid you will have in your dip).
2. Preheat your oven to 375. Dump the drained ricotta into a mixing bowl, add goat cheese, honey, lemon zest,  lemon juice, and a pinch of salt. Mix well and taste. Make any adjustments you deem necessary, keeping in mind that you are about to add more honey on top.
3. Transfer your ricotta mixture to a small baking dish and smooth out the top with a spatula. Chop up your roasted, salted almonds and cover the ricotta with them. Drizzle the almonds with honey.
4. Bake your dip at 375 for 20-25 minutes, or until the top is slightly browned around the edges. When you take it out of the oven, it will be a little wobbly-looking. Let it cool for about 20 minutes, and serve with crostini and maybe a little grind of black pepper (trust me it works).

P.S. It’s also good cold.

  1. This is making my mouth water. I can't wait to try this!!! What a great idea to put all of these ingredients together. I love a good "cheesy dip" that has some sweetness to it as well. (And while I'm commenting, would you send me an email so I can ask you about featuring this recipe on our site? I couldn't find an email address for you on your site. Thanks!!!!)

    Marcia — September 26, 2014
    1. Hey Marcia! Thanks for reaching out. I'll send you an email as soon as I get to my computer!

      courtney — September 26, 2014
    2. reply
cancel reply

Basic Crostini

basic crostini

Crostini are one of those foods that are stupidly easy to make, but sadly underused. I love them because I’m a dip fiend, and these pretty little toasts turn any dip into a fancy appetizer. Everything just feels more grown up with crostini. I don’t mean to insult your intelligence by posting such a simple recipe, but I don’t want to assume everyone already knows how to do it. You’ll see what I mean. Dead. Simple.

basic crostini

The most important thing you need to make great crostini is a sharp bread knife. You want your slices to be about 1/4 inch thick, so they’re easy to crunch into. If your bread is a little bit stale it will be even easier to get uniform slices, but it’s not necessary if you’ve got a good knife.

basic crostini

And really, you can make crostini out of any bread you want. I like to use baguettes because I think they make nice chip-sized bites, but you can use the loaf that goes best with your dip, as long as you cut them into about two-bite pieces. It might be a bit more difficult to slice a large loaf into thin slices, but if you let it get a bit stale you’ll have a better time of it. So toast up some pumpernickel triangles, bagel chips, even three-cheese focaccia slices – they all behave similarly in the oven.

crostini and honey almond goat cheese baked ricotta


Basic Crostini

Ingredients:
a baguette or loaf of un-sliced bread
olive oil or melted butter
salt and (optional) pepper

Method:
1. Preheat your oven to 375 Fahrenheit. Some people like to go hotter, and that’s fine, but I find I get a more even result at a lower temperature for a slightly longer time.
2. Slice your bread into 1/4 inch thick slices, as evenly as possible. Line them up on a baking tray and drizzle them with olive oil or melted butter. Sprinkle with salt and (if using) pepper.
3. Bake your oiled bread slices for 15-20 minutes, until golden brown. Things brown up quickly between the 15 and 20 minute mark, so turn on your oven light and keep and eye on them. Allow them to cool, and store in a zip-top bag for up to a week.

cancel reply

Naked Roasted Almonds

naked roasted almonds

I know almonds are supposed to be one of the best things people can snack on, but there’s just something so obnoxiously wholesome about them. In their natural state they taste like joyless tree bark. And the people who can eat bags of raw, skin-on almonds as their afternoon snack without immediately reaching for a bag of ruffles afterward exhibit a level of discipline that I find frightening.

naked roasted almonds

On the other hand, I love the flavor of salty, roasted almonds on ice cream or with butter on my green beans. It took me an embarrassing amount of time to figure out that the worst thing about almonds as a snack is the skin (stupid, tooth-sticking nut-bark) and the raw-ness. And that both of these issues are easily fixable.

naked roasted almonds

The secret to crave-able, snack-worthy almonds is blanching. Dunk raw almonds in boiling water for about 30 seconds, pull them out and shock them with some cold water, then salt them and roast them yourself. The result isn’t just better than raw almonds, it’s completely transformed. I would even go as far as to deem these almonds worthy of appearing next to a wedge of parmesan on your next cheese tray. Plus, with blanching and roasting, you haven’t even really altered the caloric content of the almonds, so yay.

naked roasted almonds

Popping the almonds out of their skins is about a 15 minute time commitment for a full pound of almonds, but it’s worth it if you ask me. If anyone comes up with a more efficient skin-removal method than popping the almonds out one-by-one, I’m all ears.

naked roasted almonds

naked roasted almonds

I prefer eating these almonds plain, but they’re also really easy to jazz up. For this variation I just heated some oil in a pan, added some crushed garlic, a dash of curry powder, a pinch of cayenne, and tossed in the almonds for an extra layer of flavor. They don’t need it, but they do like it.

naked roasted almonds

naked roasted almonds

naked roasted almonds

Naked Roasted Almonds

Ingredients:
raw almonds
salt

Variations:
olive oil or butter
garlic, crushed
your favorite spices

Method:
1. Set a medium-sized pot of water over high heat and bring it to a boil. Prepare a bowl of cold water with ice and set it aside. Preheat your oven to 400 degrees Fahrenheit.
2. Blanch your almonds in the boiling water about a cup at a time. The almonds may cause the water to bubble up, so add them slowly. After thirty seconds or so, use a slotted spoon to transfer them to the bowl of ice water.
3. After blanching the almonds, you will notice that the skins have wrinkled up and loosened around the almonds. One by one, pinch the almonds until they pop out of their skins and transfer them to a baking sheet.
4. While the almonds are still wet, sprinkle them liberally with salt and give them a stir. Roast them in your pre-heated oven for between 15-20 minutes, or until they are as brown as you like them. Allow them to cool and snack away.

* If you want to add extra flavor, heat a Tablespoon or two of olive oil or butter in a pan over medium heat and throw in a clove of garlic to infuse the oil. Once the garlic is fragrant, add a teaspoon or two of your favorite spices (I used curry and cayenne, but you could use paprika, black pepper, cumin, etc). It’s really hard to screw these up, so play around and find what you like best.

cancel reply

Dill Pickle Potato Salad

dill pickle potato salad

I love potato salad. It is full of potatoes – which I adore, and usually mayo – which is also delicious. I eat potato salad in all it’s iterations too: fully loaded, mustardy and eggy, german with bacon, etc. But sometimes they can get a little heavy and overly complicated with indistinct, muddy flavors. This recipe is great because it’s simple and  fresh tasting without being boring at all. In fact it’s rather punchy in the flavor department.

dill pickle potato salad

To keep the flavors clean and the texture interesting, I chose to highlight dill pickles with baby yukon gold potatoes. The rest of my ingredients are there support and compliment the main players.

dill pickle potato salad

You could use whatever potatoes you like with this same dressing, but I really like the texture of baby yukon gold potatoes and the way they hold themselves together when they’re cooked. Nothing mushy or muddy happening in this salad at all – it’s fresh, summery, rich and bright all at once.

dill pickle potato salad

Dill Pickle Potato Salad
makes 6-8 side dish servings

Ingredients:
-about 3 pounds yukon gold potatoes
-1/3 cup mayo
-1/3 cup sour cream
-1/3 cup dill pickles, chopped
-a splash of pickle juice (a few tablespoons)
-1 clove garlic, grated or finely minced
-2-3 tbsp. fresh dill, chopped
-2-3 tbsp. fresh chives, chopped
-salt and pepper to taste

Method:
1. Wash potatoes and remove any weird eyes or grassy stem pieces. Put potatoes in a pot, cover with cold, salted water and allow to come to a boil slowly (over medium to medium-high heat). Cook potatoes until a knife inserted into a potato will slide back out without sticking at all.
2. While potatoes cook, make dressing by whisking together your favorite mayo, sour cream and pickles. Add pickle juice, garlic, dill, chives, salt, and pepper. Taste the dressing and add more salt or pickle juice if necessary. The dressing should be pretty strong – remember it has to give flavor to the potatoes which don’t have a lot going on by themselves.
3. Once the potatoes are done cooking, allow them to cool slightly and cut them into bite-sized pieces (if your potatoes are very small you may only want to halve them). Stir the still-warm potatoes into the dressing and taste the salad for seasoning. Add more salt if necessary. Serve chilled or at room temperature.

  1. Love a good potato salad! Another thing you can do to boost the flavor is reserve a little bit of pickle juice (or use additional) and pour it over the piping-hot, just done potatoes. Give them a little toss and they will soak up the pickle juice in a big way. Sometimes I mix pickle juice and a bit of yellow mustard for this purpose, as well. Then when you mix the cooled potatoes into the dressing, you're hit with double flavor. Best tip I've ever received!

    Emma — August 20, 2014
    1. Hey Emma! What a great idea! I always knew mixing warm potatoes with their dressing was the best way to get them to absorb flavor, but I love the idea of an extra hit of pickle juice on naked potatoes. It probably makes the layers of flavor a lot more interesting. I'm trying your tip next time!

      courtney — August 20, 2014
    2. reply
cancel reply

Scones with Strawberries and Cream

scones with strawberries and cream

About a year ago I posted a formula for scones that could be made savory or sweet. At the time I chose to highlight the recipe’s versatility by making cheddar chive scones, but I want to remind everyone, and make sure you are all fully and viscerally aware that my old recipe works just perfectly for sweets.

scones with strawberries and cream

Plus, whenever I eat strawberry shortcake, the shortcakes are really dry and um dry. These scones are the opposite of dry because they are full of butter and cream and topped with crackly sugar and the textural contrast is just incomparable (especially fresh out of the oven…mmph). They are also simple to make and an appropriate substitute for shortcake (in my opinion) because they aren’t overly sweet.

scones with strawberries and cream

You can top them however you like, but I do recommend whipped cream and berries. It’s the right thing to do this time of year.

scones with strawberries and cream

My sister’s weasely little chihuahua, Bandit, agrees. But he’s not allowed sweets like this, so eat one for him, will you?

scones with strawberries and cream

Scones with Strawberries and Cream
serves 6-8

Ingredients:
for scones:
2 cups all-purpose flour
1/2 tsp. salt
1 Tbsp baking powder
3 Tbsp brown sugar (plus more for sprinkling)
1 stick butter
1 cup heavy cream (plus more for brushing)
for toppings:
about 1 pound strawberries, sliced
2-3 cups heavy cream (make it a full quart if your guests are enthusiastic about it, adjust sugar as needed)
2-3 Tbsp granulated sugar
pinch of salt

Method:
1. Follow instructions outlined (with illustrations) for making scone dough and baking it properly in my “last scone recipe you’ll ever need” post – the photos are really helpful in getting the texture right. For plain, sweet scones use the flour, salt, baking powder, and brown sugar for the dry ingredients, butter and cream for the wet ingredients. Cut packed/refrigerated dough disks into six even slices for larger scones (like the one pictured) or eight slices for smaller scones. Brush with cream, sprinkle with brown sugar, and bake at 400. But seriously, go back and read my last scone post – you will be glad you did.
2. Wash and hull strawberries, then slice however you like. If they are a little on the tart side, sprinkle them with a teaspoon or two of sugar, stir to distribute, and set aside.
3. Pour 2-3 cups cold whipping cream into a bowl with 2-3 Tbsp granulated sugar and a tiny pinch of salt. Whip with a stand mixer or hand mixer until fluffy (I like mine a bit stiff, some people like it drapey – follow your heart or whatever, just don’t let it become butter). Taste and add more sugar if you like it extra sweet.
4. Split warm scones with a bread knife, pile with whipped cream and strawberries, and eat up.

  1. mmmmmmmmm so good, thank you!

    amy — August 12, 2014
    1. reply
  2. <3 I could eat these every day.

    caroline — August 12, 2014
    1. reply
cancel reply

Grilled Corn and Zucchini Salad with Poblano, Feta, and Honey Lime Dressing

Corn and Zucchini Salad with Poblano, Feta, and Honey Lime Dressing

Zucchini is one of those vegetables that’s kind of hard to get excited about. It’s mild in flavor, spongey when raw, watery when cooked, and it does not know moderation. When zucchini grows, it grows abundantly and with enthusiasm, which is kind of adorable, but also pretty inconvenient. If pinterest is any indication, everyone is up to their eyeballs in zucchini right now, and fresh out of ideas for how to use it. Zucchini bread, grilled zucchini, zucchini gratin – the veggie is versatile for sure, there’s just way too much of it.

Corn and Zucchini Salad with Poblano, Feta, and Honey Lime Dressing

And does anyone really want to bake in this weather? Gratins and breads are out for me, but grilling is something I can get behind. That slightly charred grill-flavor just screams summer. Add some sweet grilled corn, blistered poblanos, citrusy dressing and salty feta and I’m actually pretty stoked.

Corn and Zucchini Salad with Poblano, Feta, and Honey Lime Dressing

It’s summer in a bowl. The grilled veggies retain a bit of their texture which makes for a more interesting and tasty salad if you ask me.

Corn and Zucchini Salad with Poblano, Feta, and Honey Lime Dressing

A crave-worthy salad you’ll probably actually miss this winter. Get it while you can.

Corn and Zucchini Salad with Poblano, Feta, and Honey Lime Dressing

Grilled Corn and Zucchini Salad with Poblano, Feta, and Honey Lime Dressing

Ingredients:
juice of one lime
1 clove garlic, grated or finely minced
2 Tbsp cilantro, chopped
2 Tbsp olive oil
1-2 tsp honey
2-3 zucchini
3-4 ears fresh corn
2 small poblano peppers
1/3 cup (approximately) feta cheese

Method:
1. Whisk together lime, garlic, cilantro, olive oil, and honey in a mixing bowl to make dressing. Add salt and pepper to taste.
2. Cut zucchini into thick slabs (about 1/3 inch), brush with oil, sprinkle with salt, and grill over medium-high heat until well marked. Brush corn with oil and grill until marked, and grill whole poblanos until blistered.
3. Peel papery skin off of blistered poblanos and cut the flesh away from the stems and seeds. Dice poblanos and grilled zucchini, and cut the grilled corn away from their cobs.
4. Add diced poblanos, zucchini, and corn to the honey lime dressing, toss to coat and add crumbled feta. Taste and add salt and pepper if necessary. This is meant to be a savory salad with sweetness in the background, so season accordingly.

  1. this looks so tasty i want to make it right now!!! of course we killed off our zucchini plant this year. what?? well, we have a few yellow zucchinis. those will work, too, right?

    miranda — August 8, 2014
    1. Yellow squash would definitely work!

      courtney — August 8, 2014
    2. reply
  2. This looks great - lovely and summery. I love grilled corn salads. Will give this a try. Thanks!

    Geraldine | Green Valley Kitchen — August 16, 2014
    1. Thanks Geraldine! I hope you love it!

      courtney — August 16, 2014
    2. reply
cancel reply

Fresh Tomato Tart

fresh tomato tart

It’s time to eat tomatoes! We are in the thick of the season, so can them, obsess over them, bathe in them – because this time is fleeting. But you probably already know this. Maybe you’re even a little sick of gazpacho and caprese and tomato sandwiches by now. But you also know that by the crisp end of fall you’ll be wistfully reminiscing about the perfectly meaty, juicy tomatoes of summer, so to you I propose a new way to maximize tomato season: the fresh tomato tart.

fresh tomato tart

There are a lot of tomato tarts out there, but most of them suggest baking the tomatoes in the crust. But cooked tomatoes are for the off-season. Summer tomatoes should not be trifled with. Eat them raw.

fresh tomato tart

Blind bake a pie crust, whip up some mascarpone cheese with lemon juice, chives, basil, and salt, and lay on slabs of heirloom beauties. I am so serious about tomatoes right now.

fresh tomato tart

fresh tomato tart

Fresh Tomato Tart

Ingredients:
-your favorite pie crust
-one 8oz tub of mascarpone cheese
– juice of 1/2 lemon
-1/4 cup chopped chives
-2 Tbsp chopped basil
-two perfect summer tomatoes
-salt and pepper

Method:
1. Press your pie crust into a tart pan (preferably with a removable bottom – but you’ll survive without it) dock the dough and blind bake it using your favorite method (instructions will be included if you use packaged pie dough). Or if you are making your own crust (bravo) use this blind-baking method.
2. In a mixing bowl, whip your mascarpone cheese with a whisk until light and fluffy. Stir in lemon juice, basil, and most of your chives (reserve some for topping). Add salt and pepper to taste. Spread cheese into bottom of baked tart crust.
3. Cut your tomatoes into round slabs, spread them on your cutting board and salt them. Then, layer your cut tomatoes in some sort of aesthetically pleasing manner, and scatter them with chives and more black pepper. Cut into wedges and eat as quickly as possible (because fresh tomatoes don’t do so well in the fridge).

  1. This is so absolutely perfect. I could eat tomatoes like apples, can't wait to try it!

    Lauren | Wicked Spatula — August 5, 2014
    1. Thanks Lauren. Tomato lovers unite! And eat tarts!

      courtney — August 5, 2014
    2. reply
  2. This is so beautiful and pretty much everything I'm wanting in a meal right now!

    Melissa @ Treats With a Twist — August 6, 2014
    1. Thanks Melissa! It's a good blend of freshness and richness. I hope you like it if you get a chance to make it!

      courtney — August 6, 2014
    2. reply
cancel reply