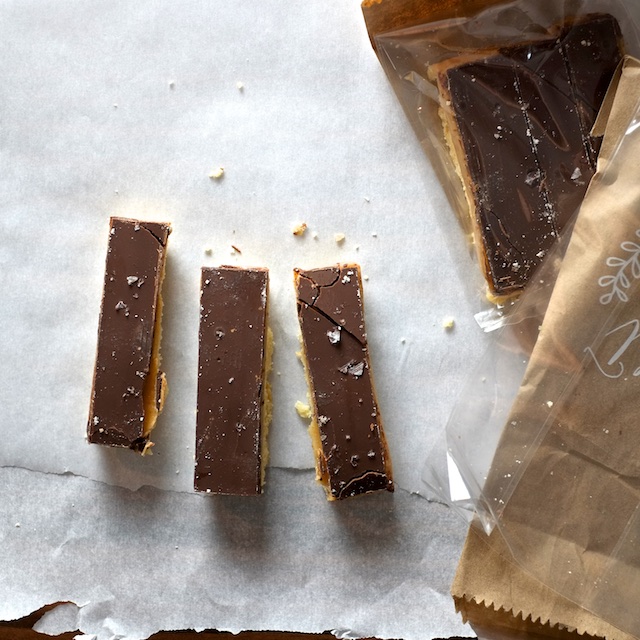
Millionaire Shortbread Bars with Maldon sea salt: the homemade (by me!) favors for my little sister’s wedding.
Before I dive into this, I just want to say that having a cold while pregnant is real lame. I miss sleep. Also, not being allowed a proper adult amount of caffeine to compensate for the lack of sleep is…inconvenient. And then add to that the fact that I normally require amphetamines to organize my thoughts well enough to be helpful and coherent (prescription, because I have ADD) and drugless pregnant brain slugs. My brain is slugs. Writing this post feels like climbing a mountain with Murdock on my back. While pregnant.
But I have something to say and it feels important because it contains updates and corrections and I feel guilty because it means the information I previously provided is flawed.
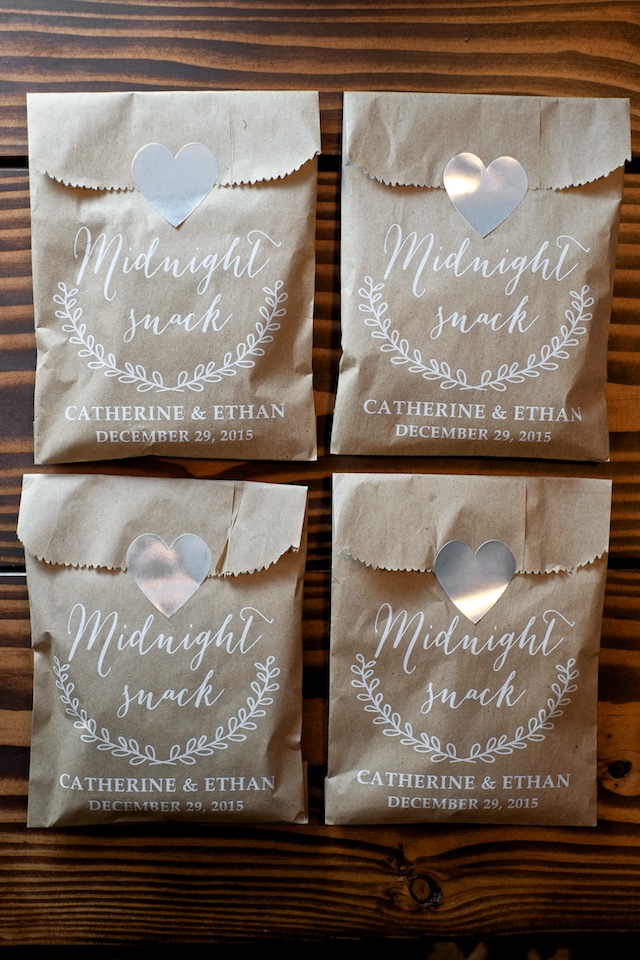
My sister got married after Christmas and I made the wedding favors. 200 bags of these bars. Have you ever made a recipe dozens of times without any problems and then one day they go wrong? It pulls the rug out, shatters the confidence, but as a silver lining learns us a thing or two. That’s what happened to me with these “easy millionaire shortbread bars” that I had previously written about. And while they are probably still easy by most standards, I’ve come out with a newfound respect for them and some tips for success. So here you go.
First of all, I don’t see any point making a normal sized batch of these anymore. If you are going to saddle up and make a mess in the kitchen, make a double batch using a half sheet or jelly roll pan. Take extras to work, stick them in the fridge for later, or give them out as gifts. Everyone will love you.
Always line the pan thoroughly with aluminum foil. Heavy duty or nonstick are my favorites. Make sure the foil extends around the edges of the pan too, so you can lift the bars out easily.
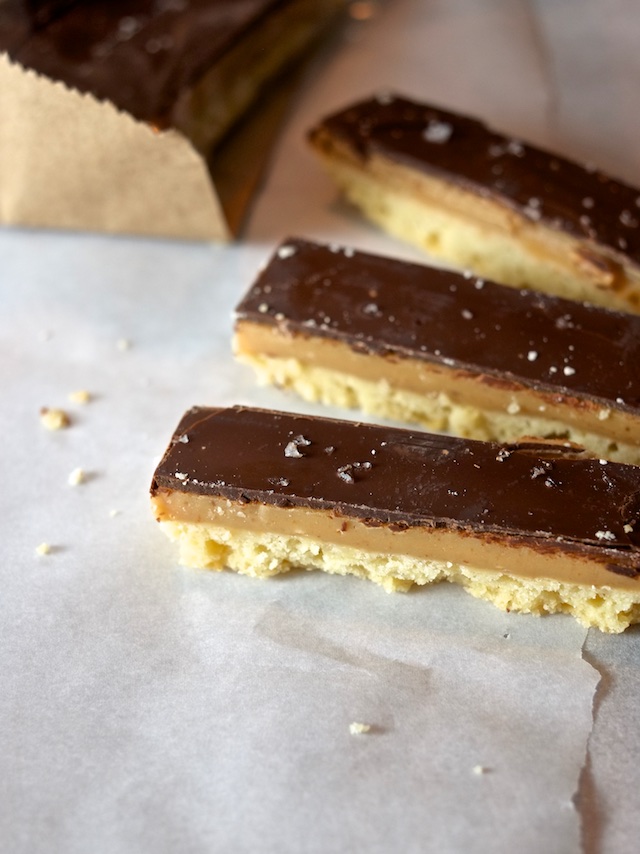
For the shortbread: add more butter than I suggested in the original recipe. It makes it easier to work with and ever so slightly less crumbly. If you have a food processor make the shortbread with it. And lastly, bake the crust until it’s solidly golden brown (at least 20 minutes, possibly 30)
On the caramel: I experimented with shortcuts and long cuts (like letting it sit in a crock pot for hours on end) and there’s just no nice way to do it. Get ready to stir for a solid 30 minutes, and wear rubber gloves because getting spit on by hot molten sugar and fat hurts like the dickens. Don’t wait to melt the butter into the caramel until the end (like I originally suggested), add it at the beginning.
Cook the caramel over medium-low instead of medium (it will spit at you less but take slightly longer to finish), stirring occasionally until it starts to brown, then stir constantly until it’s nice and brown and thick (see below). You want the texture to be sticky and ribbony with slowly popping bubbles. If you are a candy maker, the mid pot temperature range is between 219-222 F (that’s kind of between firm and hard ball) and the bottom of the pot is around 240 F (that’s soft crack stage). I’m guessing that means the finished product is some kind of hard ball soft crack hybrid, but I don’t know candy, so someone tell me please. Salt the caramel well and taste it (carefully!) before you pour it over the shortbread.

For chocolate: Use chips. Chips contain stabilizers and because I’m not a chocolate expert and I don’t want to bother with tempering, I need the extra help. The biggest failed experiment I had was when I used bar chocolate instead of chips and the chocolate had this awful crumbly sandy texture and I still don’t understand why. Melt the chocolate gently in a glass bowl over a small pot of water on medium low heat, making sure the bottom of the bowl isn’t touching the water below. Set the bowl on a towel before pouring it over the caramel (getting water in melted chocolate will cause it to break and get grainy almost immediately). Then allow the chocolate to set a bit at room temperature before you stick the whole slab of bars in the fridge. I salted the bars for the wedding with Maldon salt before letting them cool, and it tasted good and looked pretty but I think I was tempting fate by possibly drawing moisture out of the chocolate? So salt the chocolate at your own risk (it was delicious though).
So have I scared you out of making these? I really don’t mean to! Honestly even the batches I considered “failures” were gobbled up by my family. I’ve literally only screwed these up badly once (the crockpot caramel and crumbly chocolate incident which was not served to wedding guests), and it was because I was over thinking them. It’s hard to truly fail with a recipe that contains this much butter. The bars pictured were even the messiest, cracked-chocolate-est bars of wedding batches bunch (some were actually pretty) and they were delicious and everyone loved them. I think I’ve just become a bit better attuned to the nuances of texture and flavor after making so many of these bars, so I’m pickier than I used to be. THE MORE YOU KNOW (picture rainbow and book logo here).
So you guys, if anyone makes these and has feedback for me, pretty please let me know. As you can see, I’m open to criticism and making improvements as often as necessary.
NEW AND IMPROVED Millionaire Shortbread Bars
Ingredients:
For the shortbread:
2 1/2 cups all purpose flour
1/2 cup sugar
1/2 tsp salt
2 1/2 sticks salted butter, cut into small cubes
For the caramel:
2 cans sweetened condensed milk
1 cup sugar
6 Tbsp light corn syrup (use a 1/4 cup measure and fill it one and a half times)
2 sticks salted butter, cubed
more salt to taste (I used at least an extra 1/2 teaspoon)
For the chocolate:
2 cups of your favorite chocolate chips (I like a blend of Ghirardelli bittersweet and semi sweet)
Method:
1. Start by making the shortbread. If you have a food processor, add all the ingredients to the bowl and pulse until well combined and all the butter looks evenly sandy. If you don’t have a food processor, stir together the flour, sugar, and salt, and cut in the butter with a pastry cutter.
2. Line your half sheet or jellyroll pan with aluminum foil (making sure all the edges are well covered) and press in the shortbread mixture. Bake at 350F for 20-30 minutes or until solidly golden brown.
3. Put on some gloves. In a 2 quart sauce pan over medium-low heat, combine ingredients for caramel. Whisk occasionally until the mixture starts to brown, then whisk constantly until the caramel is thickened substantially, is sticky and ribbony when you lift your whisk and bubbles that show up pop slowly. This process will take about 30 minutes, but I promise it’s worth it.
4. Pull out a spoonful of caramel, let it cool, and taste it. Add salt if necessary (you want the caramel to be the main sweet/salty component). Pour the finished caramel over the baked shortbread and spread it evenly with a rubber spatula or knife.
5. Rinse out the saucepan you used for the caramel and add an inch of water to the bottom (resourceful!). Set a glass mixing bowl on top of the pan with your two cups of chocolate chips. Stir the chocolate until it is melted. Remove the bowl to a towel to dry the bottom.
6. Pour the melted chocolate over the caramel and spread it evenly. I find it helpful to shake the pan back and forth or drop it on the counter from about six inches in the air to help work the bubbles out of the chocolate. Allow the chocolate to come to room temperature before chilling in the fridge. If you have time, you can let the bars cool entirely at room temperature and skip the fridge.
7. After the bars are set, remove them from the fridge (if that’s where you put them) and let them come to room temperature for 20-30 minutes (this makes the chocolate less likely to crack during cutting, though frankly who cares?). Cut into bars and serve them up!


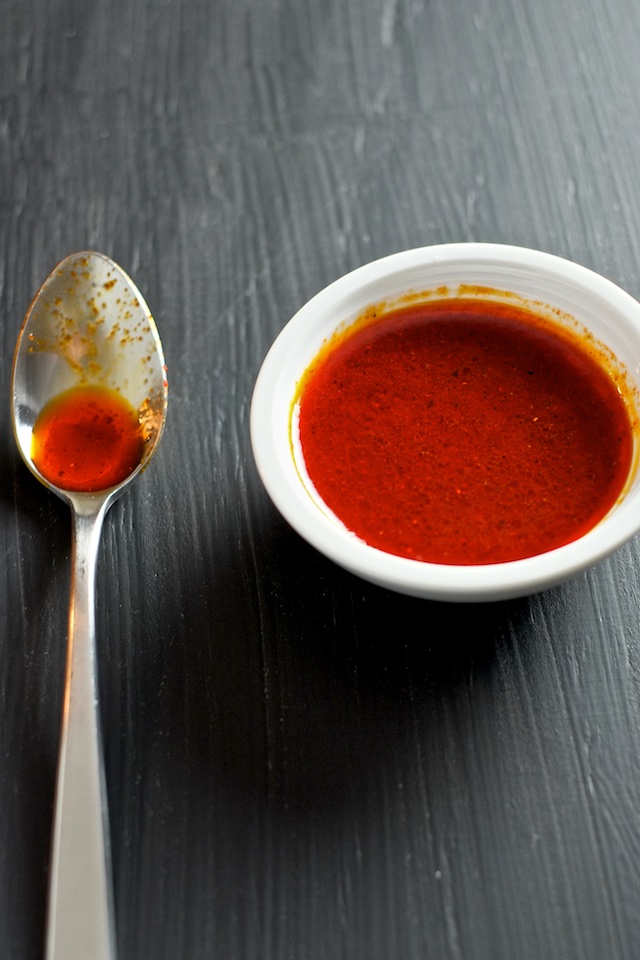 I’m in California! We are visiting Cody’s family, and eating lots of good food, and I have instagrammed exactly one photo of my travels because family distracts me better than anything. But this vinaigrette is important, so here I am blogging for you.
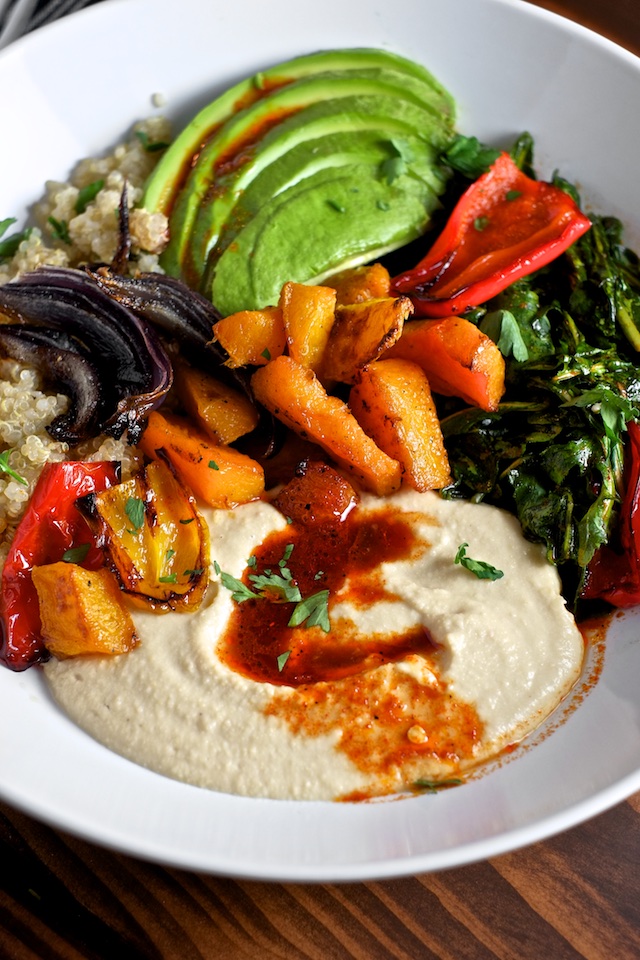
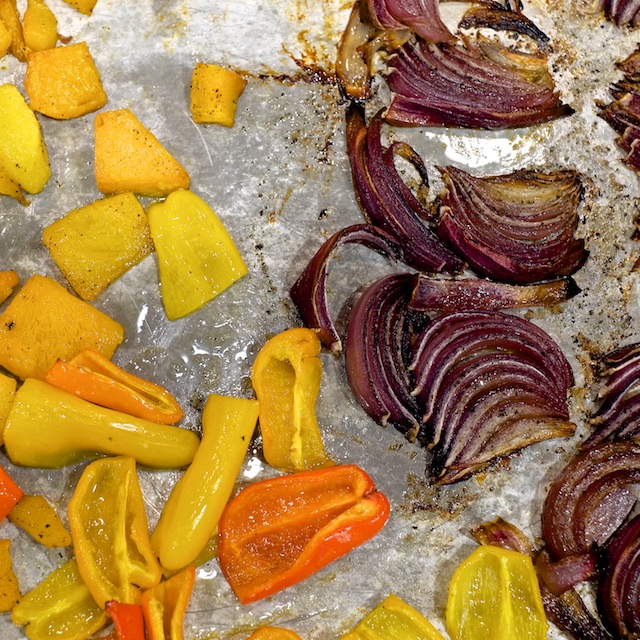
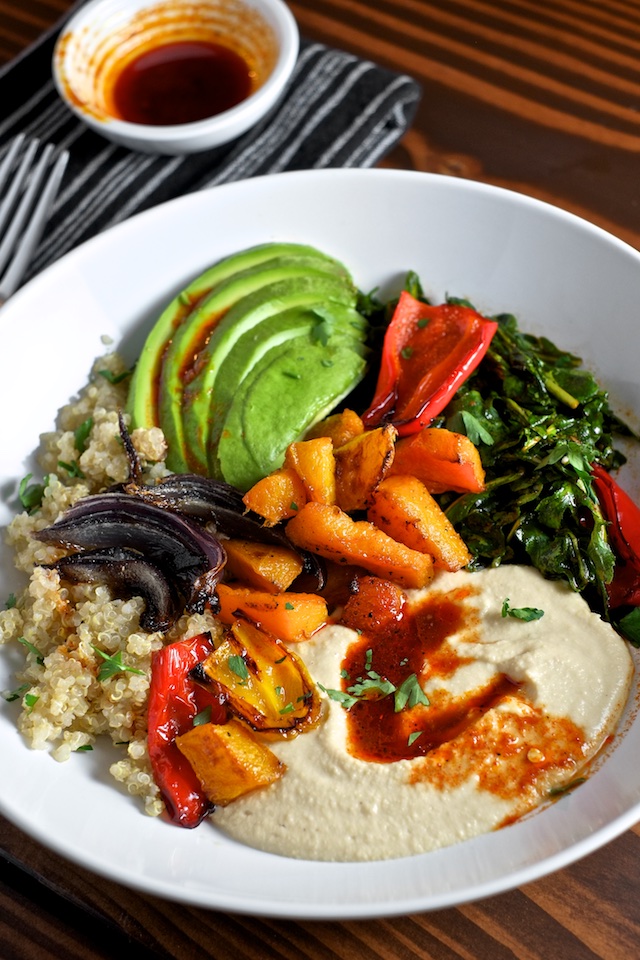
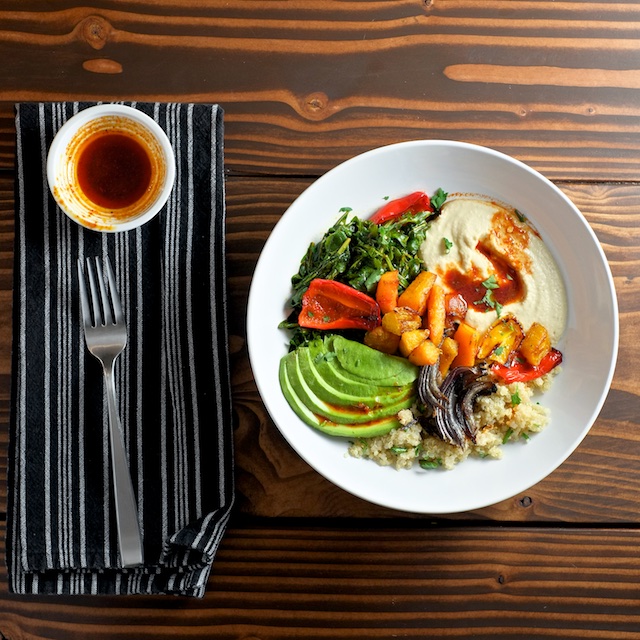
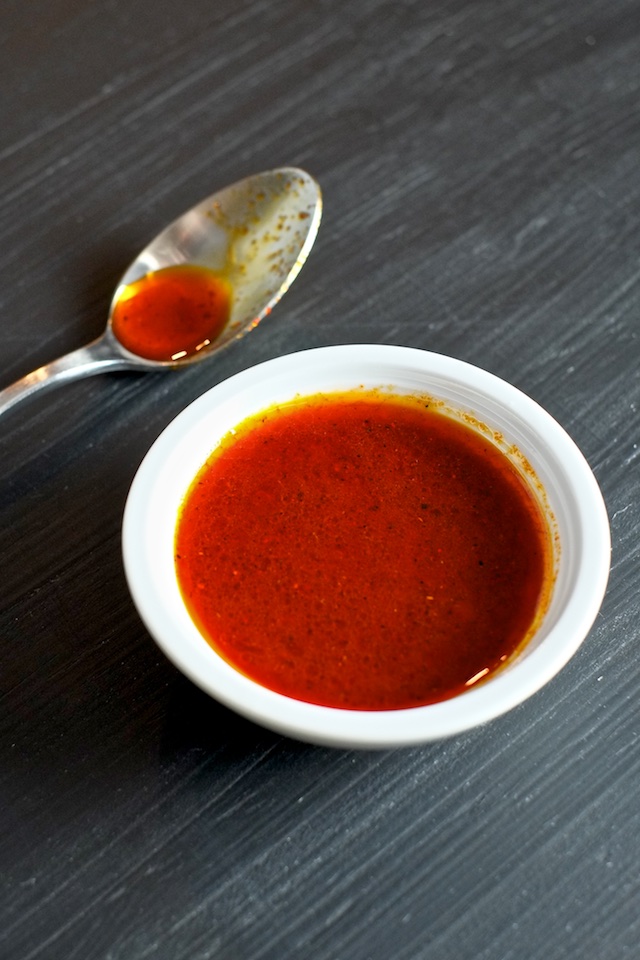 I made this vinaigrette specifically for a really awesome power bowl that will be coming at you very soon (like probably tomorrow) and it completely makes the bowl. I was inspired to create it as sort of a Nando’s Piri Piri hummus with paprika drizzle tribute (spoiler: the power bowl has hummus). So it goes awesomely with hummus, but also with greens of all kinds, avocado, and roasted winter squashes. So I recommend making a batch and using it liberally.
Made this today and it was delicious! I just used fresh instead of frozen broccoli.
Suzanne Carroll — January 31, 2016