Asian Guacamole

More guacamole! Too much of a good thing is actually pretty great, amiright? Avocados have a mild and buttery flavor that is a bit more adaptable than most people recognize. The fruit is native to Mexico, so Mexican cuisine is the most obvious place for avocados to turn up. But Asian cuisine, with it’s use of onion, garlic, acid, and heat also makes for a lovely foil to the richness of avocado. I can’t be the first person to figure out this awesome combination, but eating it made me feel like a bit of a genius.

asian guacamole

Tortilla chips just wouldn’t do for an Asian guacamole, so I picked up some raw wonton wrappers and baked them up.

baked won ton strips

I knew I wanted sesame oil in this guac, in addition to garlic and scallion and lime. The lime makes the dip sort of skew Vietnamese/Thai, so I took it further and added basil to the flavor profile.

asian guacamole

asian guacamole

Large-diced avocado for extra chunkiness.

asian guacamole

asian guacamole

I started eating before I remembered to add sriracha (the smell was taunting me) – but it’s really good with sriracha. It kind of needs that hit of heat. Now honestly, why isn’t Asian guacamole already a thing?

asian guacamole

asian guacamole

Asian Guacamole

Ingredients:
2 small avocados
2 Tbsp scallion, sliced fine
2 Tbsp basil, chiffonade (roll together and thinly slice)
1 small clove garlic, grated
1/2 teaspoon toasted sesame oil
juice of one lime
salt to taste
sriracha for topping

Method:
1. Brush a baking tray with oil and lay out wonton wrappers, brush wrappers with additional oil. Bake at 350 degrees for 7-10 minutes, or until golden brown.
2. Slice scallion, chiffonade basil, and grate garlic. Combine in a mixing bowl with lime juice, sesame oil, and a pinch of salt. Set aside.
3. Cut open avocados, remove pits, and take off the peels while keeping the avocado flesh as intact as possible. Dice and add to bowl with scallion mixture.
4. Stir and mash slightly with the back of a spoon. Taste for seasoning, add more lime juice or salt if necessary. Top with sriracha and serve with baked wonton chips.

cancel reply

The Ideal Guacamole

I tend to gravitate toward recipes that are really simple, to the point of being obvious. Like my ideal salsa, the ideal guacamole doesn’t need to have secret, outside-the-box ingredients to taste incredible. It’s about getting the ratios right, balancing the acid and the heat and the subtle sinus-burn of raw onion with the right amount of salt. If you hit those points, you’ll end with guacamole that’s clean tasting, bright, satisfying, and addictive.

the ideal guacamole

Lets talk about avocados though. I know a lot of people who go to the store the day they want to make guacamole and stand in the produce section squeezing every avocado in the bin until they find one that’s ready. Then they go home, chop their cilantro, squeeze their limes, and when they crack open the avocado, it’s half brown inside and utterly hideous. This has happened to me more times than I care to admit, and it took this next piece of information for me to see the light: avocados don’t ripen until after they are picked. That means the avocados that are soft in the bin are also old.

So now, and forever more, I buy avocados when they are green and hard (hard enough to survive the rough journey from across the country) and let them ripen on my counter, free from the squeezes of strangers. I haven’t opened a disappointing avocado in years. The price you have to pay for perfect avocados is planning. Buy them at least 3-4 days before you need to use them.

the ideal guacamole

Besides avocados, you need a lime, a handful of cilantro, a jalapeño, and a red onion.

the ideal guacamole

And because I like my guacamole very chunky, I try to get the flesh away from the peel in one piece, and dice instead of mash.

the ideal guacamole

the ideal guacamole

the ideal guacamole

The Ideal Guacamole

Ingredients:
2 small, ripe avocados (yielding a little over a cup of diced flesh – double or triple the recipe for a big batch)
2 Tbsp cilantro, chopped
2 Tbsp jalapeño, finely minced (about one small pepper, remove seeds if you’re a wimp like me)
1/4 cup red onion, finely diced
juice of one lime
salt to taste

Method:
1. Dice onion, chop cilantro, and mince jalapeño. Combine in a mixing bowl with lime juice and a pinch of salt. Set aside.
2. Cut open avocados, remove pits, and take off the peels while keeping the avocado flesh as intact as possible. Dice and add to bowl with onion mixture.
3. Stir and mash slightly with the back of a spoon. Taste for seasoning, add more lime juice or salt if necessary. Serve with chips.

cancel reply

Japanese Fried Chicken (aka Karaage)

japanese fried chicken

It took me longer than it should have to discover karaage. Traveling abroad is something I’ve always pined for but never had the opportunity to do, so when I finally got to go to Japan I was determined not to waste a minute of my time eating food for Americans. I wanted to immerse myself in the culture and stuff my face with real Japanese food.

Bad luck, along with my own lack of preparation, conspired to throw me in the deep end of the food scene, and in my first few weeks I had eaten (without meaning to) many of the most challenging foods in the Japanese repertoire, including: natto (fermented, sticky and stinky beans), salted and dried fish (with bones, for breakfast), squid sashimi (soo chewy), and cheap curry (which was toothache-sweet). I was on the ropes, desperate for something I could just devour when I finally caved and ordered the seven-dollar fried chicken special at my favorite lunch spot. I expected chicken tenders, but what I got was a bonafide Japanese epiphany – breading that’s shatteringly crisp yet somehow delicate, and juicy, soy-marinated chicken. This chicken is what motivated me to find Mari’s cooking class, because I needed to know how it was made.

japanese fried chicken

And it’s laughably simple. The secret, magic ingredient that makes Japanese fried chicken special is potato starch. Dunk well-marinated chicken in a single dredge of potato starch, fry it, and you end up with something so impossibly crispy and delicious, there aren’t words.

japanese fried chicken

I used small pieces of boneless chicken so my little nuggets would cook quickly without burning the delicate breading.

japanese fried chicken

Mari mentioned that cornstarch is a decent substitute for potato starch if you can’t find it, so I did a side-by-side comparison below. For me, the potato starch makes the chicken. Bob’s Red Mill sells it, so check your grocery store’s health food or gluten-free section if you don’t find it with the regular baking supplies.

japanese fried chicken

Cornstarch on the left, potato starch on the right. I love how the potato starch piles on itself and makes pretty, crispy flakes when it’s fried. Ugh I’m hungry.

japanese fried chicken 10

Japanese Fried Chicken
(adapted slightly from a recipe given to me by Mari)

Ingredients:
2 boneless chicken breasts or 4 thighs, cut into 2-bite pieces (if you de-bone yourself you should leave the skin on because it’s delicious)
1/4 cup soy sauce
1/4 cup sake
about 1 Tbsp fresh ginger, grated or chopped
3-4 cloves garlic, grated or chopped
2 tsp sesame oil
about 1 cup potato starch
oil for frying (choose a high smoke-point, neutral flavored oil like peanut)
lemon, for serving (optional)

Method:
1. Mix together soy sauce, sake, ginger, garlic, and sesame oil. Marinade chicken pieces for at least two hours, but up to overnight.
2. Remove chicken pieces from the marinade and drop them directly into a bowl of plain potato starch. The residual marinade will be enough to make the potato starch stick really well. Turn each piece to coat, and set aside.
3. Heat about two inches of oil in a dutch oven or deep pot over medium-medium high heat until a wooden spoon handle lowered into the oil bubbles actively. If you have a thermometer, shoot for a steady 350 degrees Fahrenheit. If you don’t have a thermometer, fry a few tester pieces to make sure your oil is hot enough to achieve golden-brown deliciousness. Fry the chicken in batches, turning as necessary. Move the cooked chicken to a paper towel lined plate or a wire rack over a pan.
4. Taste for seasoning – if you’ve marinaded your chicken long enough it shouldn’t need any, but if you did a quick marinade you may want salt. Serve while hot, with a squeeze of lemon if you like.

cancel reply

Tokyo Cooking Class With Mari

My absolute favorite Tokyo adventure was taking a cooking class from a native named Mari in her actual home. We booked her for the whole day and spent the morning at Kappabashi street, which is known as a cook’s and restaurant-supply mecca. With her help we were able to make a few informed additions to our kitchen gear.

kappabashi street

We weren’t in the market for any, but we couldn’t help checking out the plastic food. It’s a real art form in Japan, and these little plastic sculptures aren’t cheap. That plate of fried rice below is 4200 yen, which is about 42 dollars. For plastic food.

kappabashi street

Mari learned to speak english from teaching her cooking classes to tourists, so her near-fluency is pretty impressive. Something I learned about myself in Japan is that I am incapable of noticing and eliminating idioms in my speech, but she wasn’t thrown. She was indispensable as a translator in the Japanese shops full of foreign words and tools.

kappabashi street

After a few hours shopping, we went to her apartment to cook.

tokyo cooking class

I had her teach me to make gyoza, karaage (Japanese fried chicken), teriyaki chicken, chahan (a Japanese interpretation of Chinese fried rice), sesame and spinach salad, and octopus with green onion and miso. She commented on the abundant meatiness of the menu, so I made it clear that I wouldn’t be eating these all at once on a normal day (we can be pretty carnivorous in the US, but come on). My point was to learn as many of the popular but frequently screwed-up-in-America main-dishes as possible.

tokyo cooking class

So we chopped.

tokyo cooking class

We measured.

tokyo cooking class

We got messy.

tokyo cooking class

And I tried my hand at folding gyoza. It’s pretty easy once you get the hang. My folding was not so tidy though.

tokyo cooking class

tokyo cooking class

We crushed our own sesame seeds. In Japan I discovered my intense love of sesame. Finding new food loves is the best thing about traveling.

tokyo cooking class

tokyo cooking class

Mari is a competent enough cook that she doesn’t need a thermometer for deep frying. Legit.

tokyo cooking class

And just before we passed out from hunger, we sat down and stuffed our faces with homemade Japanese food.

tokyo cooking class

tokyo cooking class

tokyo cooking class

tokyo cooking class

tokyo cooking class

tokyo cooking class

It was all delicious, obviously, and I was sent home with detailed recipes to cook from on my own. This day of cooking was the best money I spent the whole trip. And if you’re ever in Tokyo, you can meet the adorable Mari and take a cooking class too.

  1. drooling again

    Carrie — July 23, 2014
    1. grinning

      courtney — July 23, 2014
    2. reply
  2. wow, that looks amazing! a lot of meat though. ;) that's a pretty rare opportunity. you'll have to teach us what you learned!

    miranda — July 24, 2014
    1. I definitely will! Some of it on the blog probably.

      courtney — July 27, 2014
    2. reply
cancel reply

Tokyo Recap

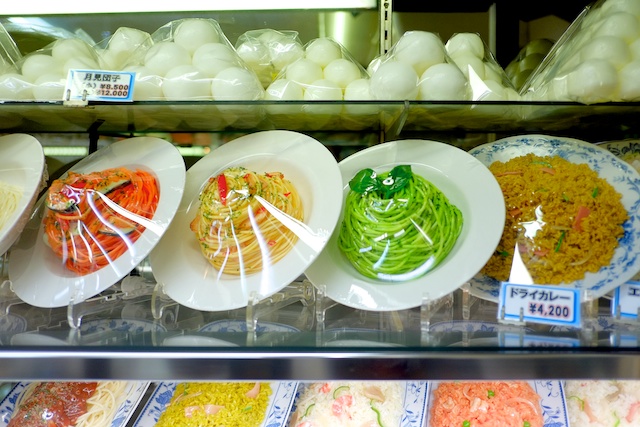
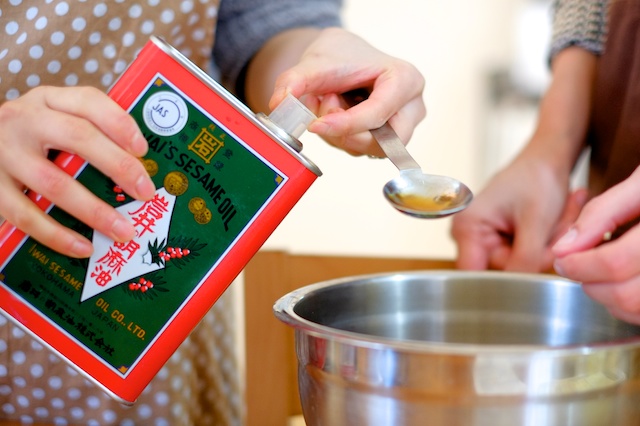
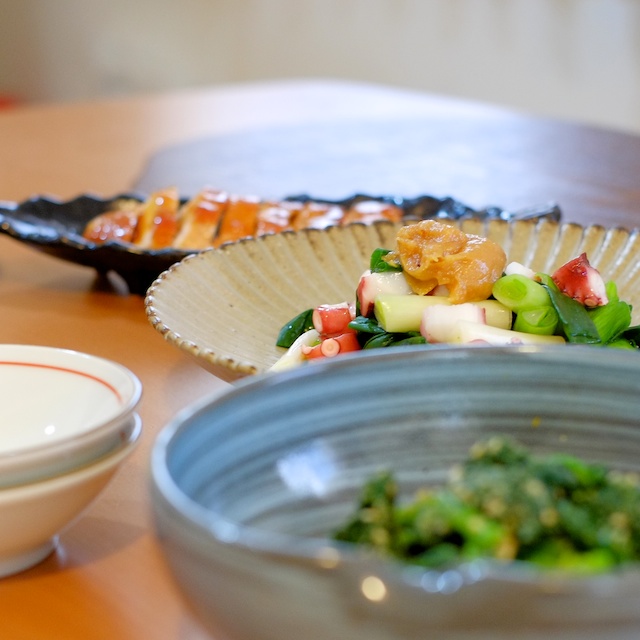
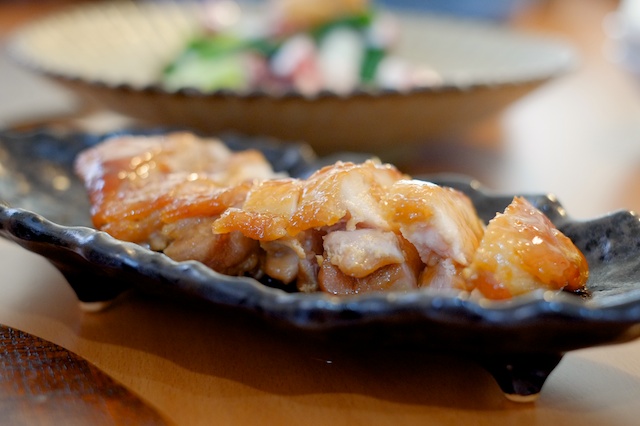
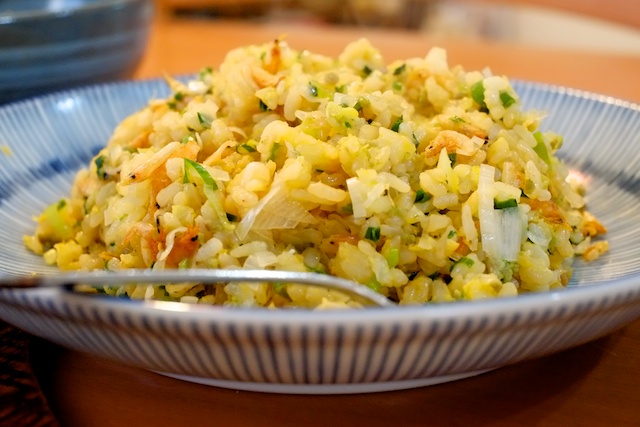
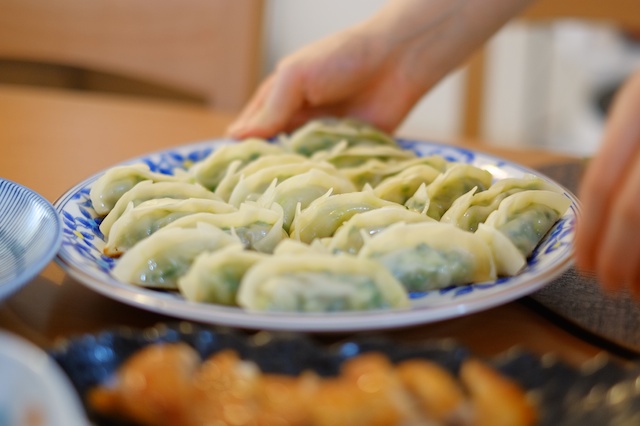
This Tokyo post is way late, (4 months but who’s counting?) and I was planning to chop it up into a few posts but I don’t think I can wait this long and be calculated about it. So it’s a photo-dump, but hopefully a nice one. On our way home from Tanegashima, Cody and I decided we’d better take advantage of the opportunity to explore Tokyo, and chiseled out a ten day stretch to enjoy the city. We used Airbnb and found a nice, clean, and cheap studio apartment in Shinjuku, which is an area we had already explored a tiny bit. Our host was great, spoke very good english, and gave us a list of restaurants to try in the area, which we did, as well as maps to local sights and transit, and a wi-fi hotspot card, which was SO nice for me because I had my phone in airplane mode for the entire trip (to avoid international calling and data fees), so having my own wifi card felt pretty luxurious.

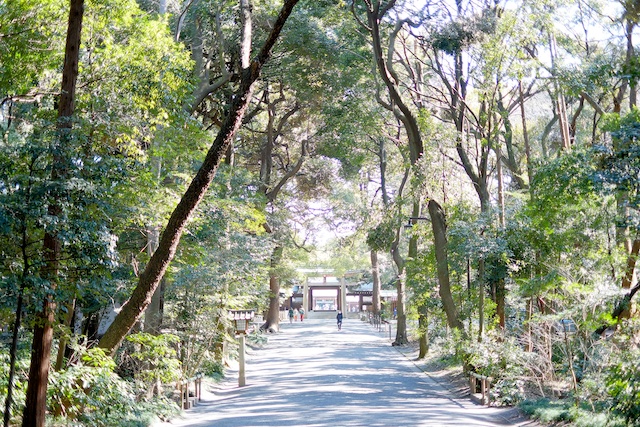
Our first day in the city we decided to explore on foot and found our way to Yoyogi park and the Meiji Shrine.

tokyo

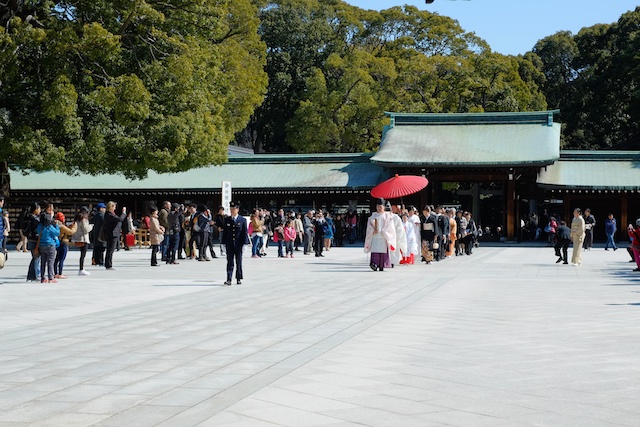
We were lucky enough to arrive during a wedding procession and got to see the bride, groom, and families decked out in traditional kimonos. The procession moved slowly and was very quiet, but the bride and groom were all smiles.

tokyo wedding procession

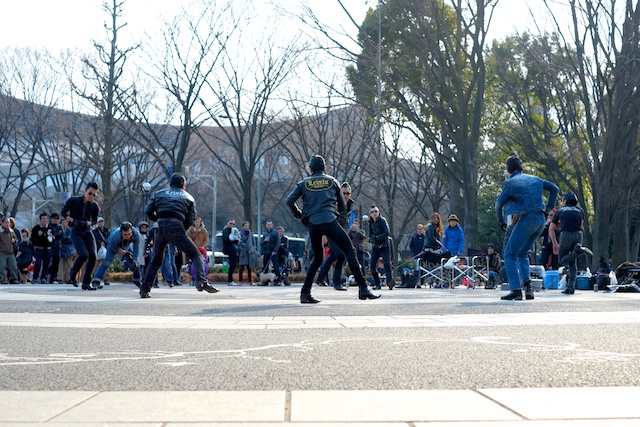
Yoyogi park is also known as an area for cosplay enthusiasts to congregate. I think I missed the main crowd in their anime getups, but managed to catch an interpretive Elvis-dancing group named the “Lebels” (according to their custom leather jackets). They played Elvis music and did a lot of knee swiveling and attracted a substantial group of gawkers.

tokyo lebels

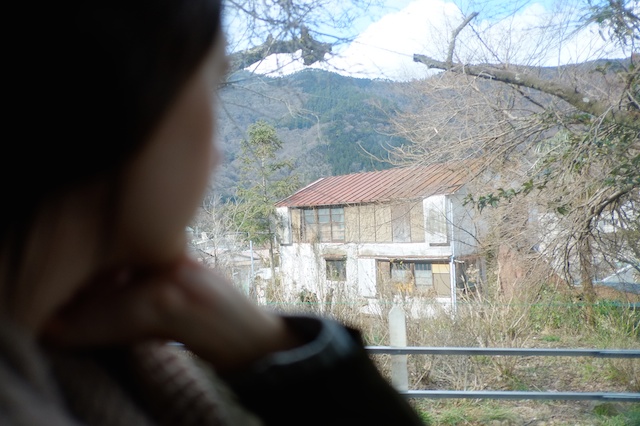
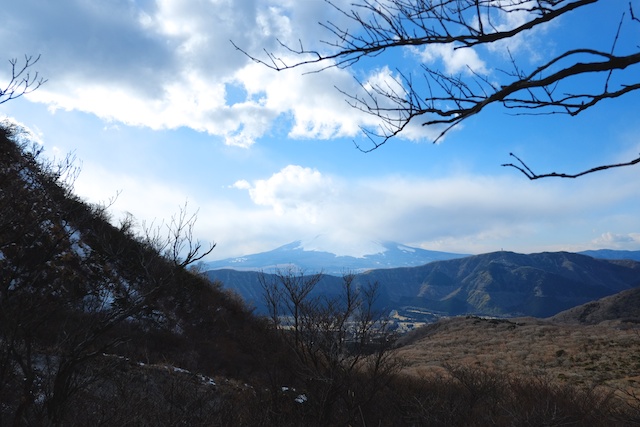
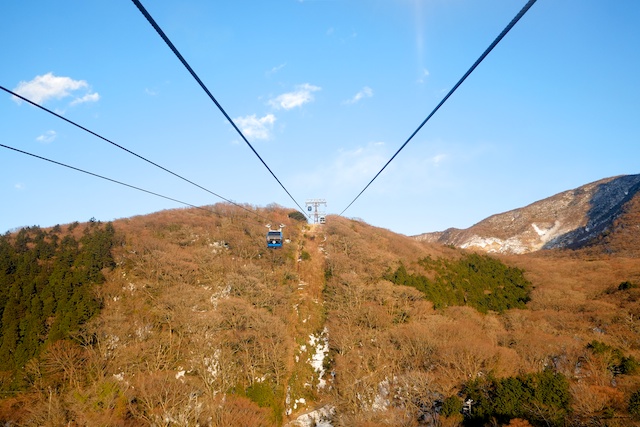
Another highlight of our trip was Hakone park, which is at the foot of Mt. Fuji and offers really great views of the mountain. We paid about $50 for each of us to have a park day pass, train fare to and from the park, and access to all the transit inside. We started with a train at Shinjuku station that took us all the way to Hakone, and within Hakone we rode the railway that made a lot of switchbacks climbing up a Fuji-adjacent mountain, and the ropeway which gave us some incredible views of Fuji-san. A lot of people go to Hakone as part of a tour group and stay overnight to take advantage of hot springs and fancy hotels in the area, but we felt like it was easy to do on our own, and pretty good for a day trip.

train to hakone park

Cody was sick during our trip to Hakone and was happy we got to spend a lot of time sitting and enjoying pretty views from the ropeway. Hakone is a relaxing little jaunt.

hakone ropeway

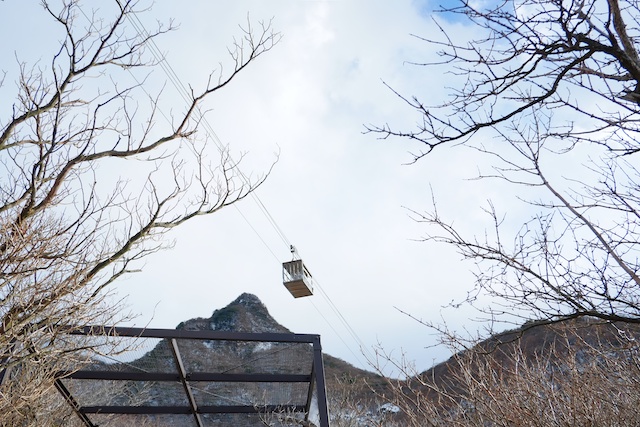
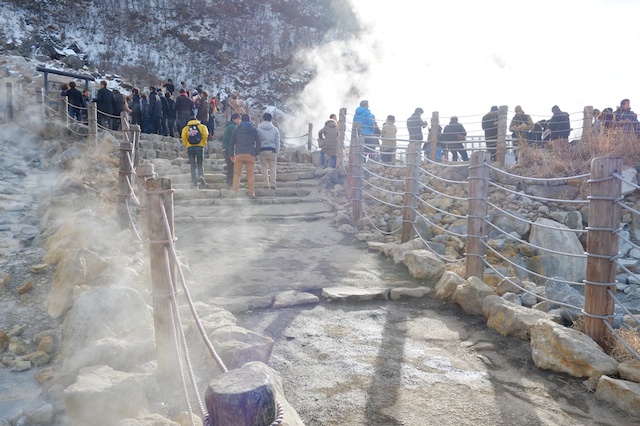
Up at the top of the ropeway is a gift shop that sells Fuji-related gifty things and specializes in little snack bags of eggs boiled in the sulfuric hot springs. The sulfur turns the egg shells black, so it’s a pretty cool novelty item. But I have to say, those hot springs smell pretty intensely, and that violent eggy aroma tickling the back of my throat didn’t really make me hungry for more egg. Anyway, that little cage on a rope below is a fresh delivery of sulfur eggs from the hot spring.

hakone park eggs

The hot springs, while smelly, look pretty dang cool, especially in the late winter when it’s chilly out and the steam comes off the water in big puffs.

hakone park

Oh and Fuji-san!

fuji san

This is the forward-view when you ride the ropeway, a little scary but really cool.

hakone ropeway

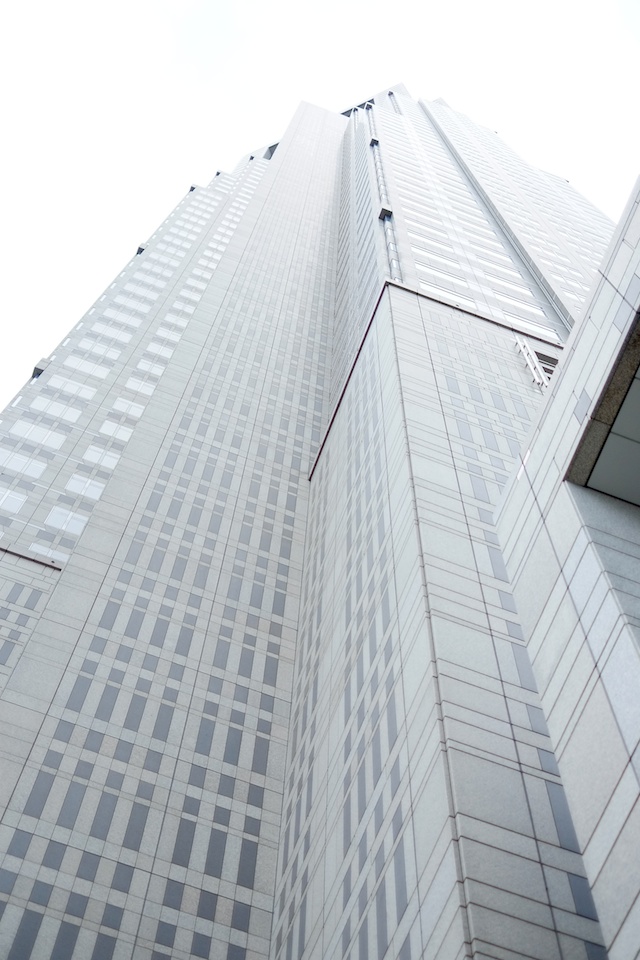
Back in Tokyo, on another of Cody’s sick days, we stayed close to home and visited the government building across the street from our apartment to check out the views from their public observation deck. That’s a shot of Yoyogi park below.

tokyo

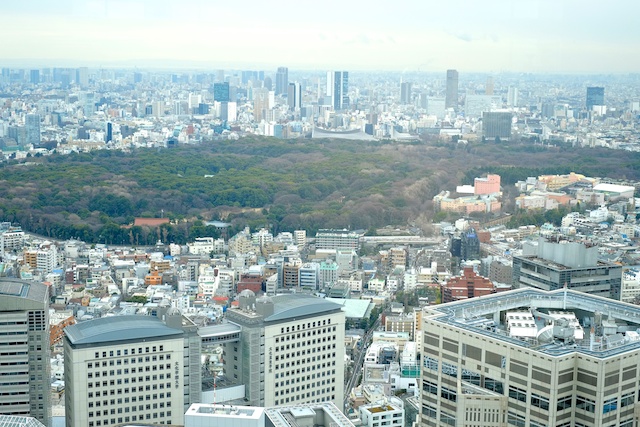
And that’s the government building, shot from the foot.

tokyo skyscraper

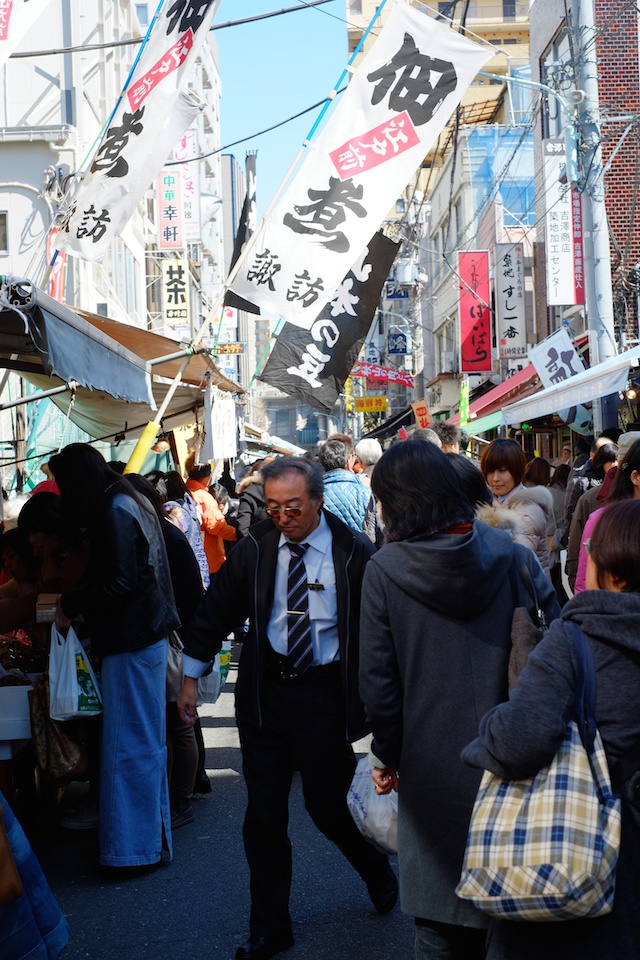
Later in the week, when we were feeling better, we visited Tsukiji fish market, and holy crap. It was so crowded and everything was moving and have you ever been dizzy just from looking at things? Because that’s what happened to me.

tsukiji fish market

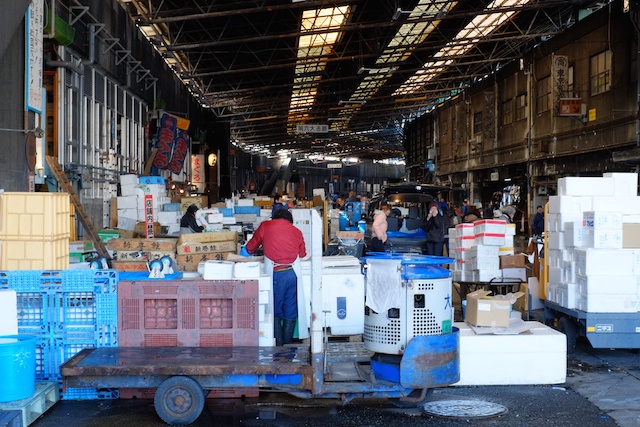
This place is kind of stressful when it’s crowded because the little trucks that people drive around have the right of way over pedestrians and tourists (they are there for business) and people are trying to buy things on your left and your right and there is no space and you are literally always in someone’s way. We didn’t get many photos because we felt like we couldn’t stop walking long enough to do a lot of snapping. But still, you need to see it if you’re ever in Tokyo. It’s mindblowingly big and busy and it smells shockingly good – like ocean water and not at all  like your local grocery store’s fish department.

tsukiji tuna

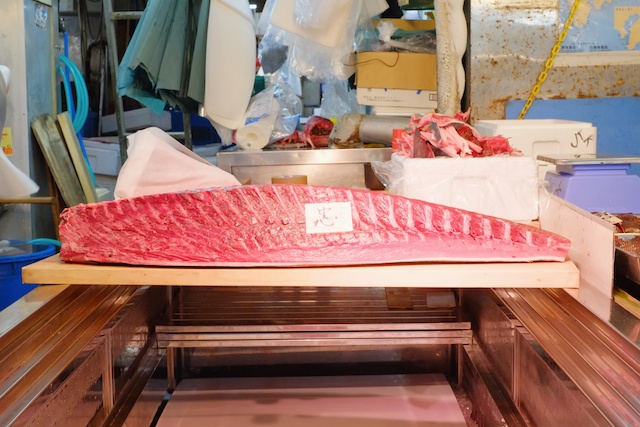
A large slab of tuna and some kind of dried cuttlefish stacked like paper.

tsukiji fish market

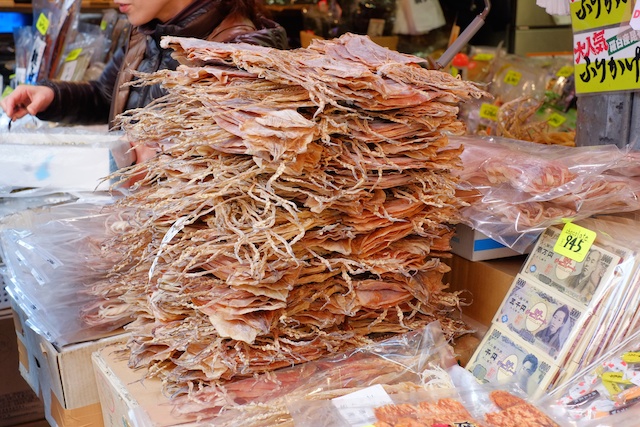
Below is a shot from the exterior market surrounding the fish market. They sell everything from cookware to spices to nori and souvenirs. It is also crowded.

tsukiji

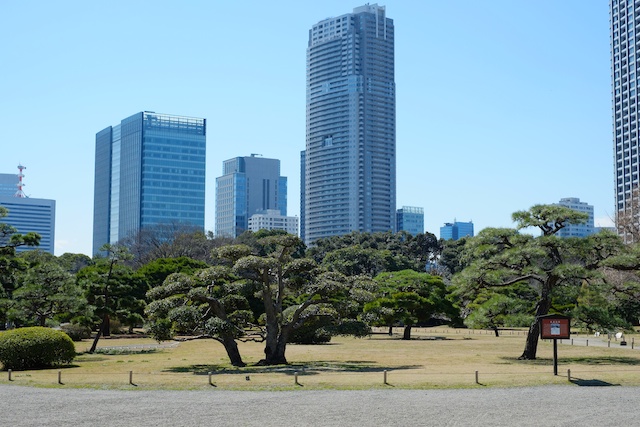
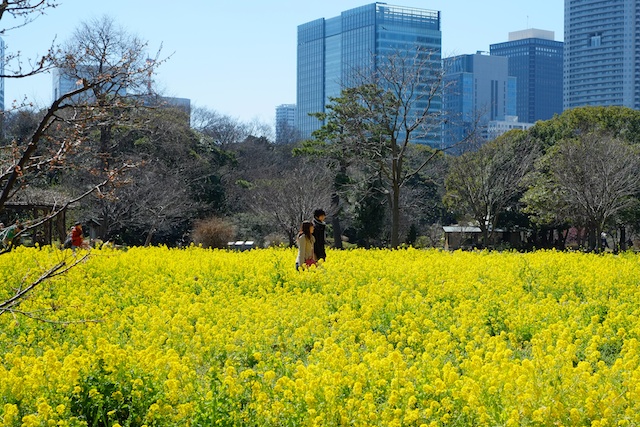
We found some breathing space afterward in a nearby park. I can’t remember the name of the park, but it was home to the Kyuinao shrine. Maybe it’s Kyuinao park?

tokyo

tokyo

And later in the week, we ate some ridiculously good sushi at one of those conveyor belt places. I learned to like sushi in America, but Japanese sushi is completely different. The fish tastes cleaner and it has a texture that’s somehow firmer and meltier than American fish at the same time. I couldn’t ever understand how someone could want to fill up on sushi in the states, (it’s just not that good here) but in Tokyo I had to restrain myself. This place was in the basement of a subway station and it was very busy. We were lucky to be seated directly to the right of one of the sushi chefs, so we would just grab one of whatever he put up on the belt. I ordered a few pieces from the menu too, but had to repeat myself because of my bad accent. The sushi chefs were kind about it though, and willing to help. If you go and aren’t confident in your Japanese, I recommend pointing to what you want on the menu (after saying your “sumimasen”) or just taking what’s on the belt. It’s all delicious anyway.

tokyo conveyer belt sushi

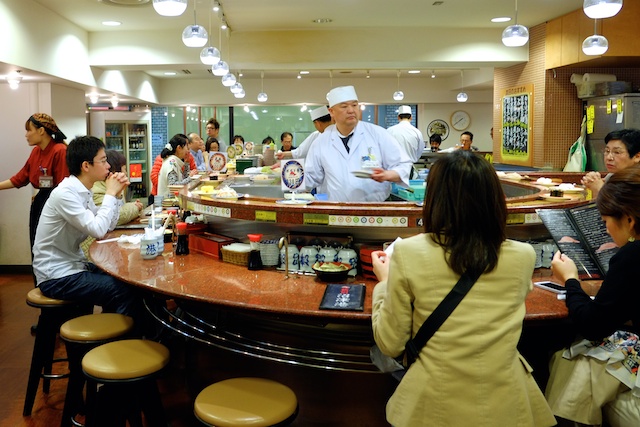
That’s some tuna, somewhere between toro and chutoro – not the fattiest but not the leanest. It was lovely.

tokyo sushi

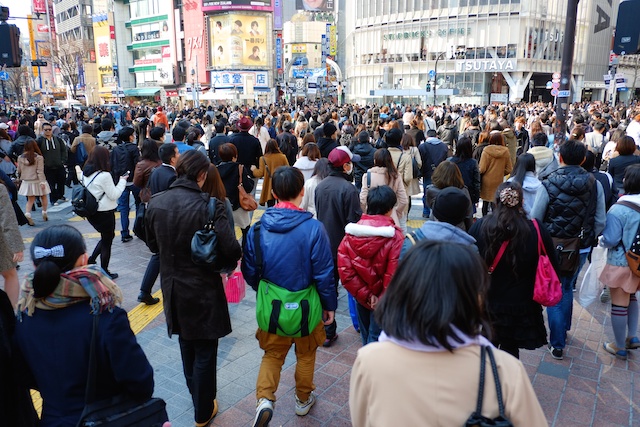
We did lots of shopping in Shibuya while we were there, and crossed the famous crosswalk many times. It’s a lot easier than most crosswalks in New York somehow.

shibuya crossing

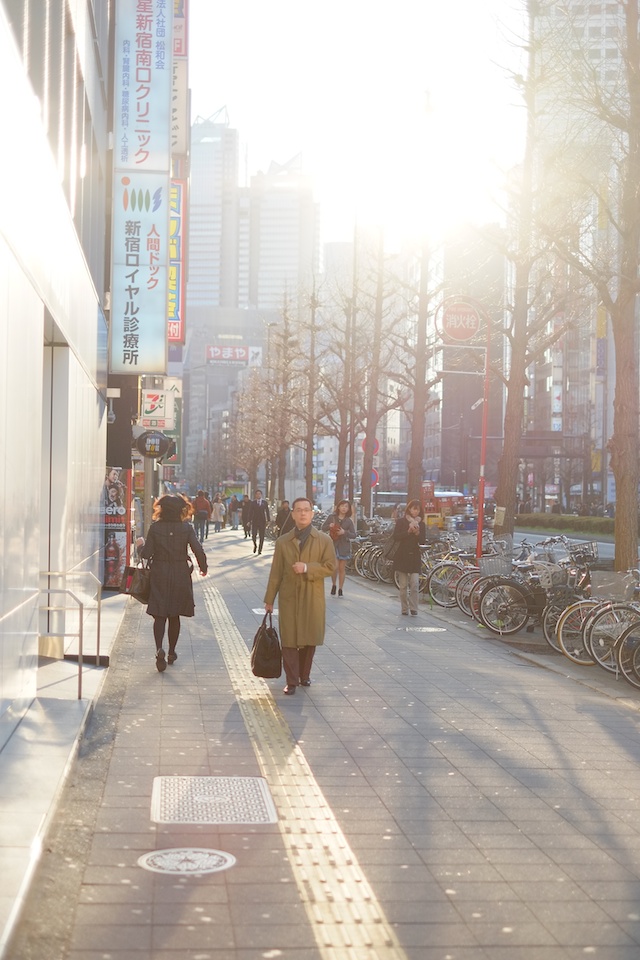
And walking around Shinjuku at sunset. Going through these photos makes me want to go back sooo bad!

shinjuku

If anyone wants specific info about the Airbnb host we used or how to get around, don’t hesitate to comment or send me an email. To those of you planning trips there, take me with you!

cancel reply

Sauce Series in Practice – Homemade Mayo in 30 Seconds

In the caesar dressing recipe, we covered a food-processor method that works really well for making creamy, emulsified sauces. That same method works perfectly for making mayo, but what I’m about to introduce you to is a bit more fun.

sauce series - mayo

Mayonnaise can be made very quickly with a hand blender.  This means no standing over the food processor pouring oil, and it means you get to watch the magic happen. This is some really cool-looking chemistry. Because oil is lighter than egg yolk, lemon juice, and water, it floats to the top. The blades of the hand blender will emulsify the yolk with the lemon and water, and the holes on the side of the hand blender will let the oil in just slowly enough to make mayo happen.

sauce series - mayo

For this to work, you have to let the oil and liquid settle after you get your stick blender to the bottom of the cup. You MUST NOT start your blender until it’s nestled at the bottom of the cup and the oil has had time to re-separate. You may end up needing to tilt the blender very slightly to allow more oil in after you begin, but be super, super careful, because over-tilting will introduce too much oil too quickly and ruin the mayo.

sauce series - mayo

Lastly and MOST importantly, you have to find the right sized vessel. I was able to pull it off with a one-cup pyrex, but not before ruining my first two batches. The size of the cup you use is critical – it should be just big enough to allow your hand blender to touch the very bottom and it will ideally be straight-sided. I’m convinced my over-tilting along with the sharp flare of the pyrex I used are the culprits of my failures. If your hand blender came with a tall mixing cup, that’s the one you should use.

sauce series - mayo

If you have all your ducks in a row cup-wise and blender-wise, you’re ready to go. Just give your oil time to settle after introducing the blender and before you start blending, and tilt the blender very slightly if you need to introduce more oil. Maybe also make sure your oil and eggs are well-stocked. There may be a bit of a learning curve as you figure out your blender/cup dynamic. But once you get it, it’s like magic. Tasty magic.

sauce series - mayo

See the recipe I use, with a really helpful video at one of my favorite websites, Serious Eats. Theirs is a little more honestly titled “2-minute mayo” but I was mostly referring to the blendy witchcraft part with my title, which really is 30 seconds, if not less. Plus mine sounds better.

If you want to be a little safer or you don’t have a hand blender, make your mayo in the food processor by combining the yolk, lemon juice, water, and salt first with a few pulses, then stream in the oil very slowly with the machine running. It should take you almost two minutes to add it all, but when you finish you’ll have mayo that looks exactly like the above shot. And now you’re a kitchen sauce wizard so congrats.

  1. I had a mayonesa con limon by accident once and now regular mayo is bland to me. Would I just add lime juice to above recipe? You may have to experiment for me, please! Had no idea you could just whip up your own mayo.

    Amy — July 15, 2014
    1. Yes you could totally use lime juice instead of lemon in the above recipe, and add more if you want. I would probably just start by swapping out the lemon for lime without changing the amount and then add more lime at the end if it was needed. And how did you accidentally have mayo con limon? Is it sold near the boring, regular mayo? It sounds pretty delicious.

      courtney — July 15, 2014
    2. reply
cancel reply

Sauce Series in Practice – Caesar Dressing from Scratch

Caesar salad is a bit of a naughty salad. Romaine lettuce, while tasty, has almost no nutritional value, and apart from that we’re basically chowing on bread, cheese, and mayonnaise. If caesar salad isn’t going to be good for me, it needs to be as delicious as possible. Luckily, I’ve perfected the art of garlicky, cheesy, peppery, tastebud-punching caesar dressing.

sauce series - caesar dressing

Caesar dressing was the first emulsified sauce I made in a food processor, and it was a bit life-changing. Watching a bunch of flavorings mixed with egg yolk and a lot of oil slowly turn from a splattery liquid to a creamy, rich dressing was like discovering a hidden (tiny) super power. None of these things are inherently creamy, but I push this button and they become so.

sauce series - caesar dressing

The secret is in the yolk. Really it’s not secret, just science, but the fact that I don’t understand it makes it sort of like a mysterious secret.

sauce series - caesar dressing

And here’s the dressing after adding the oil:

sauce series - caesar dressing

This dressing is strong enough that you don’t need a ton, but let’s be honest, you will probably use a ton.

sauce series - caesar dressing

sauce series - caesar dressing

Homemade Caesar Dressing

Ingredients:
2-4 anchovies (or 1-1 1/2 tsp anchovy paste, use just a tiny bit if you’re scared but you really won’t taste it)
1 medium clove garlic
1 tablespoon dijon mustard
2 tablespoons champagne or white wine vinegar
1 egg yolk
1/2 tsp worcestershire sauce
1/2 cup neutral flavored oil (I like organic sunflower oil)
1 cup parmesan grated with a microplane (less if using a larger grater)
salt and pepper to taste

Method:
1. Add the first six ingredients to the bowl of a food processor and pulse until liquified and well combined.
2. Scrape down the sides of the food processor bowl and re-fit the lid (make sure you use a lid with some kind of bowl-access hole). With the processor running, stream in the oil very slowly. It should take you over a minute to add all of the oil.
3. Scrape down the sides of the bowl again. Your dressing should be quite thick at this point. Add your parmesan cheese and pulse a few times to combine. Taste and add salt if necessary and lots of black pepper.
4. Serve in a salad with chopped romaine lettuce, homemade croutons (get a french loaf, cut or tear it to pieces, coat with olive oil, toss with salt, bake at 375 until golden brown) and extra parmesan and pepper.

cancel reply

Sauce Series Part 4 – Emulsions

We’re in the final phase of the sauce series – huzzah! I’ve been wanting to do this series forever and I’m glad I’ll be able to move the freak on and use it as a reference point in future recipes. This sauce topic can be ironically dry, it’s just so important, it needs to be covered. Brass tacks and whatnot.

Our final sauce-making method is emulsion. The technical definition of an emulsion is a fine dispersion of two liquids which aren’t soluble – which in the culinary world means oil and something watery. So, technically, a plain vinaigrette with just oil, vinegar, salt, and pepper is an emulsion while it’s well shaken, it’s just not a very stable one, since it likes to separate as soon as it’s still.

sauce series - emulsions

Stabilizing an emulsion can be done with anything viscous – honey or mustard in a vinaigrette, peanut butter in your thai peanut sauce, or even ketchup in barbecue sauce – but all of these will settle or break over time (to some extent) and require manual re-emulsification. These emulsifications are easy to make and difficult to bungle, but they are just the tip of the iceberg.

sauce series - emulsions

The most transformative and temperamental emulsions are made with egg yolks and a lot of fat. The French mother sauce we’re dancing around is hollandaise, but the most ubiquitous emulsion in our pantries is good old mayo.

sauce series - emulsions

Handmade hollandaise and mayonnaise are famously difficult to make. The amount of whisking required to aerate the yolks enough to introduce fat, and the stamina required to continue whisking furiously while pouring the merest stream of oil into the yolk – it’s basically heroic. And add too much fat, or simply add it too quickly, and the sauce becomes a broken, sloshy mess. Luckily, somewhere around the 1970’s the food processor was invented. If you have one, you will be able to make mayo on your very first try without any pre-emptive muscle conditioning, and I’ll show you how.

sauce series - emulsions

I’m not saying there isn’t any value in making mayonnaise with a trusty analog whisk. I’m sure it’s very educational, and someday my curiosity might compel me to give it a try. But if you aren’t completely entranced by the chemistry of it, there isn’t really a need. Plus, I love food-processor technology. But not as much as mayonnaise. But I still love technology. Always and forever.

Up next, to illustrate (with technology): caesar dressing from scratch and homemade mayo in 30 seconds.

cancel reply