Maryland Style Hot and Spicy Crab Dip

Maryland Style Hot and Spicy Crab Dip

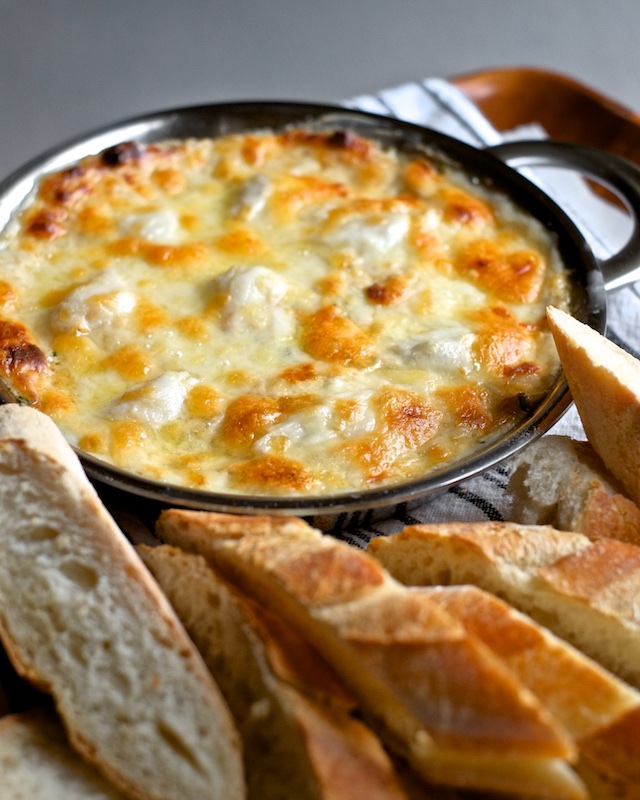
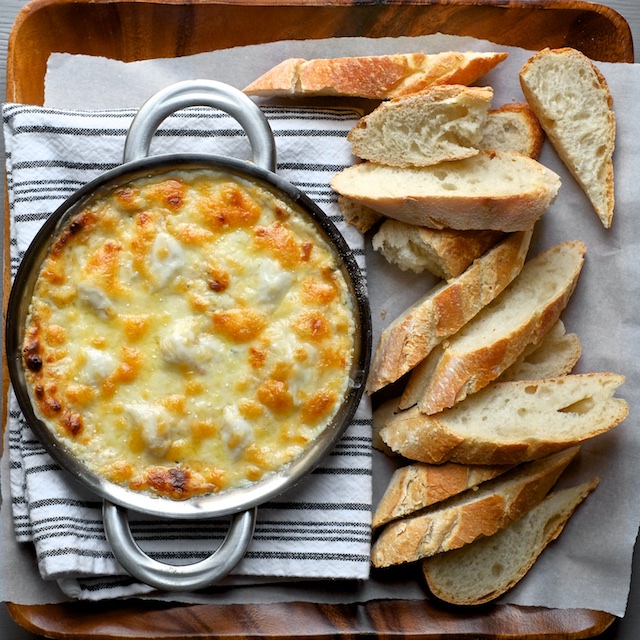
There’s one more thing you need to eat before you punish yourself with kale salad for the next month. Ok…so probably more like the next week and a half (be honest now). But still, you neeeed a cheesy, decadent flavor-bomb before the clock strikes twelve on the new year. You deserve it. A last hurrah. You need crab dip.
Maryland Style Hot and Spicy Crab Dip

But before we get to the dip, I need you to pat me on the back for even blogging today. My house is still overrun with fourteen of the previous eighteen (most adorable) relatives, which is great, but they brought with them a plague. I spent the last day and a half chilled to the bone while sweating out all my “toxins” or whatever and all I want to do is sleep. Today a doc-in-box confirmed that I do indeed have strep. My will to take part in anything but a netflix marathon is squashed, and I’ve completely excused myself from the charade of making resolutions this year. But here I am blogging even though I’m legitimately ill! I just could not wait until after new years to post this perfectly indulgent, celebratory dip. You need this and you need it now. I’m doing this for YOU.
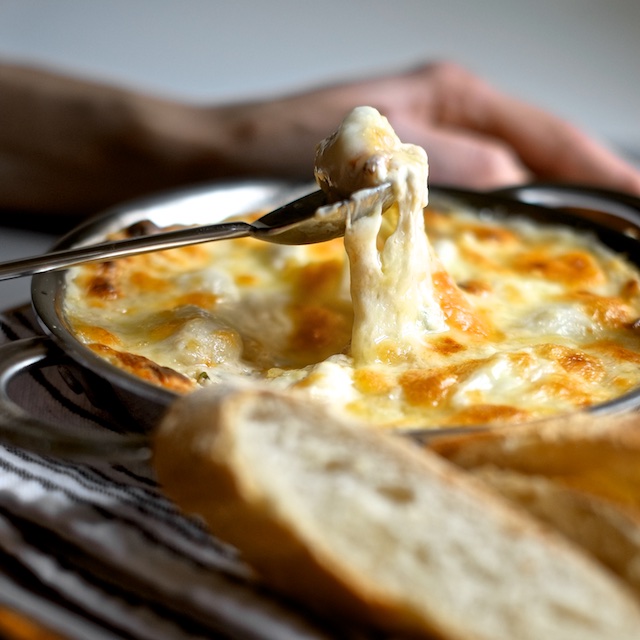
Maryland Style Hot and Spicy Crab Dip

I don’t care if you already have your new year’s eve menu planned. Make room. And trust me on this, because I’m a Marylander, and if there’s anything we do right (culinarily speaking) it’s crab.
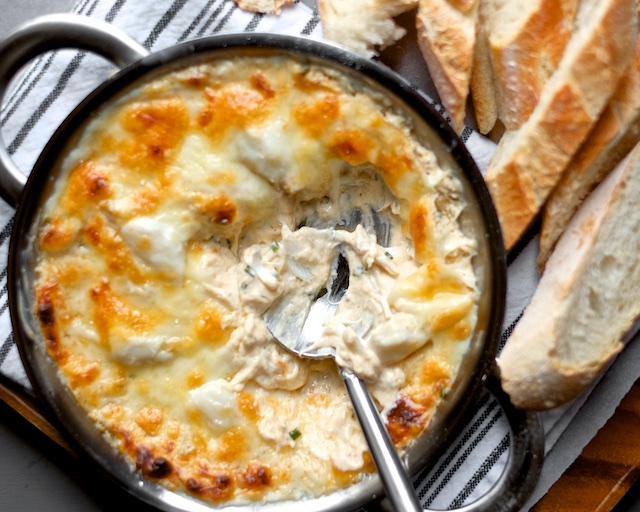
Maryland Style Hot and Spicy Crab Dip

Crab ain’t cheap, which is why I like to use it in dip – everyone shares it, and all that cheese makes it so heart-stoppingly rich that you absolutely need help to finish it. As far as crab goes, this is really pretty thrifty. Thrifty crab-eating could even be a worthy resolution, for those (like me) who lack scruples. Baby steps!
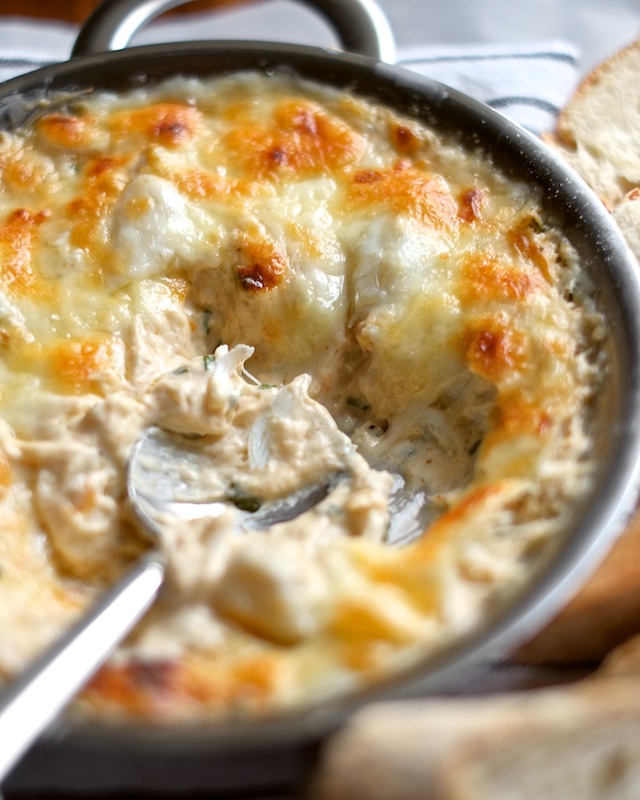
Maryland Style Hot and Spicy Crab Dip

Maryland Style Hot and Spicy Crab Dip

Ingredients:
-1 block cream cheese (8 oz)
-1/4 cup mayo
-1/4 cup grated parmesan cheese (plus a little for topping)
-1/2 cup grated white cheddar (plus a little for topping)
-1 clove garlic, grated
-1 tsp. dry mustard
-1 Tbsp. worcestershire sauce
-2 tsp. Old Bay seasoning (I recommend low sodium O.B. and using the full 2 tsp, but if you only have regular start with 1 tsp and add more to taste)
-1/4 tsp cayenne pepper (more if you like a bigger kick)
-2 Tbsp chives, chopped
-1 cup lump crab meat
-salt and black pepper, to taste

Method:

1. Soften cream cheese to room temperature (use microwave if you need to, as long as the cheese is unwrapped and in a microwave safe bowl.

2. Stir mayo, parmesan cheese, cheddar cheese, garlic, mustard, worcestershire, Old Bay, cayenne, and chives into the cream cheese. Taste before adding any additional salt or pepper.

3. Gently fold crab meat into cheese mixture. Spoon dip into a baking dish, smooth out the top and cover with more cheddar and parmesan.

4. Bake at 350F for 20-25 minutes or until heated through and the cheese on top is browned. Serve with warm baguette slices, crackers, or crostini.
  1. My favorite crab is this. Perfect.

    Carrie — December 31, 2014
    1. Mine too probably - though crab cakes are pretty great too.

      courtney — January 6, 2015
    2. reply
  2. Um, yes please! I'll take the whole bowl :) Hope you feel better soon -- have a happy (and healthy!) New Year!

    April @ Girl Gone Gourmet — December 31, 2014
    1. Thanks April! If you get the chance to make it let me know what you think!

      courtney — January 6, 2015
    2. reply
  3. you are such a blog warrior - posting while sick! Feel better pretty!

    Caitlin — December 31, 2014
    1. Ha! I'm feigning discipline. Fake it 'til you make it right?

      courtney — January 6, 2015
    2. reply
  4. This crab dip just looks so incredibly addictive and delicious - loving all of it's cheesiness especially. Wish I had a bowl to devour right now!

    Thalia @ butter and brioche — January 7, 2015
    1. Thanks Thalia! It's rich stuff, but if I'm honest I could probably polish off a batch without much help. Cheeeeeese.

      courtney — January 10, 2015
    2. reply
  5. YUM! Nothing better than a hot, melt-y dip. It doesn't get much better than that :).

    Annie @ The Garlic Diaries — January 7, 2015
    1. Right, Annie? Hard to beat cheese, especially when it's spiked with Old Bay and crab!

      courtney — January 10, 2015
    2. reply
  6. This is basically my go-to recipe, but I add artichoke hearts!

    Nicole — October 9, 2015
    1. Artichoke hearts are a brilliant addition!

      courtney — December 6, 2015
    2. reply
  7. How do you buy the crab meat? In the cans? Fresh? Legs and you get it out yourself? Thanks! Looks amazing!!!! Will use it for my ladies annual Christmas party!

    Margi — December 5, 2015
    1. Hi Margi! My local supermarket sells little containers of hand picked lump crab meat in the seafood section, which I now realize is probably an exclusive perk of living in Maryland. I'm way too lazy to pick crab meat for dip. Back when I lived in Utah I was able to find little plastic tubs of Philips brand lump crab meat at Costco, which worked really well. If you don't see any at your local supermarket I'd try Costco or Sam's Club or whatever club type store you have near you. It's pricey stuff, so if you don't see yourself using up the whole tub, You can make a double batch of dip and freeze some for later (defrost overnight in the fridge and heat like the recipe says). I hope that is helpful!

      courtney — December 6, 2015
    2. reply
  8. How big is your baking dish? I have a lot of company coming for Christmas Eve. I am wondering if I will need to double this recipe! It looks delicious and I am drooling over my computer!

    Betsy — December 10, 2015
    1. Hi Betsy! I'd definitely recommend doubling the recipe for a big crowd. My dish here was mini (about 5 inches round) and it held a half batch. A whole batch would probably serve 6-8 as a hearty appetizer. You'll want more baguettes or crackers to go with all that dip too. Hope that helps!

      courtney — December 15, 2015
    2. reply
  9. This is now a holiday staple for all family/friend parties! Thanks for the perfect dip. My family and friends thank you, too. Pinterest brought me to you :) Merry Christmas and Happy New Year!

    Michaela — December 19, 2015
    1. Michaela, thanks for the comment! I love hearing my recipes work for people. I'm making a few batches for family and friends this season too! Cheers, Merry Christmas, and Happy New Year to you!

      courtney — December 19, 2015
    2. reply
  10. […] image via Sweet Salty Tart […]

    10 Spicy Crab Recipes That Every Seafood Lover Will Enjoy — September 19, 2016
    1. reply
cancel reply

Ultimate Party Mix

Ultimate Party Mix

I’d planned to post this on the 19th, but clearly that day sailed on past me without acknowledgement. I was even going to have a little Christmas post with Murdock covered in bows, but I couldn’t make it happen.

It pains me to remind you, but Cody and I are living with my grandparents right now (love them, don’t love being fake adults). My grandparents are hosting Christmas and New Years this year for my entire family (from out of town), plus their spouses and kids. We are stuffing 18 people into 6 bedrooms and it’s absolutely insane. I mean wonderful. Honestly, I love it, but I’ve been helping my grandma clean and coordinate and figure out how to feed 18 people for a week and a half and I underestimated the magnitude of the project. I also overestimated my ability to blog while I have babies to snuggle and beasts to roast and an infinite pile of dishes that need doing…counters that need wiping… Surely you understand.

Ultimate Party Mix

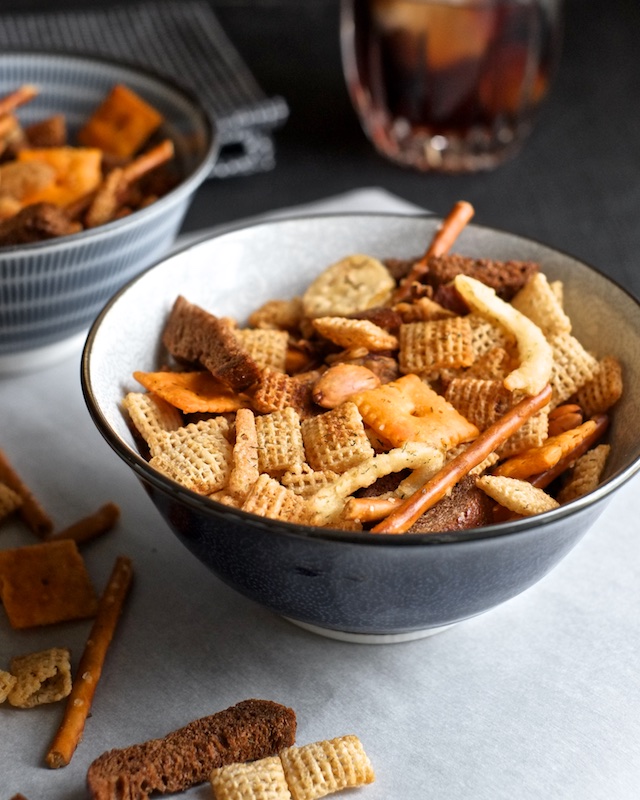
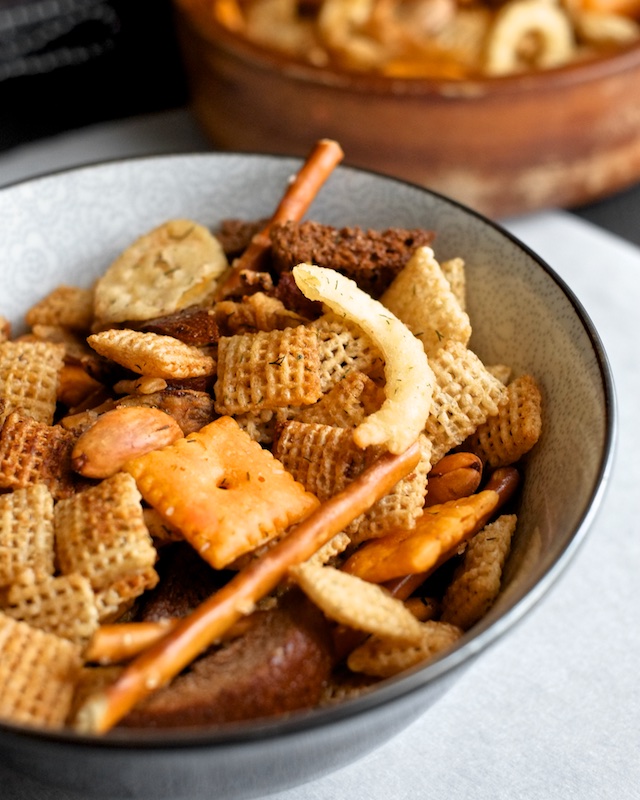
Before the motley crew flew in from their respective corners of the country I had the good sense to make a gigantic batch of party mix, and it has done us well. It’s a perfect, substantial snack for those stretches of time between our breakfasts-at-noon and dinners, whenever they end up being. My version is punchy, with mustard and cayenne and a bag of french-fried onions because they’re awesome. Why should green beans have all the fun anyway?

Ultimate Party Mix

Ultimate Party Mix

Ingredients:

-1 stick butter
-1/4 cup worcestershire sauce
-1 tsp dijon mustard
-1 tsp dry dill
-1 1/2 tsp seasoning salt (like lawry’s)
-1 clove garlic
-1/4 tsp cayenne
-5-6 cups rice chex
-4 cups cheez its and pretzels (together, NOT individually – in your preferred ratio)
-1/2 to 1 cup roasted almonds (I suggest naked)
-1 bag (or can) french fried onions
-3 cups pumpernickel bread, cut into cubes or sticks (or you can substitute bagel chips)

Method:

1. In a small sauce pan over medium heat, melt your stick of butter and add the worcestershire, mustard, dill, seasoning salt, garlic, and cayenne. Whisk together to combine and remove the pan from the heat.

2. In a really big bowl, stir together chex, cheez its, pretzels, almonds, fried onions, and pumpernickel bread cubes. You don’t need to worry about the bread being soft, it will dry out and become crunchy when the mix is cooked.

3. Drizzle the butter/worcestershire mixture over the mix and stir it well to combine and coat the pieces. Taste the mix for salt and add a little if it’s needed. The mix will taste vinegary before it’s cooked, but don’t worry because it will mellow out in the oven (or microwave).

4. You can spread the mix out on a sheet pan and bake it in a 300F oven for an hour or so (stirring from time to time until the mix is totally dry), OR if you use a glass bowl, you can put it in the microwave for two minutes at a time, three to four times (stirring well between each zap) until the mix is dry, then spread it out on a sheet of parchment to cool.

Eat it by the fistful and store leftovers in a plastic bag or covered bowl to keep it fresh. OMNOMNOM

  1. Yay, party mix! Love the idea of french fried onions :)

    April @ Girl Gone Gourmet — December 28, 2014
    1. Thank you April! I have to say I was pretty pleased with myself for coming up with an excuse to eat them that didn't involve vegetables ;)

      courtney — December 31, 2014
    2. reply
cancel reply

My Family's Famous Homemade Hot Fudge Sauce

My Family's Famous Homemade Hot Fudge Sauce

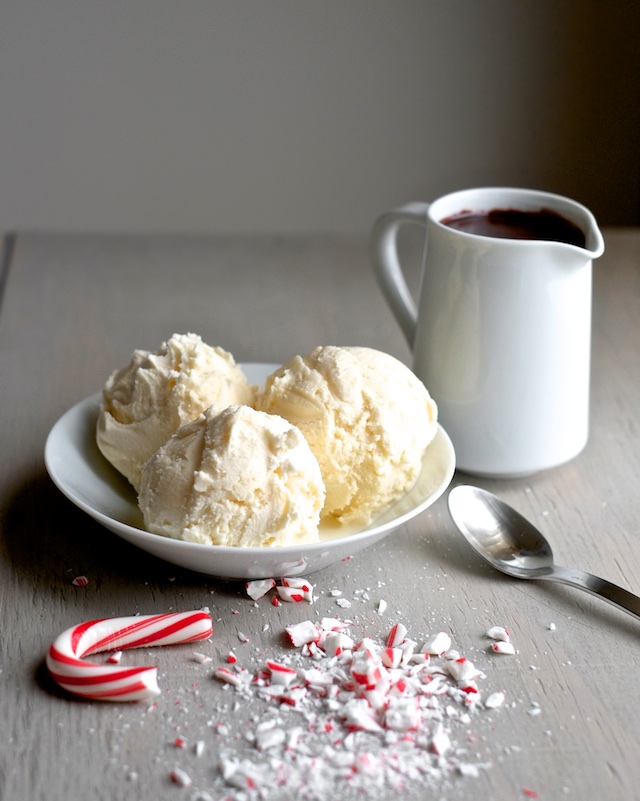
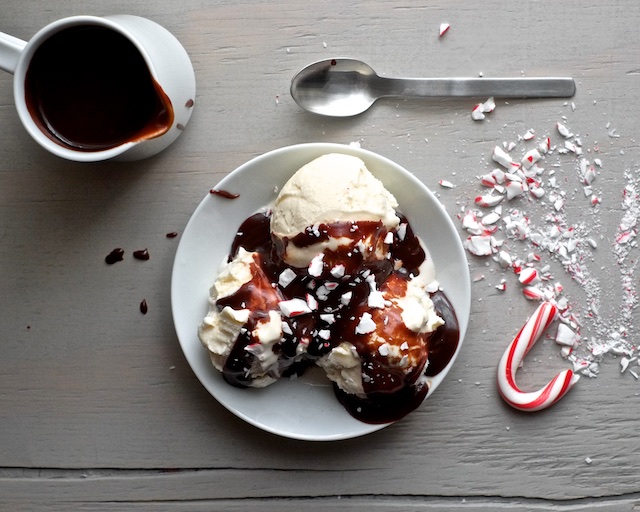
This recipe, along with my family’s beef stew and black pepper pumpkin pie are pretty much the trifecta of foods we always get asked to bring to parties and potlucks. This sauce in particular is universally loved. The go-to dessert at my parent’s house when we had company over was always some kind of brownie (didn’t matter how it was made) generic vanilla ice cream (quality not important) and this sauce – which is capable of redeeming even the most mediocre of sundaes. Powerful stuff.

My Family's Famous Homemade Hot Fudge Sauce

Making the sauce is easy, too easy in fact, and it fills the house with the lovely smell of serious chocolate. You probably even have all the ingredients you need in your pantry right now…

My Family's Famous Homemade Hot Fudge Sauce

I don’t think there’s much else to say.

My Family's Famous Homemade Hot Fudge Sauce

My Family's Famous Homemade Hot Fudge Sauce

Crushed candy cane is festive, but I can take it or leave it. Cody ate the bowl in the photo, and asked for a refill of sauce half way through – no such thing as too much, or enough for that matter.

My Family's Famous Homemade Hot Fudge Sauce

My Family’s Famous Homemade Hot Fudge Sauce

Ingredients:
-1 cup granulated sugar
-1/2 cup cocoa powder
-1 1/2 cups heavy cream (the original recipe calls for a can of evaporated milk, which also works, I just prefer cream)
-1/2 tsp salt
-1 tsp vanilla (my dad prefers Mexican vanilla, and I agree)

Method:
1. In a 2-3 quart saucepan over medium heat, combine sugar, cocoa, and cream. Bring mixture to a low boil and cook, stirring constantly, for about 2-3 minutes. If you use evaporated milk instead of fresh cream, you will need to cook it another few minutes to get a thick consistency.
2. Add salt and vanilla and combine, boiling a few seconds more to allow the alcohol to cook out of the vanilla.
3. Remove sauce from heat and allow to cool slightly before serving.

This recipe stores well in the fridge, but will need to be re-heated and stirred either in the microwave or on the stovetop. It’s far too thick in it’s cold state to pour straight on a sundae. Personally, I think that’s a good thing.

  1. Looks yummy...dangerously yummy! Miranda lets make this!

    Lisa — December 17, 2014
    1. Make it! And tell me what you think :) It's sa-weeet but pretty much undeniably tasty.

      courtney — December 18, 2014
    2. reply
  2. Um, yes please - I'd like a big serving of that sauce with some ice cream on the side!

    April @ Girl Gone Gourmet — December 17, 2014
    1. That's pretty much how it always ends up when I have it :)

      courtney — December 18, 2014
    2. reply
  3. Wow! I need to try this!

    Bobbi — December 18, 2014
    1. Thanks Bobbi! I hope you like it :)

      courtney — December 18, 2014
    2. reply
  4. helloooooo i must try this!!!! also, if you need an escape from your twelve thousand guests you can always come visit me in my little quiet house :)

    CourtneyH — December 30, 2014
    1. Yes you must! And that is a tempting offer, but my lovely relations gave me strep, so I'm determined to stay in bed for the entire near future. I'll text you when I'm myself again!

      courtney — December 31, 2014
    2. reply
  5. […] via […]

    color story: cocoa & creme | The Beautiful Indoors — March 10, 2016
    1. This is SO good! It is easy and delicious. I will totally make this again!!

      Shelley Iten — April 24, 2016
    2. reply
cancel reply

Giveaway: Art Typography Prints by Gilded Panda (CLOSED)

Gilded Panda - Blessed are the Curious

It’s my first giveaway! And it’s good!

Gilded Panda is a cute little art typography print shop from SLC and I like them pretty hard. They approached me last week about doing a giveaway and here it is! An art print giveaway on a food blog is probably an odd match to some of you, but I’m doing it for two reasons: First, Gilded Panda’s stuff is pretty and inspirational without being cheesy – which is so rare. That quote above is completely on point to me, because curiosity is vital for a well-lived life, and especially so for cooks who need to be experiencing new tastes and asking “why?” as often as possible. The second reason I decided to do this giveaway is: cooks are people too! – people with gift lists to fill and walls to decorate and hopefully an appreciation for aspirational aesthetics. Ya’ll like free stuff right?

So from now through Friday 12/19/14 I’ll be collecting entries to win a free 8×10 print of your choice from Gilded Panda! PLUS readers will get a 20% discount on their first purchase with the code: SWEETSALTYTART

To enter, leave a comment on this post naming your favorite Gilded Panda print before midnight on the 19th. Don’t forget to leave your email address with your comment so I can contact you to deliver your winnings! (Don’t worry, your email address won’t be published or used for anything.) I’ll announce a winner on Saturday and have the print shipped to your door!

So many exclamations in this post! I’m excited! Bonne chance my dears!

UPDATE: We have a winner!

giveaway winner

Ashlee was the 12th entry, so congrats! I’ll be in touch to get that print sent to you!

Thanks to everyone for participating!

  1. Agreed - my favorite is the Blessed Adventures one you posted above. It's so pretty!

    Caitlin — December 15, 2014
    1. reply
  2. I love this giveaway! I love the Blessed Adventures print but in the wide format. <3 <3 <3

    Caroline — December 15, 2014
    1. reply
  3. I've actually been eyeing Gilded Panda's amazing prints for my room! My favourite is the one with the phrase, "stay close to what keeps you feeling alive" in gold!

    Victoria — December 15, 2014
    1. reply
  4. Don't Quit Your Day Dream in blue clouds...perfection.

    Carrie — December 15, 2014
    1. reply
  5. My favorite is also the one posted above! They're all cute though :]

    Alyssa — December 15, 2014
    1. reply
  6. What a great print!

    Shelby — December 15, 2014
    1. reply
  7. The Blessed Adventures print is my favourite too! But they're all pretty cool!

    Jay — December 15, 2014
    1. reply
  8. I have been dreaming up a little corner in my bedroom for myself whenever I finally get back to Maryland. It will be my little writing corner and I am putting up quotes and pictures that inspire me. I would love that gold print "stay close to what keeps you feeling alive". It will be a great reminder. I also love the green collect moments not things. What a great shop! Thanks for introducing me!

    Tiffany Rueckert — December 15, 2014
    1. reply
  9. "Collect Moments, Not Things" is totally my motto! I'd love that one!

    Brandi Bryner — December 15, 2014
    1. reply
  10. I love "collect moments, not things"! It would be great in my kids bedrooms to remind them when they get a case of "the gimmies."

    Jen Kaufmann — December 15, 2014
    1. reply
  11. Fantastic print. My favorite is the one above. Very timely in more ways than one! Life is an adventure and some times you just have to hold on.....tight!

    Lisa — December 15, 2014
    1. reply
  12. I love the "be bountiful, blissful, bold and beautiful" one!! So many amazing prints.

    Ashlee — December 15, 2014
    1. reply
  13. I love the Collect Moments not Things one. Yay for giveaways!

    Caitlin — December 15, 2014
    1. reply
  14. i do LOVE the one you posted here. cute designs!! i'm definitely sharing this. …or wait, maybe that would decrease my chances???

    Miranda — December 16, 2014
    1. reply
  15. I like the one you posted and the "Collect Moments, Not Things" You're my favorite person.

    Tricia — December 16, 2014
    1. reply
  16. So excited! I like the Be print. :)

    Lea — December 17, 2014
    1. reply
  17. I reeally like the "FEELING ALIVE" print in Gilded. The one you posted is great too!

    Brittany at I Love Vegan — December 19, 2014
    1. reply
  18. My favorite is the Be Beautiful print! Thanks for the contest!

    Jenny @ Honey and Birch — December 19, 2014
    1. reply
  19. My favorite print is the Be Beautiful print! Now just to decide if I like it more in gold or silver...hmmm....I think I would have to go with gold!

    Sydney A — December 20, 2014
    1. reply

One-Pot Gluten Free Mac and Cheese

One-Pot Gluten Free Mac and Cheese

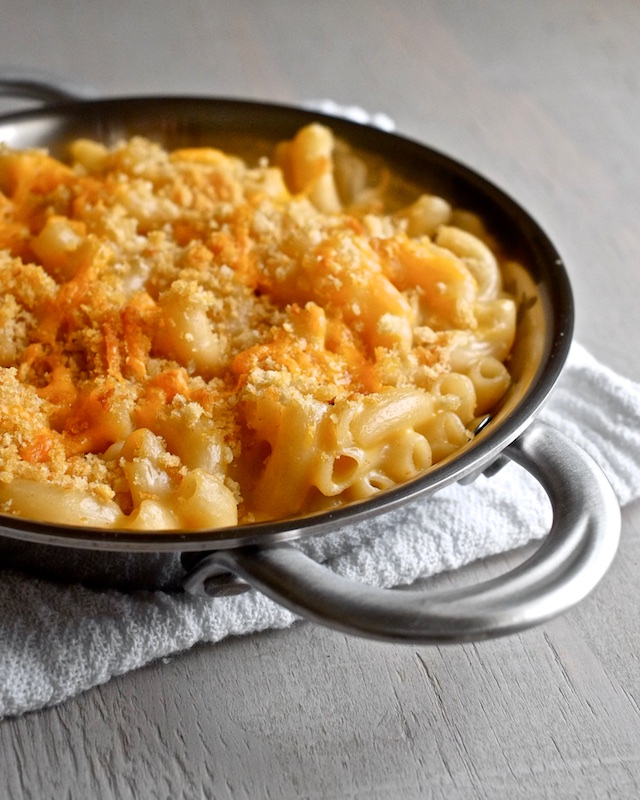
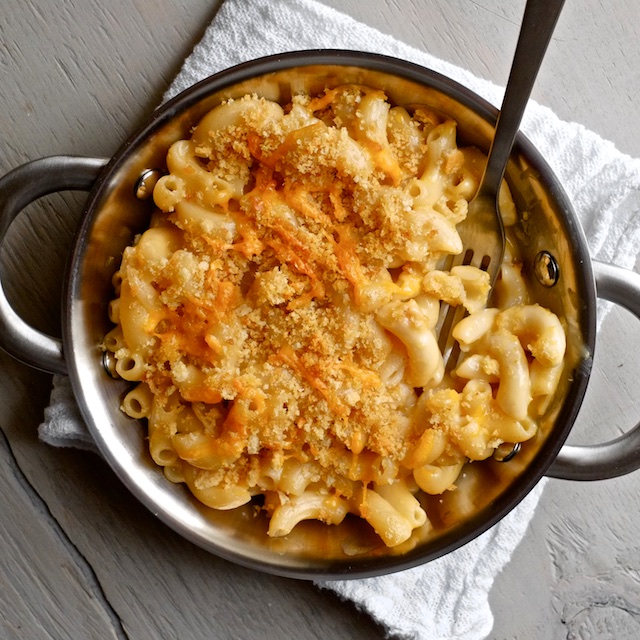
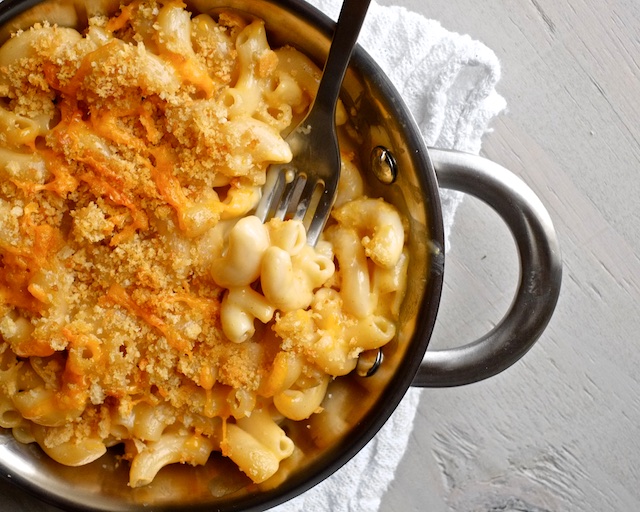
I’ve had a few questions on my cacio e pepe post about whether or not the one-pot principle can be applied to gluten free pasta – questions I could not answer because I’d never touched gluten free anything before. So I tried it, and I learned a few things.

Let me just start by saying that I don’t really understand the gluten-free trend. I get that some people are legitimately allergic to wheat, and I get that refined starches are not so great health-wise, but I don’t get eliminating gluten specifically as a dieting tactic. Doritos are gluten free! Am I missing something here?

So I’m going into this with a certain bias, but for the benefit of those with celiac, I think this is worth the trouble. I chose a bag of organic brown rice pasta because risotto is made from rice, so I know rice starch is good and starchy, which is important for one-pot applications. For whatever reason, the gluten free powers that be have decided that their pasta will be sold in twelve ounce bags instead of pound bags, which is weird, but eh.

One-Pot Gluten Free Mac and Cheese

Long story short, you can totally one-pot brown rice pasta. You will definitely need more liquid than you would for wheat pasta though (one-and-a-half times as much to be exact). And I have to say, brown rice pasta tastes super weird to me – like it has this tang to it…and when you one-pot a pasta you’re making sauce out of the starch, so none of that tang is going to get washed away the way it might if you drained the pasta and made a separate cheese sauce.

But if you’re gluten free, you might struggle to make a traditional roux-based cheese sauce anyway. And once you add some sharp cheddar to this pot it tastes pretty darn decent. I also think this would work just as well with a thin brown rice noodle in my one-pot cacio e pepe, as long as you use the brown rice pasta-to-water ratio instead of the wheat pasta-to-water ratio.

One-Pot Gluten Free Mac and Cheese

One-Pot Gluten Free Mac and Cheese

Ingredients:
-one 12-oz bag of brown rice pasta
-4 1/2 cups water (or chicken or veggie broth)
-2-3 cups grated sharp cheddar
-pinch of cayenne
-1/2 tsp dry mustard (or regular mustard if you don’t have dry – mustard and cheddar just go)
-salt to taste
-(optional) gluten-free bread crumbs, crushed chips, or almond meal

Method:
1. Heat pasta and water together with a pinch of salt (leave the salt out if you are using broth). In a large pot over medium heat and simmer until: the water is mostly absorbed, the liquid that’s left is thickened, and the pasta is cooked (I’m not so sure brown rice pasta is capable of “al dente”). If the pasta isn’t fully cooked at this point, add a bit of water. If there is too much starchy sauce, scoop some out with a ladle or spoon.

2. Remove pasta pot from heat, add grated cheddar (optional: save some for topping) and stir until the cheese is melted thoroughly. Add cayenne and mustard and stir to combine. Taste the pasta for seasoning and add salt if necessary. Black or white pepper is also allowed.

3. This makes a good stove-top mac if you want to stop right here, but if you like, you can transfer the macaroni and cheese to a baking dish and cover with crunchies (gluten free bread crumbs, crushed chips, almond meal, etc.) and grated cheese. Then broil until the crumbs are nicely browned and the cheese is melted.

PS:
If you find yourself with a full pound bag of gluten free pasta, use 6 cups of water or broth instead of 4 1/2.

**If you are not gluten free, you can make this with one pound of regular pasta and one quart of water or broth – super easy one-pot mac!


  1. Found out I'm allergic to wheat so this is right up my alley! Gonna give it a try. Thanks for the post :)

    Lisa — December 11, 2014
    1. Lisa, bummer about the wheat allergy, but there are lots of alternatives out there! Let me know what you think of the flavor of brown rice pasta - it might take some getting used to :)

      courtney — December 11, 2014
    2. reply
  2. […] One Pot Gluten Free Mac and Cheese by Sweet Salty Tart […]

    15 Best One Pot Dishes of 2014 - Jessica In The Kitchen — December 13, 2014
    1. reply
  3. I have made a wheatless sauce out of sour cream and cheese (swiss) and I know that will do the trick, but to get it to congeal or stick together you might have to add an egg perhaps?

    Amy — January 20, 2015
    1. reply
  4. BTW... would you please post the mac-n-cheese recipe with the onions!?

    Amy — January 20, 2015
    1. reply
cancel reply

Edible Gifting: Bacon Jam

Edible Gift: Bacon Jam

There are categories of gift giving…tiers if you will. You have the big ones: kids, parents, significant others; then the “let’s set a dollar limit” ones: brothers and sisters, friends; and the other ones: neighbors, mail carriers, co-workers. The latter group is a common source of frustration during the holidays – what can you get someone that will show them you are glad they’re in your life, without breaking the bank OR having it end up in their garbage come January. My favorite answer is usually food.

Edible Gift: Bacon Jam

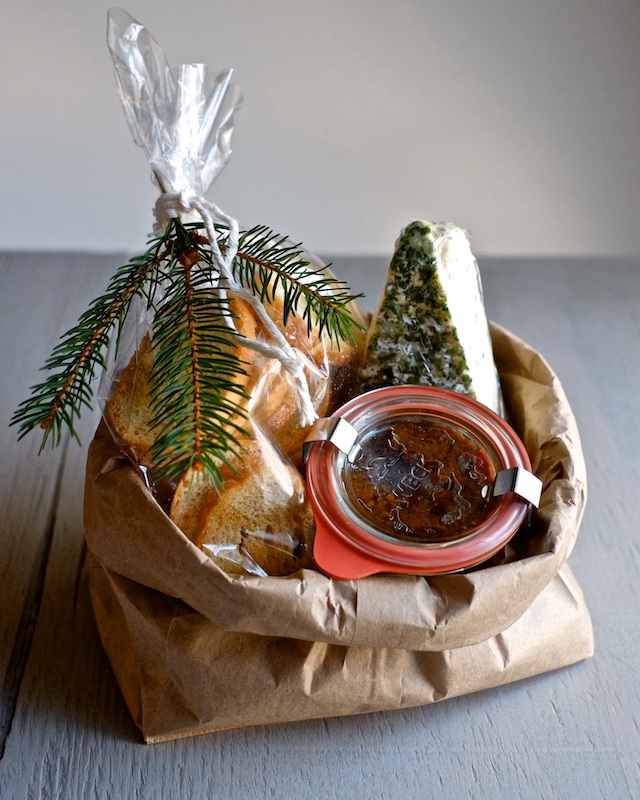
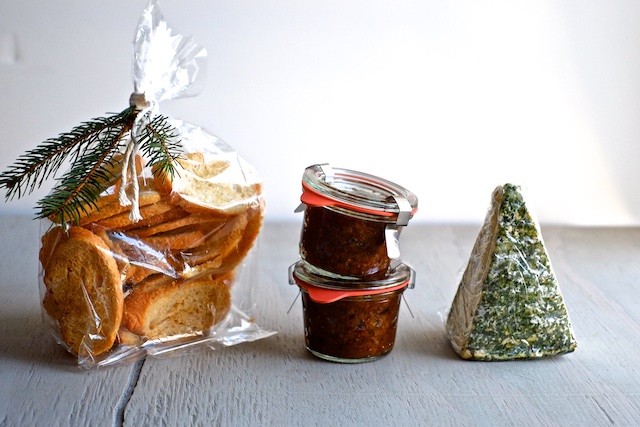
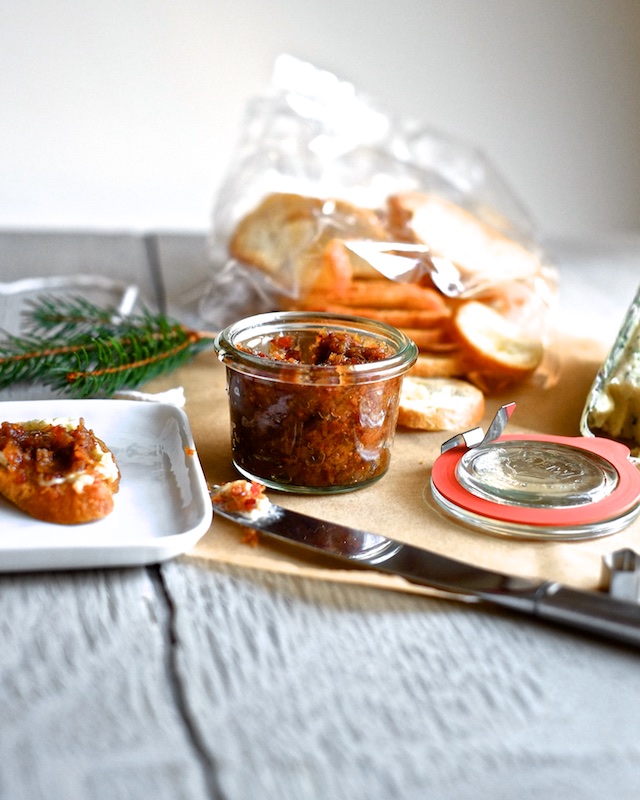
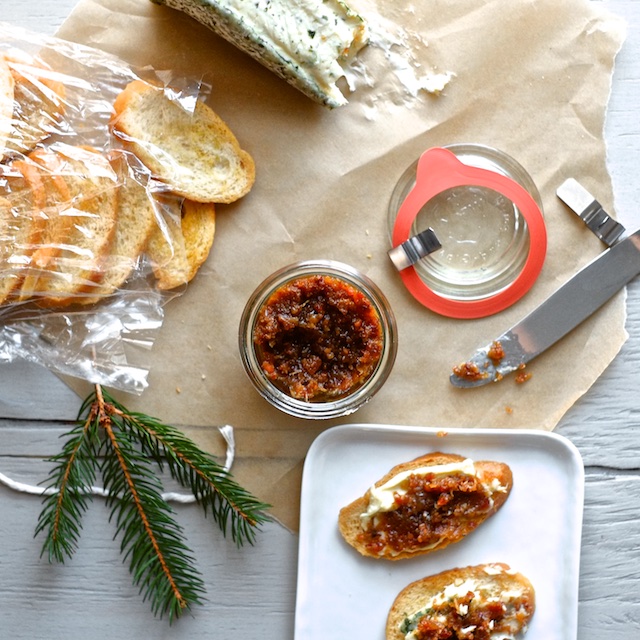
Food gifts don’t take up too much space, they are consumable, biodegradable (mostly), they are fairly cheap to put together, and they are personal enough to say “I really am thankful you’re around”. Cookies and homemade candies are classic (I’ll whip out the millionaire shortbread on a few friends this time of year) but savory snacks are really my favorite, and they tend to get overlooked.  That’s why this year I’m making bacon jam – partnered with a wedge of herby cheese and a bag of homemade crostini, it’s a perfect little present.

Edible Gift: Bacon Jam

I’m not much into wrapping or decorating gifts, so string, a branch from my neighbor’s tree, and a paper bag in lieu of a proper basket will have to do. I kind of like it – I’ll call it rustic (code for slacker).

Edible Gift: Bacon Jam

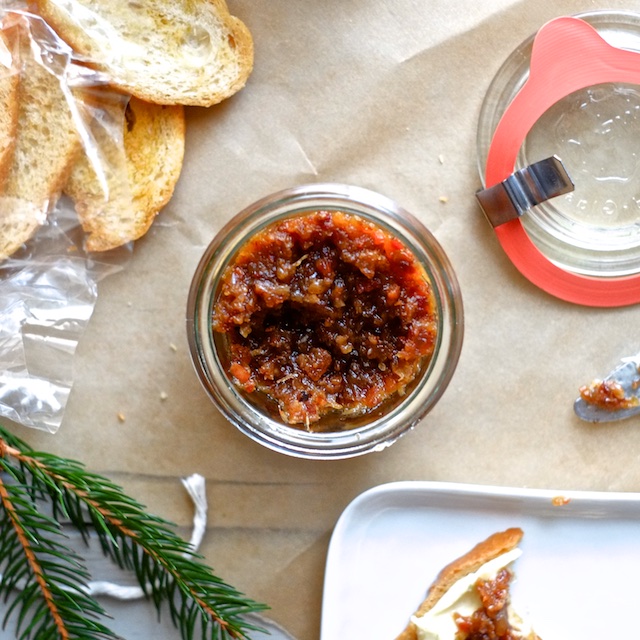
One thing to note about my bacon jam – I keep it sort of crunchy. A lot of bacon jam recipes are done in a slow cooker, which might be a little simpler to make, but will most definitely turn your bacon to mushy jam. I like the idea of preserving a bit of that crispy meaty bacon texture. To do that, I cook thick-cut bacon in a low oven so that the fat renders out as much as possible and we’re left with bacon that’s very crispy and jam that’s got some texture, even after the bacon is stirred into the melty onions. I quite like it.

Edible Gift: Bacon Jam

Edible Gifting: Bacon Jam
crostini “recipe” is over here (too easy to really be called a recipe though)
makes about 4 gift portions

Ingredients:
2 large onions
1/2 stick butter
1/4 tsp cayenne pepper
1/4 cup brewed coffee (or instant, dissolved in water, or beef broth)
1 Tbsp cider vinegar or red wine vinegar
1 Tbsp brown sugar
1 lb thick-cut bacon
salt and black pepper to taste

Method:

1. Spread bacon out in a single layer on a baking sheet and roast in a low 300 F oven until brown and very crispy. Chop finely (or mince in a food processor if you have one) and set aside.
2. Grate onion (or mince very finely in a food processor) and cook over low heat in butter until the onions become very soft and start to turn golden. Add cayenne, coffee, brown sugar, and vinegar and cook until the liquid is completely evaporated and the onions are quite brown (this will take a while – like up to two hours).
3. Stir bacon into onion mixture and taste for seasoning – it should be quite sweet from the onions and salty from the bacon. Add extra salt if it’s needed, and a few good grinds of black pepper too.

Serve with crackers or crostini and some spready cheese – I’m partial to d’Affinois with herbs (which is like a mild brie) or goat cheese, but bacon jam will go with just about any soft or fresh cheese you want.

  1. I would love to get that gift! Love the little brie tree!

    carrie — December 9, 2014
    1. I'm so scroogey I didn't even see the christmas tree in the brie wedge - nice one!

      courtney — December 11, 2014
    2. reply
  2. What a great idea! Love how you packaged it all together, too - looks really thoughtful and wonderful. I'd be very happy to get it as a gift!

    April @ Girl Gone Gourmet — December 16, 2014
    1. Thank you April! I love your blog by the way :)

      courtney — December 16, 2014
    2. reply
  3. […] up, (pictured above) bacon jam! It’s not cookies! It’s savory, snacky and, paired with a tree shaped wedge of herby […]

    My Favorite Food Gifts to Make and Give | Sweet Salty Tart — December 10, 2015
    1. reply
cancel reply

A Gift List for Cooks

I’m a lover of lists, and this year I’m feeling uncharacteristically festive and benevolent, so: a holiday gift list. I made this list for the serious food freaks in your life. Though really, it’s more than likely you’re the food freak in your life, or you might not be reading this. SO here’s what you should want this year.

gift list for cooks

1. Enameled mugs – For those of us who like bearded men and plaid shirts, but not camping – especially not in December.

2. The Flavor Bible – Recommended to me by my one friend who actually went to culinary school, this book is a guide for creative cooks who want to know what flavors go and what flavors don’t.

3. Baking steel griddle – This one isn’t technically on the market yet, but I’ll be first in line when it hits. The baking steel is like an amped-up pizza stone – it’s bigger (18×14) and made of super conductive metal so you can get really crispy pizza crusts, even in a home oven. The griddle version is also two-sided: one textured for baking in the oven and one slick side with a trough for stove-top griddling. And that’s as close as I can reasonably get to having a commercial grade flat-top in my home kitchen. I’ll take it.

gift list for cooks

4. The Searzall – This is like a portable broiler with actual power. It attaches to the top of a regular kitchen torch and delivers even heat that browns instead of burns. I swear this thing is going to be huge, especially with the advances in sous vide cooking we’ve been seeing lately. Oh, and that bruléed topping I was going for in my last post? Should have had the Searzall…

5. Pretty cloth napkins – The best gifts are usually a bit more luxurious than most people would buy for themselves, like cashmere socks or really nice chocolate. A fancy set of napkins might not be the most exciting gift to give, but I think recipients always appreciate having them. These are simple and pretty and would make me feel sophisticated and maybe even a step closer to proper adulthood?

6. A Mircoplane ribbon paddle grater – Everyone needs a microplane, and most people don’t already have this model, which is best for grating cheese and those onions you don’t feel like chopping.

gift list for cooks

7. Wire cheese cutter – I’m not typically a fan of uni-taskers, but cheese cutters are just unbeatable on blocks of sharp cheddar, which are likely to make an appearance on someone’s holiday table at some point. Plus, this one’s pretty.

8. Prune Cookbook – This is by the author of the book Blood, Bones, and Butter, Gabrielle Hamilton. Prune is Hamilton’s restaurant, and after falling in love with her writing, I’m convinced I want to eat her food.

9. Thermapen – I’m mad I don’t have one of these already. Thermometers are essential for the mastery of steak cooking, deep frying, and even bread baking, and this thermometer is the best, fastest, and most accurate out there.

gift list for cooks

10. Jacobsen White Truffle Sea Salt – Truffles are expensive and perishable, truffle oil is passé and off-tasting, artisan truffle sea salt however, is long-lasting and perfectly truffle-y.

11. Bay Leaf Wreath – A cute holiday decor alternative for the food lovers.

12. Fat Toad Farm’s Goat Milk Caramel – If I invite you to my house for a holiday party, bring me this caramel and we will be friends 4-eva.


What do you like to give your friends who cook?

cancel reply

Toasted Nut and Brown Sugar-Topped Sweet Potato Casserole

Toasted Nut and Brown Sugar Topped Sweet Potato Casserole

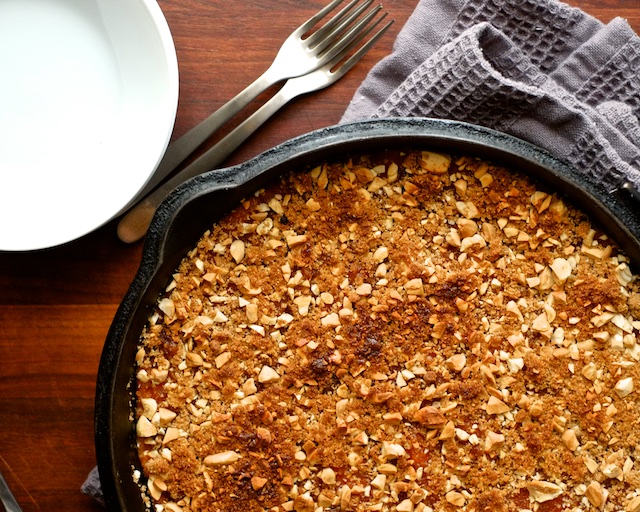
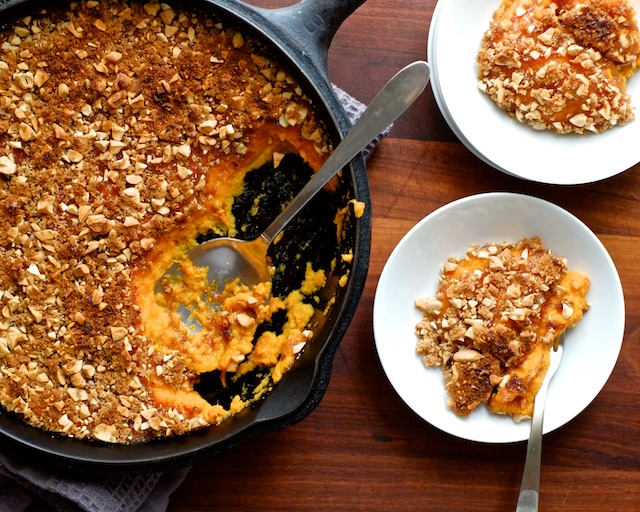
These are the sweet potatoes I made last year in Tanegashima for the NASA crew’s makeshift Japanese Thanksgiving dinner. They were well received – I even had a few guys come up and ask me for the recipe, which didn’t actually exist until now.

Toasted Nut and Brown Sugar Topped Sweet Potato Casserole

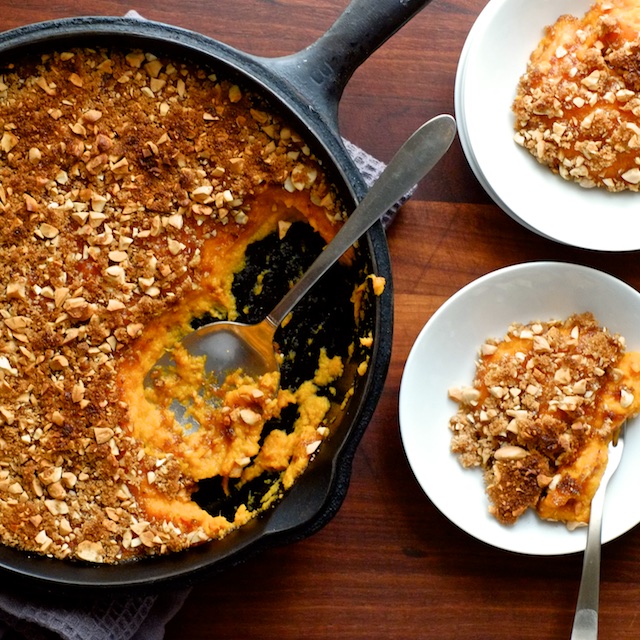
Ok, these are almost the sweet potatoes I made in Tanegashima. The missing ingredient is Japanese cooking equipment. When I made these last year, I finished them by blasting them under a high-powered broiler, since there was no oven in the hotel kitchen where we cooked. That Japanese broiler, with angry blue flames, turned the sugar topping into a crackly browned sheet of candy atop the fluffy sweet potatoes. They were delicious.

Toasted Nut and Brown Sugar Topped Sweet Potato Casserole

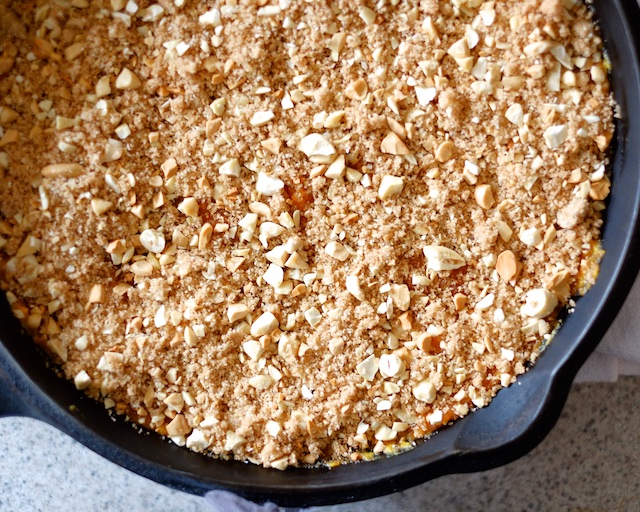
And truthfully, these are delicious too, but my weak-sauce American oven-broiler just can’t pull off a proper brulée. Still, this sugar topping is nutty and crunchy and it makes sweet and satisfying Thanksgiving yams just a little more interesting. So in the off chance you were looking for a new sweet potato recipe to round out your Thanksgiving table, here you are.

Toasted Nut and Brown Sugar Topped Sweet Potato Casserole

Toasted Nut and Brown Sugar-Topped Sweet Potato Casserole

Ingredients:
-3-4 large sweet potatoes (about 3 pounds total)
-4 Tbsp butter
-1/2 cup half and half
-salt
-1/2 cup toasted nuts (you can use your favorite – I like almonds and cashews)
-1/2 cup brown sugar
-1 tsp cinnamon
-1/2 tsp nutmeg

Method:
1. Roast potatoes whole, straight on the oven rack at 350F until they are tender. Like, pierce with a knife and the knife meets no resistance whatsoever – which will take at least an hour. I recommend lining the bottom of your oven with foil to catch the sugary juice that inevitably drips out of the potatoes.
2. Allow the potatoes to cool just enough for you to handle them. Split the potatoes and scoop the flesh out of their skins and put them in a mixing bowl. Add butter and half and half with a pinch of salt and stir together with the potatoes until they are smooth and everything is incorporated. Taste them – they should be buttery and sweet with just a hint of salt. Resist the urge to add sugar to the potatoes themselves, because the sugar topping brings a lot of sweetness already and the irregular mix of crunchy-sweet top with buttery, delicately-sweet potatoes is what makes this good.
3. Toast whatever nuts you’ve decided to use (unless you bought them pre-roasted) and chop them up. Put them in a small mixing bowl and add the brown sugar, cinnamon, nutmeg, and another pinch of salt. Taste this mix – it should be sweet and nutty with just enough salt to bring out the richness of the toasted nuts.
4. Spread the potato mix in an oven-safe casserole dish and top with the toasted nut and sugar mix.
5. Turn on your oven’s broiler and adjust your top rack as close to the heating element as possible. Broil your casserole until the sugar is browned and crispy, and serve it up. If you can achieve full-brulée status, you have my respect. A kitchen torch would be really helpful here. And that’s what I’m asking for this Christmas.


  1. This looks amazing - what a perfect holiday meal side!!

    Millie | Add A Little — December 4, 2014
    1. Thanks Millie!

      courtney — December 4, 2014
    2. reply
cancel reply

One-Pot Orzo With Roasted Brussels Sprouts, Bacon, and Gruyere

one pot orzotto with roasted brussels sprouts bacon and gruyere

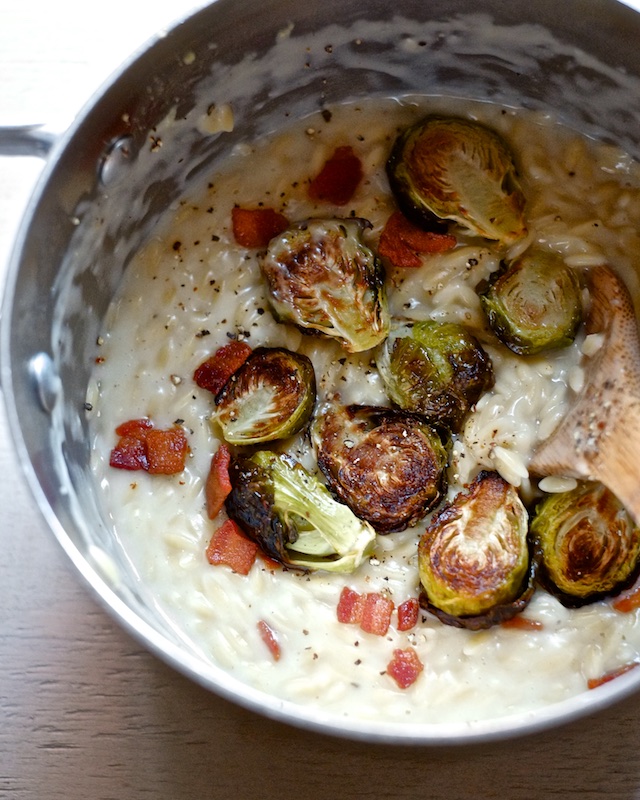
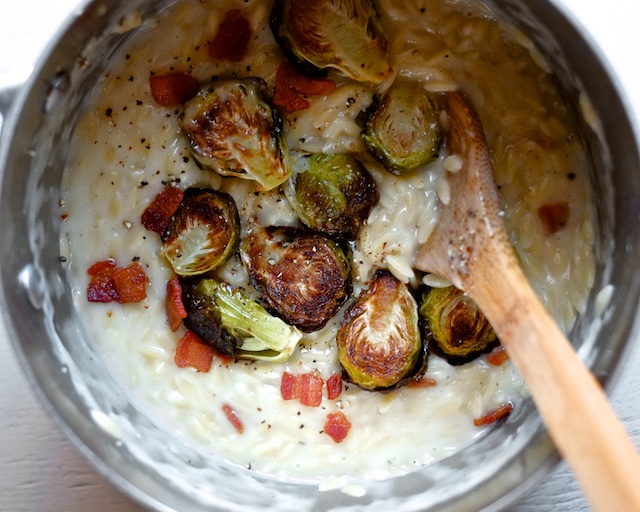
Can I still call it one-pot pasta if the brussels sprouts are roasted in the oven? It’s more like one-pot plus a pan pasta, but if you line your roasting pan with foil, you might not have to wash it after (I mean unless the foil tore, why would you?). And brussels sprouts are at their very best when roasted, so I think it’s worth another pan.

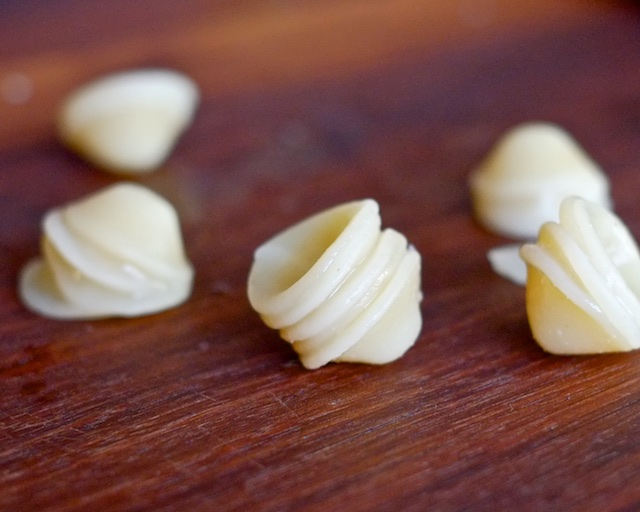
This recipe was actually born of disaster, but ended up being delicious. I set out to make one-pot orecchiette with brussels sprouts and bacon and gruyere, but orecchiette turned out to be the absolute worst thing to try to one-pot, beeeecause…

orzotto 1

Those adorable “little ear” shaped pastas like to NEST and stick together in the absolute worst way. I sat there jabbing at the pot for five minutes trying to get them all to break up, then desperately fished out all the offending stacks to pry them apart with my fingers, to no avail. The worst part is that when these things stick together they double, triple, quadruple their thickness, so they stay totally raw and chewy while the rest of your pasta turns to mush. Could I have avoided this by un-stacking them and dropping each little piece of pasta into the water one by one? Maybe, but it’s not a process I can suggest to fellow humans. So one-pot pasta makers, stay the heck away from orecchiette.

I settled on orzo because it was what I had in my pantry when the orecchiette failed me, and I actually like how it turned out. The shape of the pasta made a really thick sauce that only got richer with the addition of gruyere, and the bacon and brussels sprouts added their respective hits of salt and sweet. It’s a risotto-esque, belly-filling pasta that’s making this terribly cold fall a little easier for me to deal with.

one pot orzotto with roasted brussels sprouts bacon and gruyere

One-Pot Orzo with Roasted Brussels Sprouts, Bacon, and Gruyere

Ingredients:
-a few tablespoons of olive oil
-salt
-about 2 pounds fresh brussels sprouts, halved
-5-6 strips of thick-cut bacon (or about 10 strips of regular-cut bacon)
-1 medium onion, diced
-2 cloves garlic, minced or grated
-1 pound box orzo pasta
-1 quart (4 cups) water, plus another standby cup of water
-2 cups gruyere cheese, grated

Method:
1. Start by roasting your brussels sprouts. I like to cut off any brown stem ends, take off a few outer leaves, and just slice them in half vertically. Pile them up on your foil-lined baking sheet, drizzle on a few tablespoons of olive oil, a good pinch of salt, and toss them together to get them well coated and seasoned. Roast, cut side down, in a 400F oven for about 30 minutes.
2. In a large pot, cook your bacon over medium-low heat until it’s crispy and a lot of fat has rendered out. Remove the bacon to a paper-towel lined plate.
3. Sauté your onion and garlic over medium heat in some of the remaining bacon fat (take out as much fat as you like with a spoon or small ladle).
4. Drop your orzo into the pot along with your quart of water and a big pinch of salt. Increase heat until your water boils and stir the orzo periodically to keep it from sticking.
5. When the orzo is al dente, there should still be a good bit of saucy pasta water in the pot. If the liquid looks too thick. add more water. Turn off the heat and stir in your gruyere cheese. Taste the pasta for salt and add more if necessary.
6. Stir the brussels sprouts into the finished orzo and top with bacon and (optional) black pepper.

cancel reply

The Lazy Cook's Guide to One-Pot Pasta, Featuring: Cacio e Pepe

Hacking One Pot Pasta

That one-pot pasta…so hot right now. Martha’s doing it, Southern Living is doing it, all the bloggers are doing it, and now I’m doing it. For good reason! One-pot pasta is fast and simple and making it dirties minimal dishes, so everyone wins.

Hacking One Pot Pasta

The first time I heard about one-pot pasta it reminded me of something I saw Rachel Ray do (say what you want about RR, she was an early influencer in my n00b kitchen) back in 2007. She broke up pasta and added broth a little at a time, while she stirred, until the pasta cooked through. It was kind of like risotto-ing the pasta rather than boiling it in a steaming cauldron of salt water. Then I realized that I’d seen a more accurate one-pot pasta parallel even before 2007, on the back of a red cardboard box with an anthropomorphized hand in the corner, telling me how to brown ground beef. That’s right. One-pot pasta is really just jazzed up, deconstructed, hipster Hamburger Helper.

Hacking One Pot Pasta

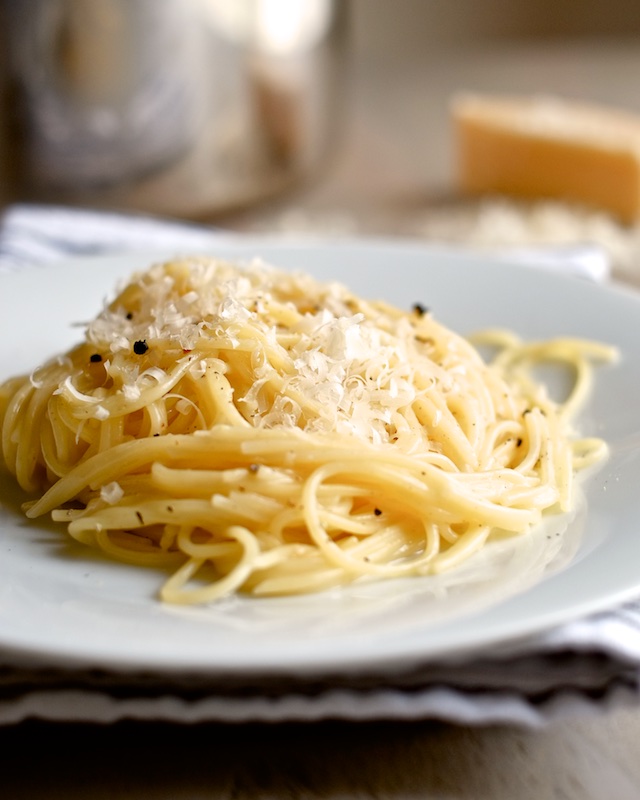
Hey, a good idea is a good idea. But what kind of cred can a cartoon glove man command in the face of an Italian grandma with generations of kitchen wisdom to back her up? If I’d just listened to that weird old hand-with-a-face, I could have saved myself a lot of gallons of pasta water and all the BTU’s required to heat them. So as a cheeky tribute to my late realization, I one-pot pasta’d an Italian classic: cacio e pepe.

Cacio e pepe (Italian for cheese and pepper) is the perfect recipe to help us understand one-pot pasta because its about as stripped-down as a recipe can possibly get. The ingredient list is four items long, so all we’re really worrying about is a pasta:liquid ratio and the task of stirring until the pasta is al dente. Once you get the ratio and the method, you can one-pot pasta any noodle you want, with any flavoring you fancy. Such power is heady, no?

Hacking One Pot Pasta

What’s probably the coolest thing about one-pot pasta is the cooking water it produces. If you make pasta with any regularity, you’ve probably heard the old trick of adding a scoop of starchy pasta water to your sauce to help the dish come together, and it really works – even when you’ve cooked a pound of pasta in a gallon of water. So, if you reduce that ratio of water to pasta, you end up with super-charged pasta water, that’s almost a sauce by itself. Built-in sauce is helpful when your pasta recipe has four ingredients, plus it means that all you have to worry about adding to the pot is pure flavor. Like parmesan cheese and black pepper.

Hacking One Pot Pasta

One-Pot Cacio é Pepe

note: I usually half this recipe, for a more manageable two-person amount of food. It works really well.

Ingredients:
-1 pound angel hair pasta
-1 quart water (that’s 4 cups), salted (plus another cup of water on standby)
-1 cup freshly grated parmesan cheese (or pecorino, or both (on a microplane if you have one))
-lots of fresh-cracked black pepper

Method:
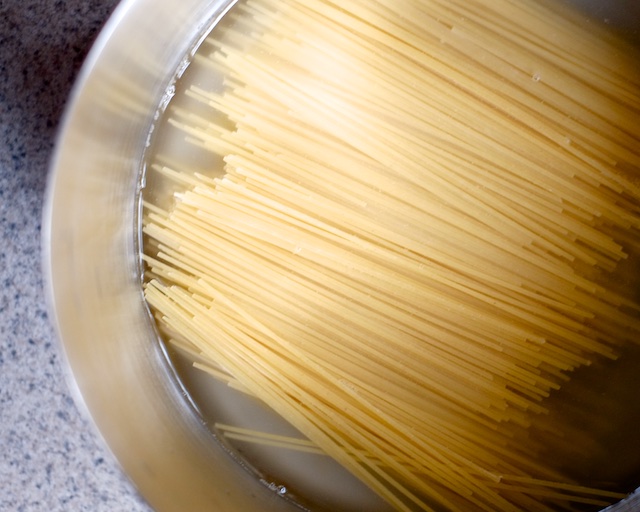
1. Drop pasta in a pot that will allow it to fit lengthwise and add water. All the pasta should be submerged in the water with the one pound to one quart ratio.

2. Season your pasta water with salt, keeping in mind that the water will reduce and be entirely absorbed by the pasta. You can add more salt at the end if necessary.

3. Cook the pasta over medium heat, stirring the noodles periodically to keep them from sticking together.

4. Taste your pasta to determine it’s doneness, and pull it off the heat when it’s just barely al dente. There should be a little bit of pasta water left in the bottom of the pot by the time the pasta reaches al dente (like 1/4 inch). If there is more than that, scoop out a tiny bit of the water with a ladle. If there is less, add a bit of water from your standby cup.

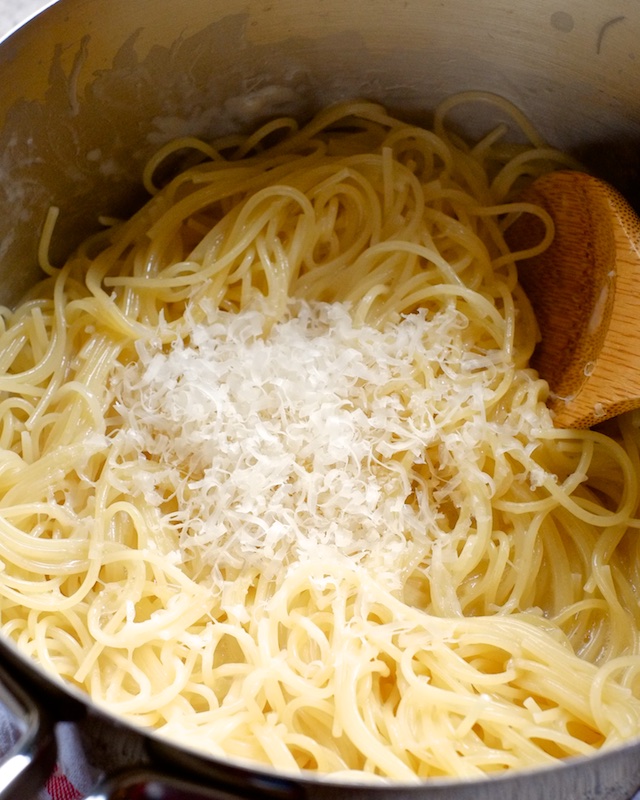
5. Add parmesan cheese and stir it into the pasta until the cheese is melted. Taste for seasoning and add salt if necessary. By the time the cheese is stirred in, the pasta water should be mostly absorbed or thickened enough to coat the noodles. If the pasta starts to lose it’s sheen or stick together, add another splash of water and stir.

6. Top with fresh-cracked black pepper and serve immediately

Because this pasta is sauced with super-starchy pasta water and cheese, it will want to start sticking together as it cools, just bring it back with a splash of water and a stir. You can also add a little olive oil or butter to help things out, but the best solution is just to eat it. If you can’t finish a whole pound of pasta in one sitting, make a half batch. You can re-heat the pasta over low heat with another splash of water, but the more water you add the further you get from al dente, because hot pasta will always want to absorb liquid, and the more it absorbs the mushier it gets. Basically, the faster you can eat this stuff the better.

Want to see how this method works with gluten-free pasta? Check out my One Pot Gluten Free Macaroni and Cheese.

  1. I wish I'd known about this a few decades ago. Definitely on next week's list.

    Carrie — November 18, 2014
    1. Thanks ma :)

      courtney — December 6, 2014
    2. reply
  2. Definitely going to give this a try but will use pecorino cheese instead.

    Marty — November 24, 2014
    1. Marty, thanks for stopping by! Pecorino is definitely traditional, and I'm sure it would taste great. I also like to mix pecorino and Parmesan when I have both on hand.

      courtney — November 24, 2014
    2. reply
  3. Would this method work for gluten free pasta? (I really miss regular pasta with the gluten, it was so much easier.)

    Jessica — December 4, 2014
    1. Hey Jessica! I have to admit, I've never tried it with gluten-free pasta, but I feel like it's probably possible. I'll have to try it and get back to you, and frankly, that's a really good question so if it does work, I'll do a whole post about it. Thanks for the idea :)

      courtney — December 4, 2014
    2. Hi, try to find a brown rice base pasta rather than the corn stuff and it *should* work, although I've not tested it. I find the brown rice stuff works most like wheat pasta of any alternative.

      Emmylou — December 5, 2014
    3. reply
  4. I've done a similar version of this with ramen noodles a few times (like the classy gal that I am), but perhaps it's time to try it with pasta. Haha. Thanks for this. Looks fantastic! (FYI: The ramen version is surprisingly delicious!)

    Allison — December 4, 2014
    1. Allison, I have been meaning to try this with ramen ever since I saw David Chang do it on that show, "Mind of a Chef". Ramen cacio e pepe is straight up brilliant, and basically if Dave Chang does it, everyone should do it IMO - so you win. Thanks for stopping by!

      courtney — December 4, 2014
    2. reply
  5. Any pasta at all that is good for a diabetic....the wheat stuff is heavy and untasty to me. Any ideas?

    redrover — December 4, 2014
    1. Honestly, I'm not very familiar with what's best for diabetic diets - would it be a rice pasta or something? I'm planning on trying a gluten-free version, but I don't know if the carb count is any better with gluten free pasta. What type of pasta do you typically like to eat? I'll see if I can get it to work in a one-pot recipe.

      courtney — December 6, 2014
    2. reply
  6. […] sweetsaltytart.com […]

    17 Recipes Every Lazy Girl Needs To Know | Breakfvst — December 4, 2014
    1. reply
  7. Congrats on being featured on BuzzFeed! That is awesome and this recipe is awesome and your pictures are incredible! You go girl!!!

    Maria — December 4, 2014
    1. Thanks Maria!! :)

      courtney — December 6, 2014
    2. reply
  8. oh wow this looks amazing! definitely going to try this out ASAP. thank you for the recipe!

    archita — December 4, 2014
    1. Thanks archita! I hope you like it!

      courtney — December 6, 2014
    2. reply
  9. […] sweetsaltytart.com […]

    17 Recipes Every Lazy Girl Needs To Know - i fucking love food — December 5, 2014
    1. reply
  10. […] Consigue la receta: Pasta Cacio é Pepe […]

    17 recetas que toda chica perezosa necesita conocer - LasSociales.co — December 6, 2014
    1. reply
  11. Eating this now. It is delicious, thank you!

    Tina — December 6, 2014
    1. Tina! I'm so flattered you made it and so happy you like it. Save some for meeeee :)

      courtney — December 6, 2014
    2. reply
  12. So simple and tasty... The only issue I have with it is some if the cheese will turn into big clumps. Also I added some To the mix, delish!

    sarah — December 7, 2014
    1. Hi Sarah! Glad you liked the flavor - I've never had issues with cheese clumping together, but I'd guess it's because it's wasn't grated finely enough and couldn't melt thoroughly, or that the cheese was added to the pot while over really high heat, which would cause it to get a hard grainy texture. Would either of those fit what you saw? Either way, hard to beat good old cheese and pasta.

      courtney — December 7, 2014
    2. reply
  13. […] sweetsaltytart.com […]

    17 Recipes Every Lazy Girl Needs To Know | Low Boredom — December 9, 2014
    1. reply
  14. […] sweetsaltytart.com […]

    Bangkok Breaking News | 17 Recipes Every Lazy Girl Needs To Know — December 9, 2014
    1. reply
  15. […] sweetsaltytart.com […]

    17 Recipes Every Lazy Girl Needs To Know ⋆ The NEW N!FYmagThe NEW N!FYmag — February 25, 2015
    1. reply
  16. Should the pot be covered at any point? Should the water reach a boil at any point, or will it cook before boiling? I'm very excited to try this out :)

    madeline — March 31, 2015
    1. Hey Madeline! Thanks for stopping by. No need to cover the pot - you will have to stir the noodles periodically to keep them from sticking and the cooking happens too quickly for much water to evaporate. If you cook the pasta over medium heat you should reach kind of a low boil, but don't worry too much about it. I hope you like it the pasta! And if you have any questions or problems when you make it don't hesitate to comment or email :)

      courtney — March 31, 2015
    2. reply
  17. […] sweetsaltytart.com […]

    Recipes for lazy girls | UCookforU — April 15, 2015
    1. reply
  18. I apologise in advance for being such a pain in the neck. I think that this method is perfect for lazy girls (like me) and I am not a morbid tradition fan (I am Italian) but I have to point out this: if you don't drain pasta all the wheat starch (that foam that forms over water while it's boiling) stays inside the pan. And that's really baaaaad for your diet. I mean, cacio e pepe is already a rich dish, don't you think?

    Sara — May 4, 2015
    1. I get what you're saying, but if I'm not celiac I don't see how this is any worse than risotto, (which retains all the rice starch). For me it's just carbs, which contribute to the texture of the finished product in a way that might otherwise be achieved with more cheese or fat (neither of which are especially wholesome). It's rich, and it's not the kind of thing I eat more than once or twice a year, but I think the idea of risotto-ing pasta has some fun implications, which is the main reason I made this and wrote about it. I get what you are saying though. I'll have to look into the nutrition differences between drained pasta and risotto-ed pasta. You got me curious.

      courtney — May 4, 2015
    2. reply
  19. […] Get the recipe: One-Pot Cacio é Pepe […]

    17 Recipes Every Lazy Girl Needs To Know — June 23, 2015
    1. reply
  20. […] sweetsaltytart.com […]

    5 Recipes Every Lazy Girl Needs To Know - Good Food Ideas — July 10, 2015
    1. reply
  21. […] If my description of the one-pot-pasta recipe confuses you, check out this blog post. She describes the process better, and even has visuals! It also contains a one-pot pasta recipe […]

    Spicy Teriyaki Noodles with Tofu and Garbanzo Beans | Speculating Sunrise — July 12, 2015
    1. reply
  22. […] Get the recipe: One-Pot Cacio é Pepe […]

    Each Lazy Girl Should Know These 7 Recipes — July 23, 2015
    1. reply
  23. Would you change the water/pasta ratio if you used spaghetti instead of angel hair?

    Kara — August 16, 2015
    1. Hi Kara! The ratio should still work with spaghetti. I'd keep an extra cup of water on standby in case the pasta soaks up more water than you expect, and add a little bit at a time if the water seems to be soaking in quickly and the pasta still has a long way to cook. It's easy to take liquid away with a ladle when it's finished cooking too, so the recipe is pretty forgiving. I've used this same ratio for a few different pasta shapes and it has worked well for me. If you have any issues though, let me know. I'm always curious to hear how my recipes work for people at home!

      courtney — August 16, 2015
    2. reply
  24. […] The Lazy Cook’s Guide to One-Pot Pasta, Featuring: Cacio e Pepe | Sweet Salty Tart. […]

    One pot pasta with four ingredients | Easy Recipe List — August 16, 2015
    1. reply
  25. […] sweetsaltytart.com […]

    17 Recipes Every Lazy Girl Needs To Know | Eldezer News — August 20, 2015
    1. reply
  26. […] ingredient list is four items long — pasta, water, pepper, and parmesan — and you don’t even have to […]

    20 Lazy Recipes Anyone Can Master | 22 Words — October 16, 2015
    1. reply
  27. […] Recipe adapted from: http://sweetsaltytart.com/2014/11/the-lazy-cooks-guide-to-one-pot-pasta-featuring-cacio-e-pepe/ […]

    Fancy Mac N’ Cheese | Meal Time for No Time — October 23, 2015
    1. reply
  28. […] This dish includes four ingredients you probably already have in your kitchen, The best part is you don't eve have to drain the pasta. […]

    Weggl | 20 Fail-Proof Recipes Perfect For Lazy People — November 11, 2015
    1. reply
  29. […] One Pot Pasta […]

    45 Easy Recipes Every Lazy Girl Should Know - Wachabuy — November 28, 2015
    1. reply
  30. Thank you for answering my question of water-to-past ratio! I like cooking it this way because using bone broth instead of water is an easy way to get more broth in your diet. And by the way, your picture taking is on point! Bradleigh

    Bradleigh Huizinga — January 19, 2016
    1. Thanks Bradleigh! That's such a clever idea! It makes perfect sense too because any time you make risotto, you use broth, and one pot pasta is very similar. I'm going to try that!

      courtney — January 22, 2016
    2. reply
  31. […] sweetsaltytart.com […]

    17 Recipes Every Lazy Girl Needs To Know | Spiderzoom — February 15, 2016
    1. reply
  32. […] already knew one pot pasta was a thing, and I’d even successfully macaroni and cheese’d some gluten free pasta […]

    One-Pot Three-Cheese Mac | Sweet Salty Tart — June 7, 2016
    1. reply
  33. Need a print key button. So can print out just the recipe and directions. Also if need photos have but can remove it don't need visual. thanks

    Wanda — June 10, 2016
    1. reply
  34. I have been doing this for years. I add a splash of heavy cream , garlic and a bit of butter to the mix at the end. Sometimes chicken and any veggies. Yumm-O.

    Joy B — June 10, 2016
    1. reply
cancel reply