Jalapeño Avocado Slaw

Jalepeno Avocado Slaw

It probably doesn’t feel like it, but we officially have a month of summer left, and many of us have more than a month of grilling weather left to maximize. I don’t know about you guys but I love slaw with grilled stuff, and this one is particularly excellent. Not too sweet, a little spicy, and a tiny bit rich – not from an overly creamy dressing, but from honking chunks of creamy avocado.

I’m a fan of diced cabbage rather than shredded cabbage in marinated salads like this. Slaws taste best when they have a few hours to mingle and let the flavors develop, but shredded cabbage tends to get limp and sad as it soaks in the salty dressing. Dicing the cabbage eliminates the soggy slaw visual so you can give the salad all the time it needs to properly get together. You can add the avocado at the last minute if you like, but the dressing contains quite a bit of lime and vinegar which will keep it from turning brown too quickly. I kind of love the green on green going on in that bowl, it’s pretty in a highly-edible, unfussy way.

Jalepeno Avocado Slaw

Jalapeño Avocado Slaw

Ingredients:
-1 Tbsp white wine vinegar (or cider vinegar)
-juice of 1/2 lime
-1/3 cup mayo
-1 1/2 Tbsp honey
-dash cumin
-1 small clove garlic, grated or minced
-2 jalapeños, seeded, quartered lengthwise, and thinly sliced
-1/4 cup green onion, sliced
-2-3 Tbsp cilantro, minced (less is fine if you’re sensitive to that flavor)
-1 small head cabbage (about 6 cups diced)
-1-2 avocados, cut into large chunks
-salt and black pepper, to taste

Method:

1. In the bottom of a large mixing bowl, combine vinegar, lime juice, mayo, honey, cumin, and garlic. Whisk together, add salt, and taste. This dressing is on the thin side, which I think makes the whole thing feel fresher. Adjust sweetness, tartness, and saltiness by adding more honey, lime, or salt as you like.

2. Dice cabbage, slice jalapeño and green onion, and mince cilantro. Add to your mixing bowl and toss to coat in dressing. Taste again for seasoning and adjust as you like. Add avocado chunks now (and re-toss to coat the avocado in dressing) if you will be serving within an hour.

3. Allow salad to rest, covered and refrigerated, for at least half an hour and up to 4 or 5 hours (but wait to add avocado if you’re making the salad that far in advance). Serve chilled.

cancel reply

Homemade Frozen Pizza

Homemade Frozen Pizza

I have a lot of low-brow food loves, and a particular soft spot for cheap frozen pizza. It’s so convenient and disgustingly delicious and you get to eat it straight out of the oven and it burns the roof of your mouth in that annoying way that is almost endearing…certainly nostalgic anyway (oh, college). When Cody and I were newlyweds I fed it to him so often that he got sick of it and made his mind up to never eat it again, which nearly broke my heart at the time. I’m almost thirty now, and I have to admit it’s probably for the best that I stay away from that particular section of the grocery store.

But cheap frozen pizza from the grocery store isn’t the same thing as pizza that happens to be frozen for later consumption. So with this loophole in Cody’s moratorium, frozen pizza is back in my life. I just have to make it myself. And I must admit, it tastes better than the store bought stuff. Plus I get to pick the toppings, I know where they come from, and I know the kitchen that prepared them isn’t infested with rodents or anything, so it’s a win-win-win.

Homemade Frozen Pizza

Making frozen pizza is easy: just blister up some pizza dough in a pan on the stove or on the grill, let the cooked dough cool off, add your toppings, freeze the pizzas, and wrap them up. Then when you want pizza, you preheat your oven and ten minutes later you can be torching your mouth with a hot and crispy slice.

Homemade Frozen Pizza

Homemade Frozen Pizza

Ingredients:
-pizza dough (use your favorite, store bought or homemade)
-your favorite pizza toppings

Method:
1. Roll out balls of pizza dough into rounds that will fit inside your cast iron pan, griddle, or on the grate of your outdoor grill.

2. Cook your pizza dough over medium to medium heat, flipping once, until both sides are lightly browned in spots and the dough is fully cooked (pan-cooked dough will be blistered like a tortilla in spots, but mostly white). Don’t try to brown your pizza too much during this step, because it’s going to be blasted in the oven again before you eat it. Get a few brown spots for flavor, but keep the overall color pretty pale and just barely cooked through.

3. Allow your cooked pizza crusts to cool to room temperature while you gather your toppings. If you are using raw meats, cook them first. Fresh veggies should be chopped and can be pre-cooked if you like, but it’s not totally necessary since the pizza will be baked again later.

4. Assemble your pizzas and put them on a baking sheet. Clear out a spot in your freezer where the pizzas can freeze, unwrapped, for at least 2-3 hours.

5. When the pizzas are frozen solid, wrap them with a few layers of plastic wrap and put them in a gallon-sized freezer bag (if they will fit, if not use a layer of foil).

6. When you are ready to eat pizza, preheat your oven to 450F and place a rack in the bottom third of your oven. Then unwrap your pizza and throw it straight on the lower rack with nothing underneath. Bake your pizza for 10-12 minutes until it’s crispy and brown and the cheese is bubbly. Eat it straight off the cutting board for nostalgia’s sake.

  1. brilliant idea courtney! it's so easy to double a batch of dough...totally using this idea soon!

    emily — August 16, 2015
    1. Thanks Emily! I hope you like it. Let me know if you have questions or run into any bumps.

      courtney — December 6, 2015
    2. reply
  2. What a beautiful blog! I stumbled upon your site through food blogger pro. I am going to try these pizzas very soon!

    annie — October 27, 2015
    1. Thanks for stopping by Annie! Let me know how it goes if you try them!

      courtney — December 6, 2015
    2. reply
cancel reply

Grilling Pizza

Grilling Pizza

I shot this post at the very beginning of grill season, and I’m feeling pretty pleased with myself for publishing it while it’s still barely relevant. My blog is so now.

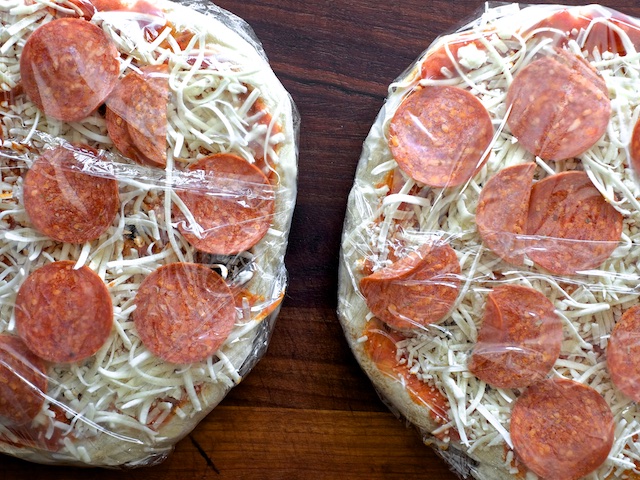
So pizza is one of those things that’s really hard to pull off when you are at home. I mostly don’t bother making it myself because my attempts are pathetic compared to what I can eat at a restaurant with proper pizza ovens that run at a thousand degrees or whatever. That said, I have been known to grill a pizza from time to time, and it’s actually delicious enough and unique enough from delivery, parlor, and fancy pizza joints to merit it’s own event in my opinion.

Grilling Pizza

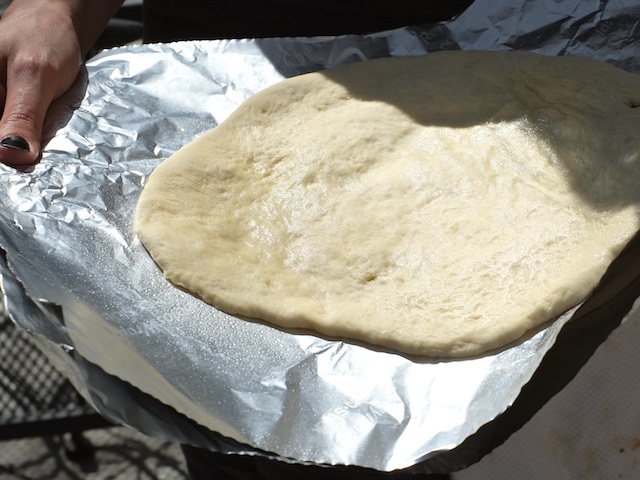
When you decide to grill pizza, there are some things you need to do to make it a pleasant experience. You need to get your toppings pre-cooked and laid out next to your grill. You definitely need to pre-roll your dough (once you start grilling there’s no time to wait for dough to be rolled) and you must absolutely keep the dough from sticking to anything, which is easier said than done. My favorite method requires non-stick aluminum foil and copious amounts of spritzed or brushed olive oil between each layer of foil. When counter space is at a premium, it’s really helpful to be able to roll out a pizza, add foil, and lay the next dough sheet right on top.

Make sure you have a layer of foil under each piece of dough, because it makes the perfect dough carrier and you can literally slap the entire thing down on the grill and peel the foil away once the dough is slightly set. Trying to get a flimsy dough sheet onto the grill without a foil sling is kind of treacherous really, so I recommend you don’t.

Grilling Pizza

I’ve heard people say that the best way to make grilled pizza is with a super hot grill to mimic the inside of a pizza oven, but I have to disagree. I go for medium heat (according to my gas grill, which is probably 400 degrees but it doesn’t matter too much), grill one side, flip, and add toppings. Medium heat should be hot enough to get some blistering and char on the bottom, but not so hot that the pizza is burnt before you’ve finished assembling it. And good luck assembling a pizza with your fingers that close to the grill grate when it’s super hot. Ha. Again, medium heat.

Grilling Pizza

This gas grill is old and was frankly on the fritz when I made this pizza. The heat was all uneven and sputtery, but the pizza still turned out tastier than anything you can make in your home oven. If you have your toppings ready and your dough isn’t sticking to everything, grilled pizza is hard to screw up.

Grilling Pizza

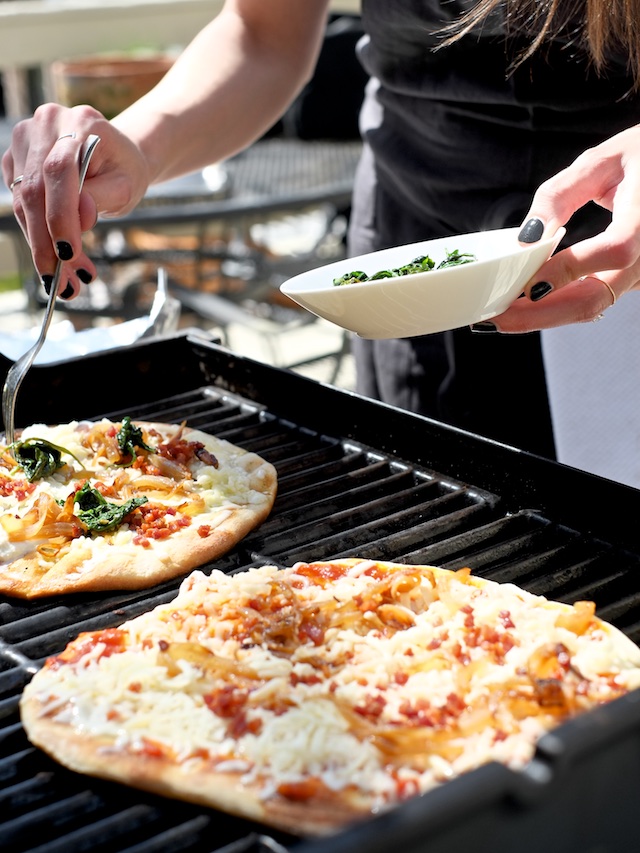
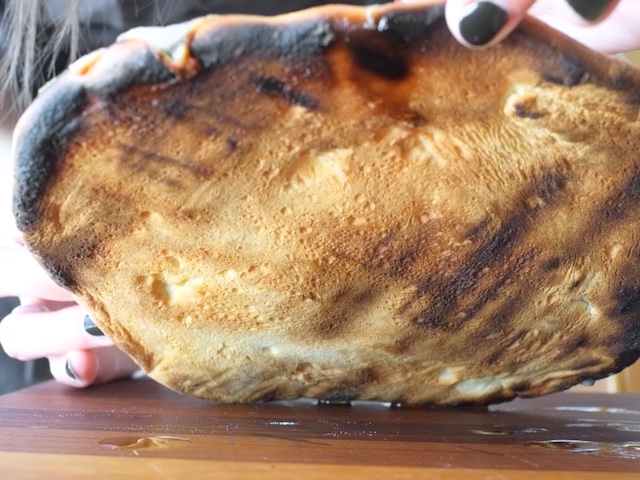
Coming along nicely there, eh? And check that charred crust below.

Grilling Pizza

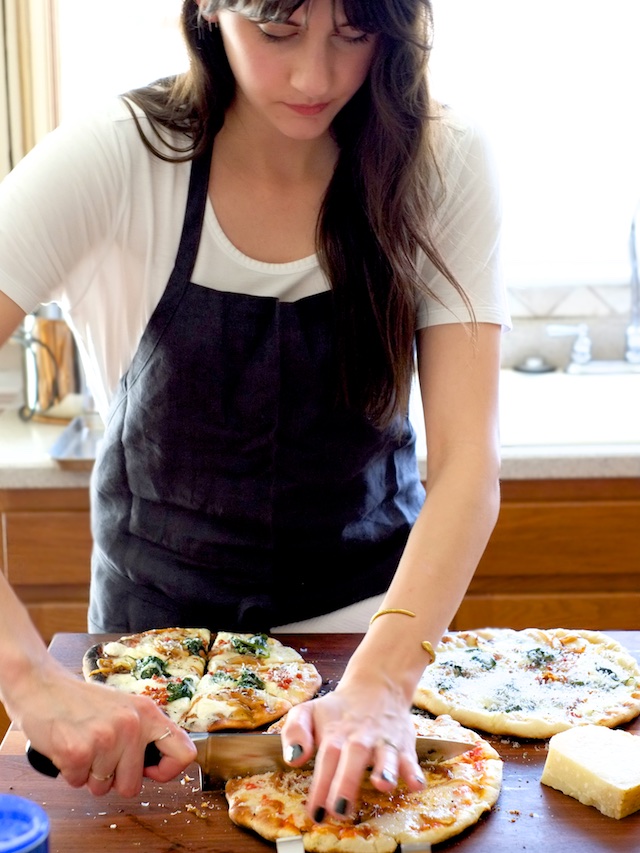
Another piece of advice, when you grill pizza don’t make it a sit-down dinner affair. You can only do one or two pizzas at a time on the grill, so think of it as a grazing night, with some appetizers, maybe a salad, and permission for everyone to swipe a slice of freshly grilled pizza as soon as it hits your cutting board.

Grilling Pizza

I’m not really a pizza dough expert, but I’ve used the exact same artisan bread dough (in 5 minutes a day) recipe for pizza and I liked it a lot, though the dough was a little tricky to roll out. Use your favorite dough recipe or even buy some if you want. The grilling is what’s important here.

Grilling Pizza

Grilled Pizza

Gear:
-lots of non-stick aluminum foil
-a rolling pin
-a pastry brush or oil spritzer
-a grill

Ingredients:
-pizza dough (use the google)
-olive oil
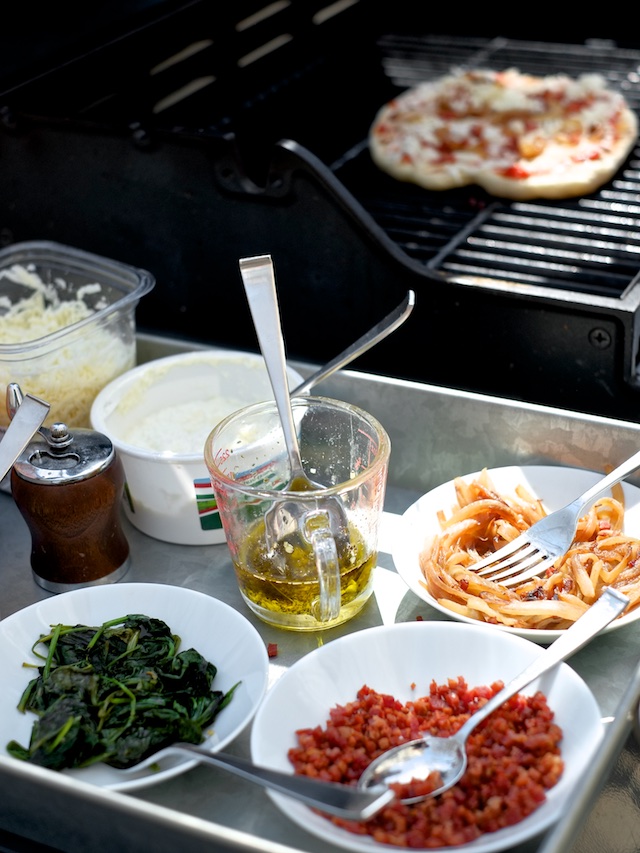
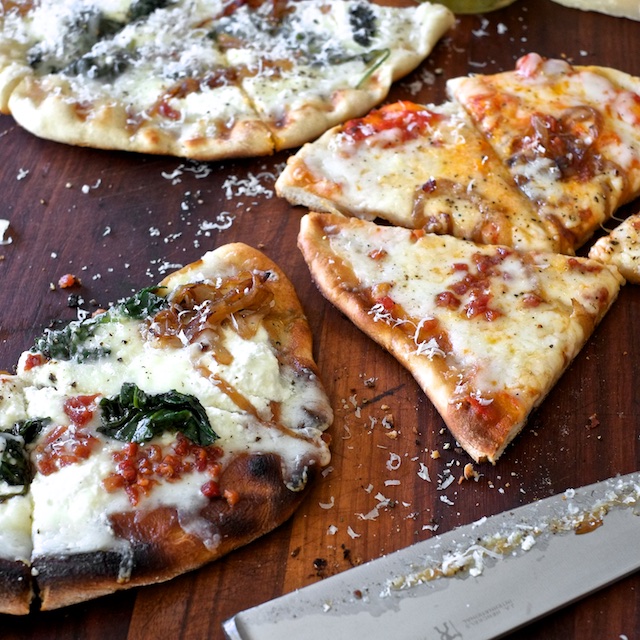
-all the toppings your little heart desires (here I used spicy marinara, pancetta, caramelized onions, wilted spinach, garlic olive oil, ricotta, and mozzarella)

Method:

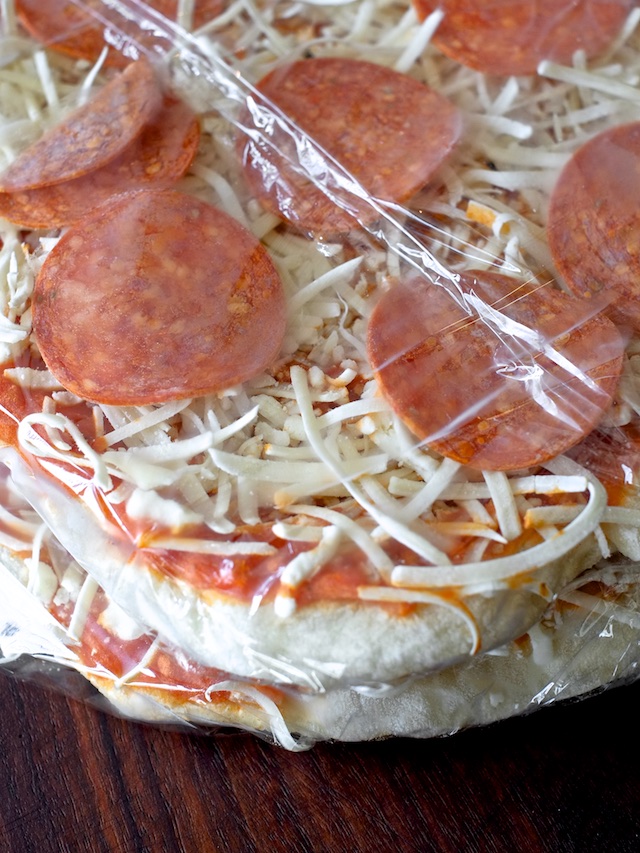
1. Start by prepping your toppings. If you want to use sausage or bacon or veggies, get them pre-cooked. Shred your cheese, put your sauces in bowls, and get them all lined up on a tray that you can take out to the grill when you’re ready.

2. Roll out your dough into foil sheet-sized 1-2 person portions (oblong, maybe 12-14 inches). I like to go as thin as possible, but I’m not very good at it so I usually end up with pillowy crusts anyway. Just keep in mind that dough fluffs up a lot when it bakes, so you probably need to go thinner than you think. Use flour while rolling to keep the dough from sticking to the work surface.

3. Make a resting place for your rolled-out pizza dough with one large sheet of non-stick foil on the bottom. Coat that piece of foil with olive oil and lay out your first piece of rolled-out dough. Coat the dough with olive oil and add another piece of foil on top. Continue like this, alternating foil and dough until all your dough is rolled out and stacked up.

4. Clean your grill and pre-heat it to medium-ish. Once the temperature is even, get your toppings set up near the grill.

5. Carry your first pizza to the grill by peeling the foil under it away from the dough beneath it. Slap the entire sheet of foil on the grill, dough-side down. If the foil lifts away immediately, great. If not, wait a minute for the dough to set up and peel the foil away.

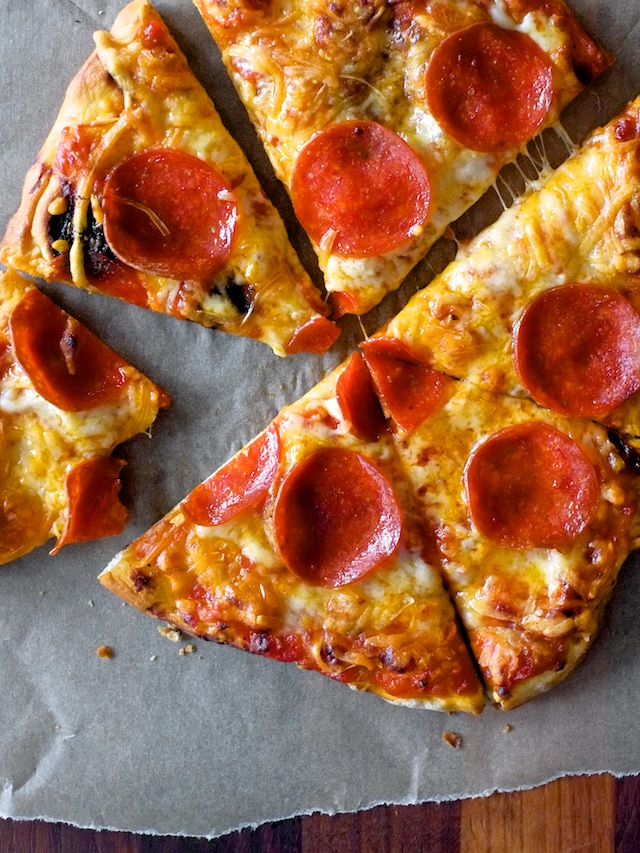
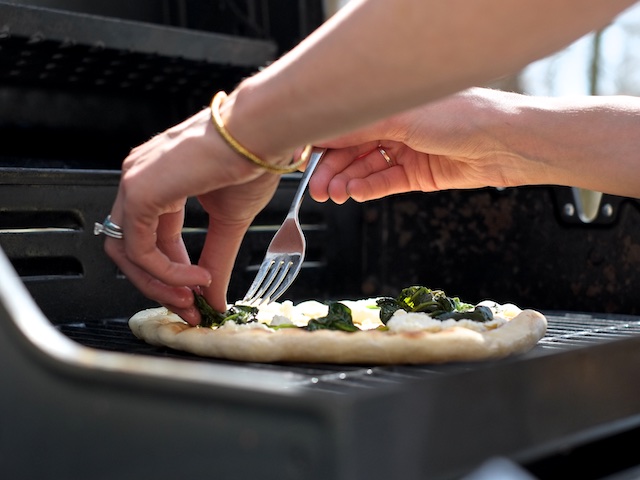
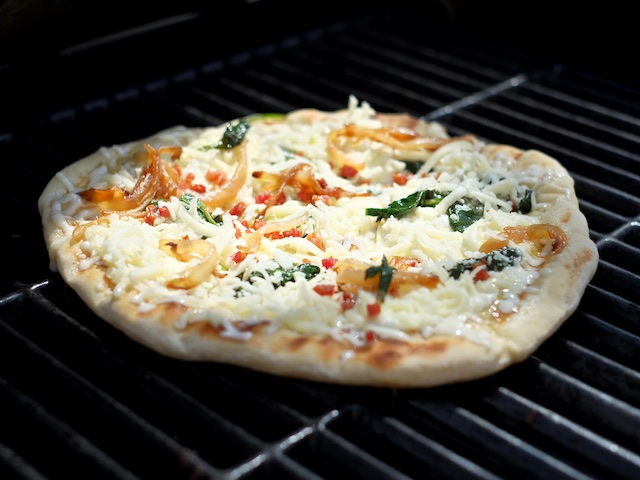
6. When your dough is marked on one side, flip it over with tongs and start adding your toppings to the cooked side. Once it is topped, check the bottom crust for progress. Lower the lid if your cheese needs to melt further. When the crust is cooked to your liking (I like mine nice and brown with some blackish bits) use your tongs to slide the pizza to a plate.

7. Carry your hot pizza to a cutting board for dismantling and immediate consumption.

  1. You make it look so easy. I'm going to give this a try.

    Lisa — August 13, 2015
    1. reply
  2. […] frozen pizza is easy: just blister up some pizza dough in a pan on the stove or on the grill, let the cooked dough cool off, add your toppings, freeze the pizzas, and wrap them up. Then when […]

    Homemade Frozen Pizza | Sweet Salty Tart — August 14, 2015
    1. reply
  3. This looks delish! I don't like frozen pizza - I would like to know why - I think there is a spice in there that is overwhelming.... anise perhaps? Can't stand it, and it is often in frozen lasagne too, so I never buy that stuff. So this looks like a wonderful solution! Now if I can only get you to make some for me!!!

    Amy — September 26, 2015
    1. Probably fennel seeds! It's in Italian sausage and a lot of Italian herb mixes and tastes kind of similar to anise. Perfect reason to make your own ;)

      courtney — December 6, 2015
    2. reply
cancel reply