I’ve mentioned it before, but I feel the need to reiterate: I don’t like baking. Baking requires measuring and like, recipes. Bread baking in particular can be very intimidating with it’s rising, punching, timing, and kneading. Most of the time, bread baking is lame.
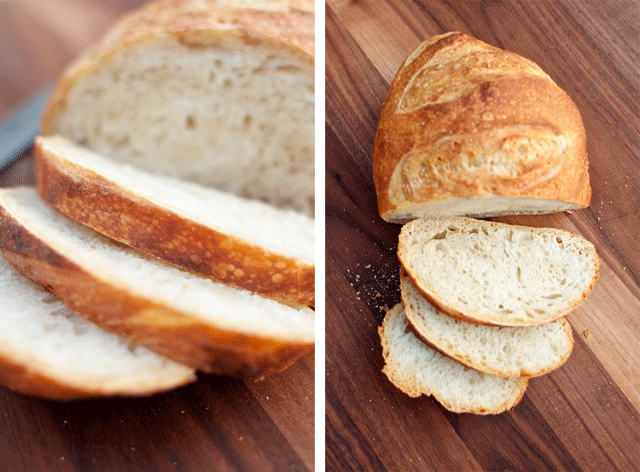
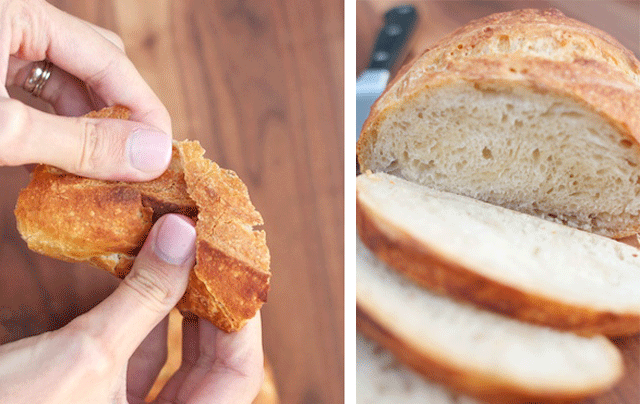
I don’t eat bread indiscriminately either, the way I eat – say, french fries. I’m picky about bread. I don’t like bread that’s cottony or flavorless or tough or dry, or powdery or overly dense, or tooth-sticky. Bread should be crispy and airy and pleasantly chewy.
Bread should be like this:

Before I moved away from Utah, my good friend Tricia gave me a bread baking book as a going away present, and that book has changed the way I feel about baking bread at home. It’s called Artisan Bread in Five Minutes a Day, written by Jeff Hertzberg and Zoe Francois.
You may have heard of their bread method referred to as “bucket bread” because, well, they recommend making the dough in a bucket.

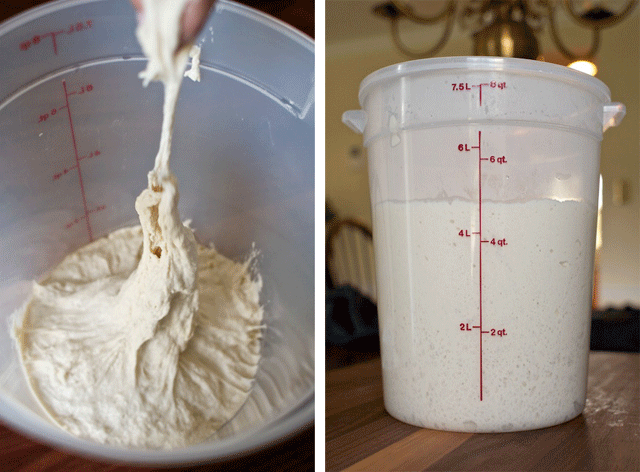
The dough-making process requires about 5 minutes of actual work, followed by 2 hours of sitting around while the dough expands at room temperature. Then you have the laborious task of placing the dough in the fridge, where it will stay for anywhere between 2 hours and 2 weeks. If, during that generous window of time, you decide you want a loaf of homemade bread, you whip out your bucket, hack off a chunk of dough, shape it, let it rest, and bake it.
In the book, they recommend using a pizza stone and pizza peel to bake the bread and transfer it to and from the oven. If you have those things, use them. I have found that a cookie sheet lined with parchment works well, as long as you remove the loaf and toss it straight on the wire rack once it’s set up enough to stay in one piece.

Here’s my adaptation of the book’s master recipe:
1. Between 4 hours and 2 weeks before I know I’ll be wanting some bread, I grab my ventilated bucket (2 for 17 bucks on amazon.com, search for “bread bucket” or “cambro bucket”. Punch some air holes with a screw driver. Or you could use a very big bowl with some perforated plastic wrap) and mix together these ingredients, making sure there are no dry spots in the dough. Sometimes I make a batch and a half, which seems to fit perfectly in my 8-quart bucket. This dough will be extremely wet. Don’t worry, it’s not supposed to be knead-able.
3 cups lukewarm water
1 tablespoon kosher salt
1 1/2 tablespoons granulated yeast
5 1/2 cups of bread flour (or 6 1/2 cups all-purpose flour)
2. Allow the dough to sit at room temperature for 2 hours to rise. It will more than double in volume.
3. Transfer the bucket to the fridge for at least 2 hours and up to 2 weeks.
4. When I’m ready to bake some bread, I grab the bucket, throw some flour on the counter, and pull out about a 1 pound ball of dough. Then I quickly shape the dough into a loaf, stretching the top of the dough around and to the bottom and tucking in the edges, until it forms a smooth oval on top (other shapes are perfectly acceptable). It’s important to work quickly here so you don’t knock all of the air bubbles out of the bread. Place the dough on a piece of floured parchment paper on a cookie sheet.
5. Let the formed loaf rest for about an hour in a warm place (like on top of a preheating oven!) and preheat your oven to 425 degrees. This will most likely take longer than the oven says it will – give it at least a half hour to heat up.
6. When your loaf is rested and risen, spray the top with water, or brush some on with a pastry brush. Make a few 3/4 inch deep gashes in the bread with a bread knife so it keeps its shape when it bakes.
7. This is a really important step, because it makes a massive difference in the final product: place a metal tray of hot water in the oven. This creates steam and helps your bread form a crisp crust. I use an 8×8 square pan, but you can use anything metal that will hold a few cups of water.
8. Place your loaf in the oven on the cookie sheet and bake for 15-17 minutes. Then remove the loaf from the cookie sheet and bake for another 20 minutes directly on the rack. The total baking time will vary by the size of the loaf. You’ll know it’s done if: it’s deeply golden on the outside, possibly even brown in spots, it’s got a hollow sound when you thump it with your fingernail, and when you smell it, it smells like perfect bread, not tangy-yeasty dough. If you take it out and it’s not quite done, throw it back in the oven for a few more minutes. No big deal.
You’ll get really good at baking bread the more you do it, but this recipe makes such stellar bread that I promise your first loaf will be amazing. You’ll be hooked. And you’ll want the book, which has a billion more awesome recipes, from challah to rye to freaking cinnamon buns.
One last tip: first-timers should start with a small loaf – a chunk of dough about the size of a large orange.
Any questions?
OMG. I need. In my stomach. Now.
Caitlin — March 23, 2012ahhh i LOVE this bread so much. we used to make it in our old house all the time. problem is, we don't have a real oven now (ours is a microwave-sized convection oven) so we can't do the hot water step. that is really the biggest sacrifice that robbie's had to make for living in dc.
hannah — March 23, 2012Hey lover! Thanks for posting about the bread. It motivated me to get out of my funk and start baking again, so i made a coiple of batches last night. Oneis to start using right away and the other im allowing to sit longer for a stronger flavor. I was at Ikea yesterday and found the perfect containers for the bread. Here's the link: http://www.ikea.com/us/en/catalog/products/40131909/ There's a vent in the lid and it's a 7 qt container and only about $7...perfect! Also, if you're ever unsure if your bread is done or not (because I've had bread that is perfectly browned on the outside and not done in the center)' you can temp your bread. This bread is A lean dough, so the minimum temp needs to be 190-212 F. If its bread that has sugar, milk, eggs, or fat (so, anything other than the basic flour, yeast, salt, and water), then the temp needs to be between 180-190 F. Hannah- you can always throw some ice cubes in the bottom of your little oven at the very beginning of baking and you will achieve the same results. I can't wait to see your hot body in a couple of weeks. Love you.
Tricia — March 24, 2012Tricia! Excellent advice! I don't know why it didn't occur to me to use a thermometer, but I definitely will next time. I kind of like that funk that the dough gets when it sits for a while too - like mild sourdough. You are a wealth of information. Can't wait to see you!
Courtney — March 24, 2012[…] not really a pizza dough expert, but I’ve used the exact same artisan bread dough (in 5 minutes a day) recipe for pizza and I liked it a lot, though the dough was a little tricky to […]
Grilling Pizza | Sweet Salty Tart — August 7, 2015Where can you buy a bread bucket with VENTING lid?
Nick Echo — February 27, 2016Hi Nick! I used an ice pick heated over the stove to punch holes in the lid of this one, but I've heard people say if you just leave the lid cracked slightly it's enough to keep the container from pressurizing. I poked around the internet a bit and didn't find anything that really fit the bill, but I'll update you if I find something that seems practical!
courtney — March 14, 2016