I have a lot of low-brow food loves, and a particular soft spot for cheap frozen pizza. It’s so convenient and disgustingly delicious and you get to eat it straight out of the oven and it burns the roof of your mouth in that annoying way that is almost endearing…certainly nostalgic anyway (oh, college). When Cody and I were newlyweds I fed it to him so often that he got sick of it and made his mind up to never eat it again, which nearly broke my heart at the time. I’m almost thirty now, and I have to admit it’s probably for the best that I stay away from that particular section of the grocery store.
But cheap frozen pizza from the grocery store isn’t the same thing as pizza that happens to be frozen for later consumption. So with this loophole in Cody’s moratorium, frozen pizza is back in my life. I just have to make it myself. And I must admit, it tastes better than the store bought stuff. Plus I get to pick the toppings, I know where they come from, and I know the kitchen that prepared them isn’t infested with rodents or anything, so it’s a win-win-win.
Making frozen pizza is easy: just blister up some pizza dough in a pan on the stove or on the grill, let the cooked dough cool off, add your toppings, freeze the pizzas, and wrap them up. Then when you want pizza, you preheat your oven and ten minutes later you can be torching your mouth with a hot and crispy slice.
Homemade Frozen Pizza
Ingredients:
-pizza dough (use your favorite, store bought or homemade)
-your favorite pizza toppings
Method:
1. Roll out balls of pizza dough into rounds that will fit inside your cast iron pan, griddle, or on the grate of your outdoor grill.
2. Cook your pizza dough over medium to medium heat, flipping once, until both sides are lightly browned in spots and the dough is fully cooked (pan-cooked dough will be blistered like a tortilla in spots, but mostly white). Don’t try to brown your pizza too much during this step, because it’s going to be blasted in the oven again before you eat it. Get a few brown spots for flavor, but keep the overall color pretty pale and just barely cooked through.
3. Allow your cooked pizza crusts to cool to room temperature while you gather your toppings. If you are using raw meats, cook them first. Fresh veggies should be chopped and can be pre-cooked if you like, but it’s not totally necessary since the pizza will be baked again later.
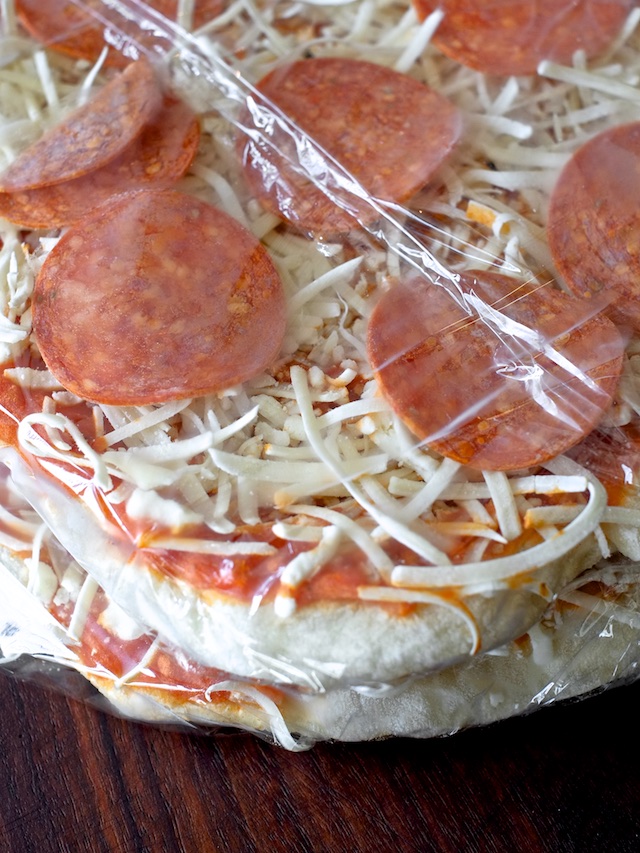
4. Assemble your pizzas and put them on a baking sheet. Clear out a spot in your freezer where the pizzas can freeze, unwrapped, for at least 2-3 hours.
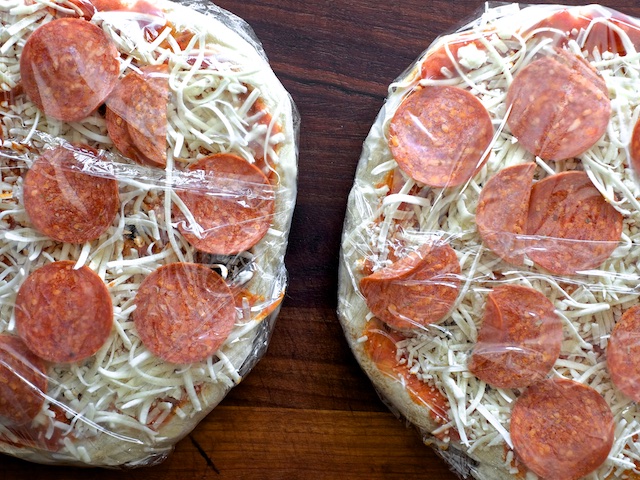
5. When the pizzas are frozen solid, wrap them with a few layers of plastic wrap and put them in a gallon-sized freezer bag (if they will fit, if not use a layer of foil).
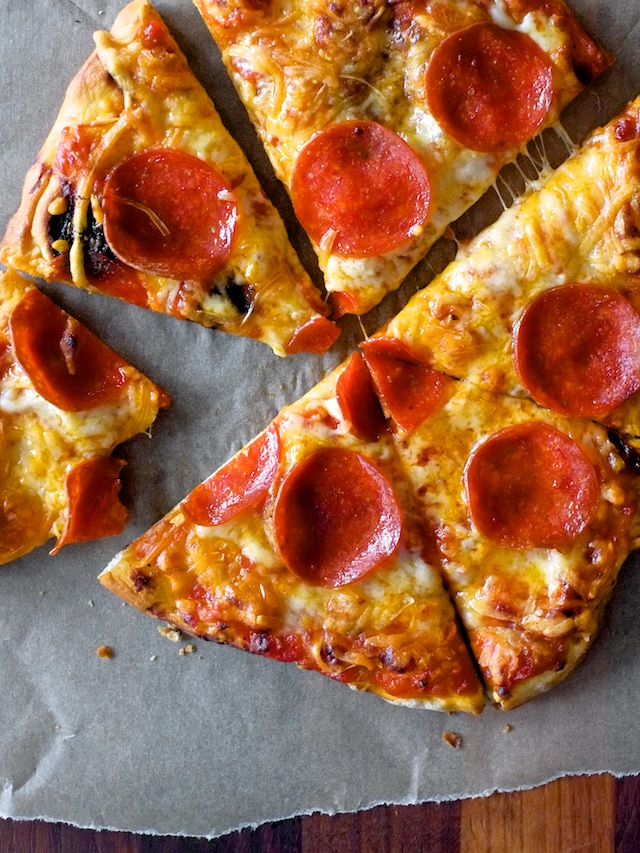
6. When you are ready to eat pizza, preheat your oven to 450F and place a rack in the bottom third of your oven. Then unwrap your pizza and throw it straight on the lower rack with nothing underneath. Bake your pizza for 10-12 minutes until it’s crispy and brown and the cheese is bubbly. Eat it straight off the cutting board for nostalgia’s sake.
brilliant idea courtney! it's so easy to double a batch of dough...totally using this idea soon!
emily — August 16, 2015Thanks Emily! I hope you like it. Let me know if you have questions or run into any bumps.
courtney — December 6, 2015What a beautiful blog! I stumbled upon your site through food blogger pro. I am going to try these pizzas very soon!
annie — October 27, 2015Thanks for stopping by Annie! Let me know how it goes if you try them!
courtney — December 6, 2015