Simply the Best

I told myself I’d try to post every week for a year, but the muses weren’t singing to me this week so you get a “best of” roundup instead of anything useful. You’re welcome!

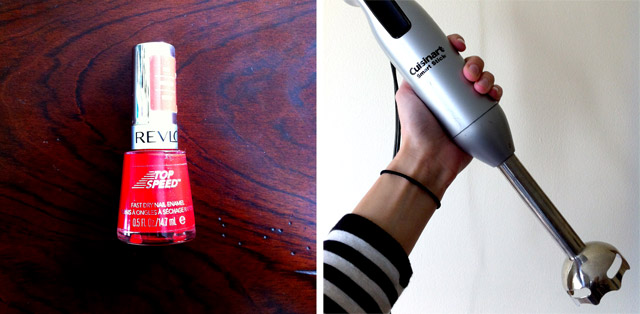
1. Best drug-store nail polish shade: Revlon Top Speed in “Fire”. It’s very red and very firey with some orangey undertones. I always feel super sassy when I wear it, and it dries in about 3 minutes which is fab.

2. Best kitchen gadget that looks like a bedroom gadget (especially when held thusly): Cuisinart Smart Stick. This thing is a blender without the pitcher, which means you can use it to puree soup in the pot, emulsify salad dressing in a jar, and generally upgrade and simplify your life without adding to your dirty-dish load. I use mine every week.
Nail Polish and Blender

3. Best little-known beauty trick: Fake it ‘Til You Make it. First coined by YouTube beauty gurus Michelle Money and Laura on the MM and L Show it’s my favorite tip for extending the life of a hair wash. For all you ladies trying to be more French  and wash your hair no more than twice a week to maximize texture and je ne sais quoi (I know I am!), this tip is invaluable. You basically wash the front of your hair, sectioning off a chunk that starts behind your ears and goes straight up your scalp to include your bangs. Put the rest in a bun (and a shower cap if you have it) hop in the shower, and shampoo (or do like they do in the video and use the sink). You get to freshen up the most visible parts of your hair while keeping all that lovely dirt and texture in the back, like a dirt mullet – a sexy dirt mullet that makes you feel like Brigitte Bardot.  Anyway, the MM and L Show comes off as a bit silly and the girls are so obviously from Utah, but they have tried every beauty product under the sun and after following many of their recommendations I have come to trust them implicitly. P.S. don’t forget the dry shampoo! Skipping washes is pointless without dry shampoo.

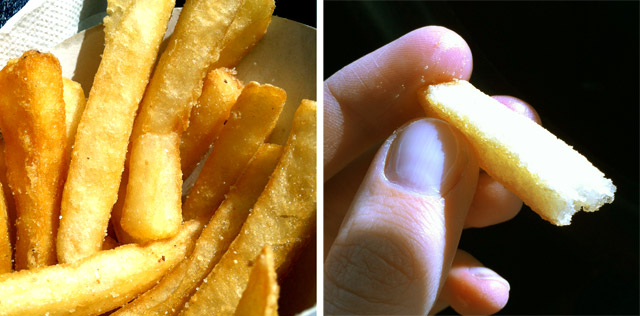
4. Best Fast-Food Fries: Burger King. It’s been a while since you’ve been to Burger King, amiright? While you were away they perfected the art of the fast food fry. BK fries are always crispy on the outside and fluffy and magical on the inside, unlike McDonalds fries which are usually more like rubberized, hollowed-out potato sticks. What BK figured out is that in order for once-frozen then fried fast-food fries to be consistently successful, they need to be thicker, or the middles dry out. A+ for Burger King in french fries 101.
Fries from Burger King

5. Best French Rom-Com: Priceless. This movie is so charming and adorable. Audrey Tautou plays a gold-digger living in the French riviera who falls for the wrong guy. Predictable? Yes, but so fun and so pretty and I bet Ms. Tautou can go two weeks without washing her hair, with all that je ne sais quoi. Oh, the trailer is pretty bad too, but trust me the movie is awesome.

  1. i totally got robbie a new immersion blender for christmas (maybe the same one?) because the one we got for our wedding died a sad, slow death from overuse. we just loved it too much. also, priceless! that movie is so cute. i don't remember when we watched it but i concur with your assessment.

    hannah — February 28, 2013
    1. I know, I love this blender! I'm sure there are higher quality models out there, and I'll probably have to upgrade at some point, but it does the job. It does many jobs. It was fun seeing you guys in DC, come up north and we'll give you the grand Bel Air tour :)

      courtney — March 7, 2013
    2. reply
cancel reply

Basics: Knife Skills

Knives

There are as many knife skills tutorials on the internet as there are food websites so I will likely be echoing a lot of the things you’ve probably already been told. That said, my personal knife philosophy is a bit simpler and further distilled than most, so hopefully you will find it useful.

There are three distinct knives that every functional kitchen should have in its drawers: a paring knife, a bread knife, and a chef knife. The chef knife will be used for ninety percent of kitchen tasks, but try cutting a bagel with a chef knife and you’ll see why a bread knife is mandatory. To be honest, I rarely do any paring, but it’s handy to have a smaller knife around for tasks where a chef knife would be clumsy. My chef knife is pictured above on the right. It’s a Victorinox knife with a “fibrox” handle, nothing fancy, but it’s sharp and comfortable and it was under thirty dollars. The other two knives are Wustof and they belong to my parents ’cause I’m cheap.

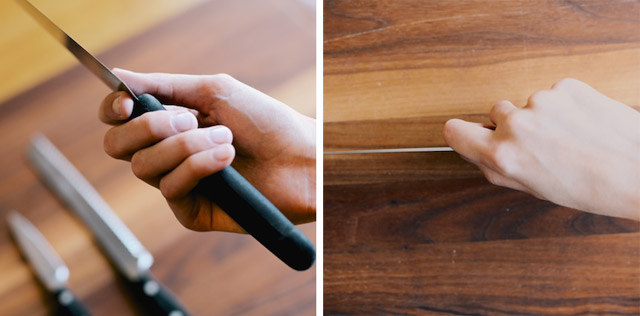
I have come away from reading and watching knife tutorials in the past feeling overwhelmed and discouraged by the delicate cuts, precarious positioning, and every professional chef’s ability to look straight into the camera while breaking down onions at a mile a minute. While the skills outlined in their tutorials will make you faster and safer (while cutting at sixty miles per hour), those of us who don’t need to be able to chop five pounds of potatoes in thirty seconds can get by with fewer rules. So here are my cardinal rules: Keep your knives sharp, watch your fingers, and hold your chef knife like this:

Knife Hold

Pinching the blade like this will help you control your knife better. The sharper your knives are, the less brute force is required to cut your food, and the less likely you are to do anything spastic. Bread knives can be held without pinching the blade, but make sure you use minimal downward pressure when sawing into your bread, and let the bread knife’s teeth do the work. We’ll talk about paring later.

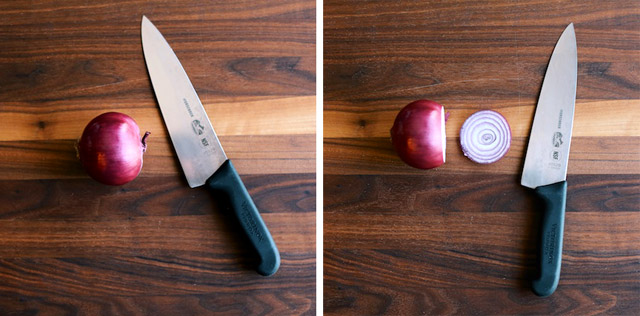
Now for some practice. Because I think my onion-dicing method is the best, I’m going to show you how it’s done. Start by removing the stem end of an onion and leaving the root end in tact (the root end is the hairy looking end FYI).

Onion De-Stemmed

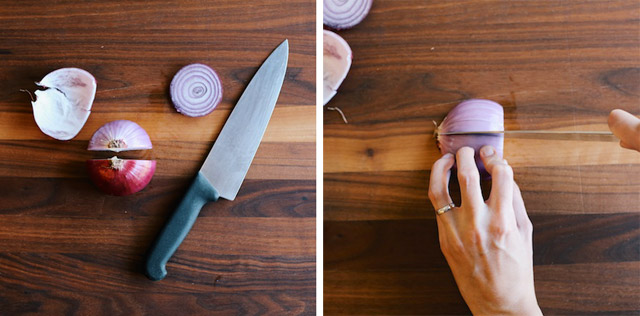
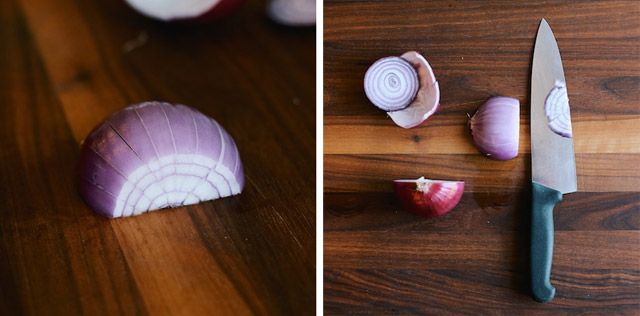
Then, cut the onion in half longitude-wise (you know, like on a globe) and remove the outer-most layer. Use the tip of your chef’s knife to cut the onion radially without cutting through the root.

Onion with Radial Cuts

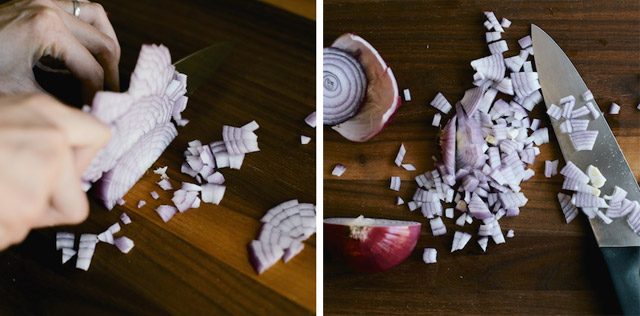
See! That’s what radial cuts will look like on your onion half. From there, you just cut slices in the opposite direction (as pictured below) and end up with lovely diced onions.

Diced Onions

More Diced Onions

As you can see, I haven’t mastered the art of keeping my fingers tucked in while chopping. Maybe one day I will, but in the meantime I’m going to watch my fingers and keep chopping precisely how I like.

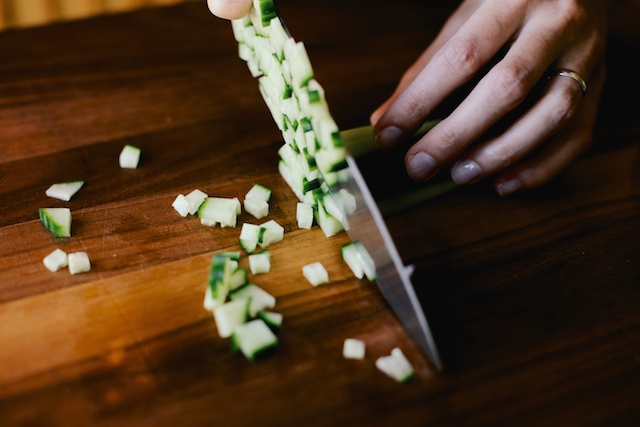
Cucumber

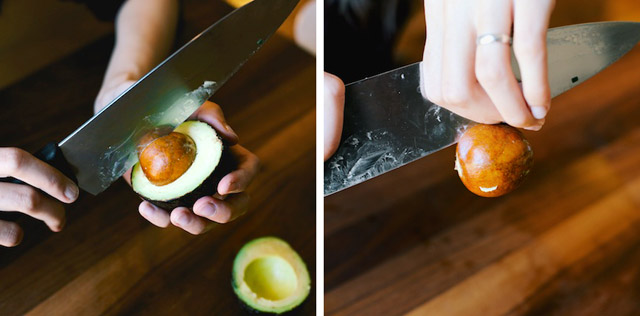
Ah, avocados. However you like cutting these is fine with me, but I will offer this suggestion for removing your pit from your knife: pinch the pit from the opposite side of the knife until the pit pops off the blade. A little less dangerous than simply grabbing it, wouldn’t you say?

Removing an Avocado Pit

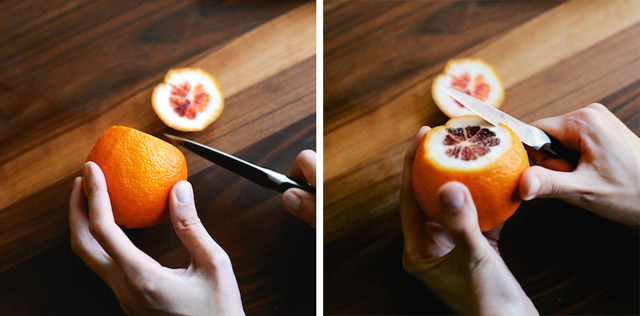
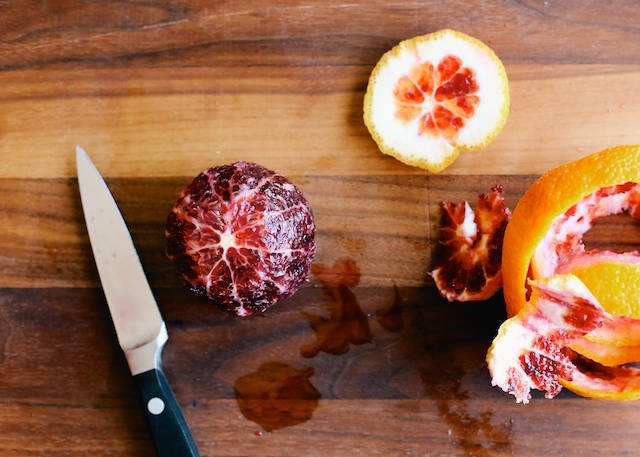
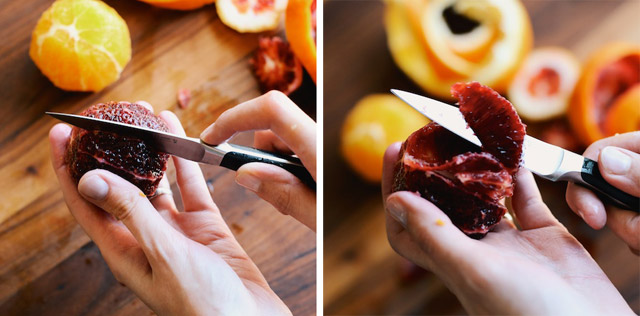
And here’s how you pare the peel from an orange. I like to start by removing the top, and from there you work the blade through the peel with your thumb, wiggling the knife back and forth as you go (since it’s hard to saw with such a tiny blade). It’s kind of hard to describe, but the pictures should help.

Paring an Orange Peel

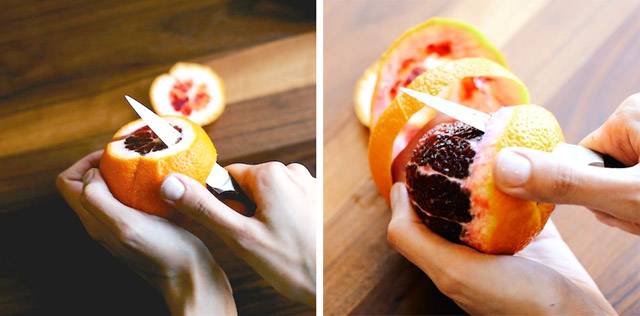
It’s not mandatory that you remove the peel in one solid coil. I have lots of practice because I was picky about my grapefruits growing up. No skin allowed.

Paring an Orange

Pared Orange Peel

Now I’m taking the sections of the orange out from between the membranes. All you do is slide your blade between the membrane and the fruit on either side of each section, and they will pop out easily. This would be stupid to do with a chef knife, obviously, and thus the paring knife finds its validation.

Sectioning an Orange

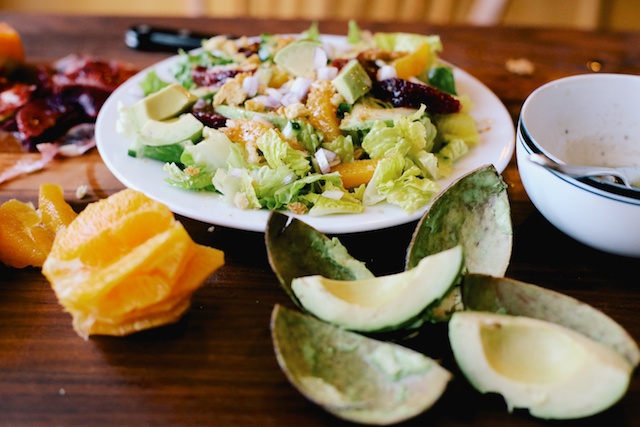
OH hey, while we were learning all about knife skills we prepped enough fruits and vegetables for a pretty salad.

A Pretty Salad

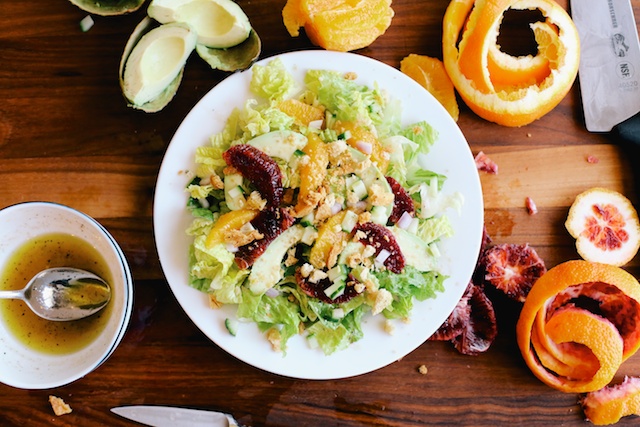
Whip up a vinaigrette with two tablespoons of lemon juice, a tablespoon of red wine vinegar, three tablespoons of olive oil and a teaspoon of honey. Season with salt and pepper and top it all with crushed croutons (preferably homemade).

A Delicious Salad

A fruitful conclusion to a very basic tutorial. Now go chop something.

cancel reply

Pho Real

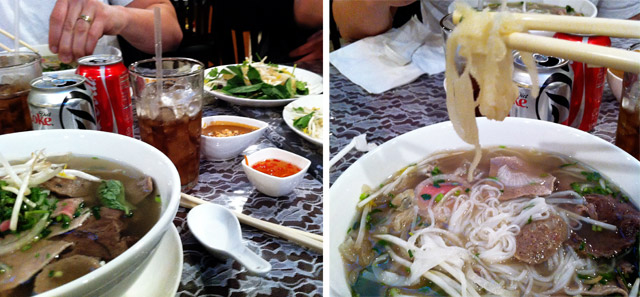
We finally shook off the winter doldrums this weekend to visit with some friends and try some Pho. I know Pho has been the thing forever, but this was my first and didn’t disappoint. I had a giant bowl of “B1” which contained sliced beef (initially raw, cooked by the hot broth that was poured over top), brisket, tripe (!) and tendon (!). Having tripe and tendon was a fun experience, but the broth completely stole the show. For those of you who haven’t had Pho, know that tripe and tendon are not mandatory. In fact, most of the combinations centered around more traditional cuts of meat with rice noodles and more of that amazing broth. Pho also comes with plates of sprouts and fresh herbs and jalapenos and limes to garnish. It’s a hot, salty, fresh, spicy experience and an all-around good time.

Pho Real Menu

I’ve been geeking out over the online menu and this place seems pretty legit. I can also attest to the deliciousness of the spring rolls and summer rolls, but there are whole sections of the menu I didn’t notice on my visit. There’s a “rice special” section that boasts a “broken rice” dish with pork and a fried egg. There’s also a “clear rice noodle and hot beef soup” section and just, I mean, I want it all (PS that’s the tripe, below on the right, pretty blurry).

Pho and Tripe

In other news, I finally jumped on the high-waisted jean bandwagon, which may have already had it’s day. I was a little put-off by the uterus-highlighting effect of such a long fly zipper, but as long as I keep my shirts un-tucked, these pants are winners. Good-bye muffin top. Hello giant bowls of rice noodles and funky meat. 2013 is looking mighty fine from here.

  1. this looks pho-cking delicious.

    Caroline — February 12, 2013
    1. T'was my dear! I'll take you out for some!

      courtney — March 7, 2013
    2. reply
cancel reply