Pre-Thanksgiving Food Prep

You’ve probably had your Thanksgiving menu planned for a while now. You might even have it broken down into a schedule: Tuesday brine the turkey, Wednesday assemble the stuffing, etc. I’m here to ask you, what are you going to eat BEFORE Thanksgiving.

I ask this because I think managing our time and energy gearing up for a big holiday event like this can set us up for happier holidays. I have made the mistake of trying to make something labor-intensive like lasagna the day before Thanksgiving and been sort of burnt out, not to mention the lack of fridge space when you’re storing leftover lasagna.

Basically, you need to PLAN AHEAD. Plan to GIVE YOURSELF A BREAK before you are drowned in turkey and stuffing. A break from cooking, a break from washing dishes, a break from poultry, a chance to clean out the fridge in anticipation of what is coming. If that means sandwiches and fast food, that is totally fine, just take your tasks and schedule into consideration and PLAN it. For myself this year, I decided to try meal prep.

This prep is designed to take about 2 hours on Friday night or Saturday day and provide you with a solid head start on dinners and snacks for the 5 days leading up to Thanksgiving. You can plan on being able to serve 4 with the amounts I suggest, so adjust according to your family size. Cody and I used leftovers for lunch since it’s just the two of us. Apart from the prep you’ll have some reheating, chopping, and an optional “breakfast for dinner” day to cook. Here’s how it breaks down:

Saturday: breakfast for dinner

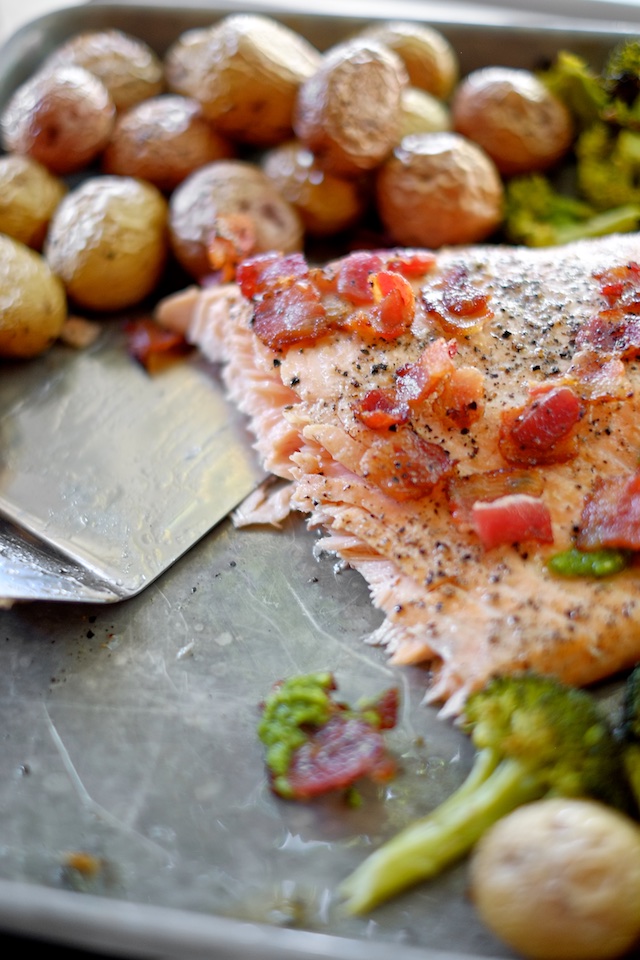
Sunday: pot roast with potatoes (or rice/cauliflower rice), carrots, and salad

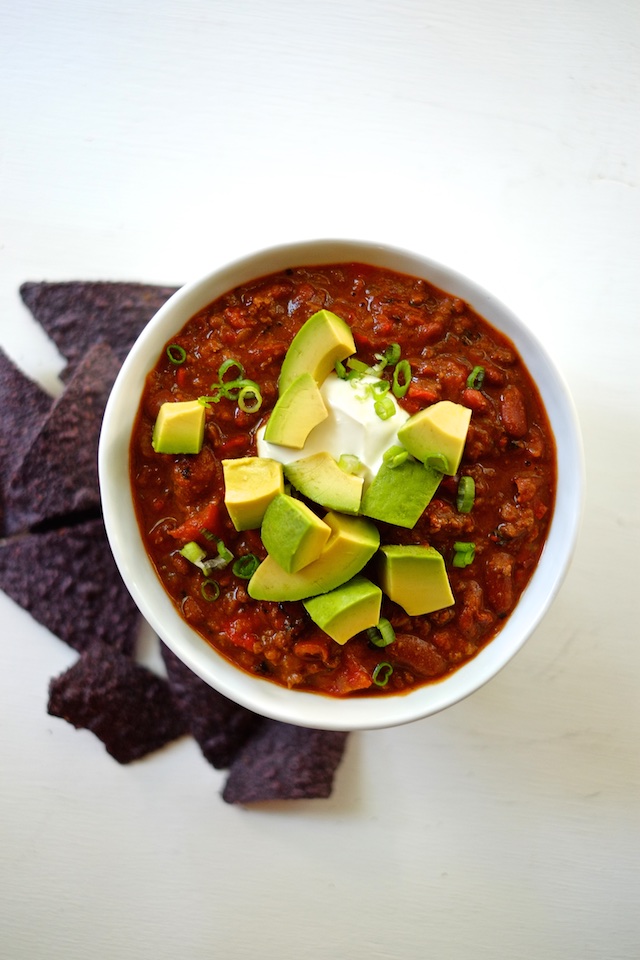
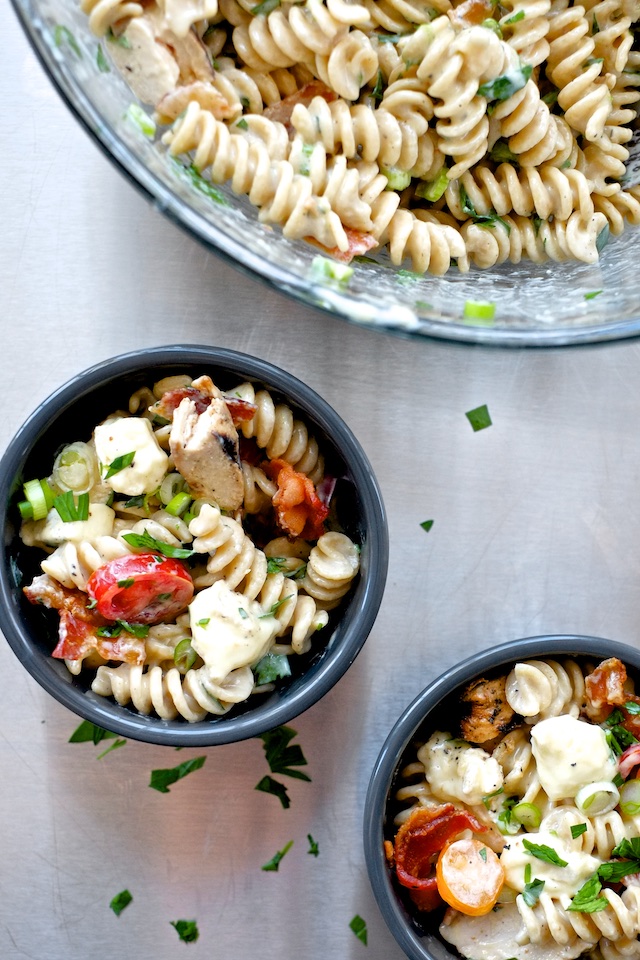
Monday: shredded beef burrito bowls

Tuesday: snack dinner (clean out the fridge)

Wednesday: soup and any leftover salad

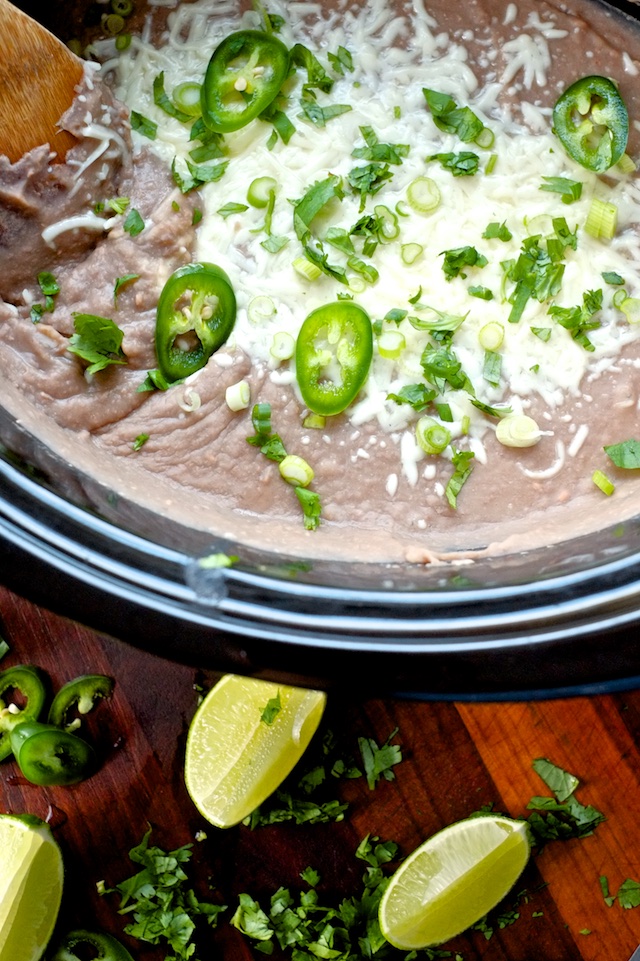
Lastly, I want to add that I realized this prep would be easier/more delicious if I cooked potatoes in the pot with the roast for that meal and replaced the rice with black beans for the burrito bowls. If you love rice (or cauliflower rice) do that, but if I’d had my head on straight when I was planning this I would have done potatoes and beans, because I love both. Cauliflower rice is admittedly probably better for my health, but everyone’s different so do you.

Grocery list:

Meat:
1 2-3 lb chuck roast
1 lb italian sausage

Refrigerator section:
ranch dressing
eggs (snacks and breakfast for dinner)
fun cheese (optional, for snack dinner)
taco bowl/snack cheese (something versatile like cheddar or monterey jack)
parmesan cheese (optional, for soup)

Fresh Produce:
avocados (optional, I like them for breakfast and burrito bowls)
1 pint cherry or grape tomatoes
about 1 1/2 pounds baby potatoes (not necessary if you’re going with rice)
about 2 lbs carrots
1 bunch celery
2 bell peppers
about 2 heads romaine (or other) lettuce
3 yellow onions
2 zucchini
3 cloves garlic

Frozen section:
2 bags cauliflower rice (if you’re going that route)
1 bag frozen kale
1 bag frozen hash browns (or whatever you like for breakfast dinner)

Pantry/grocery section:
dried thyme/rosemary/basil/oregano or “italian seasoning”
olive oil
1 can beef broth (or enough boullion for 1 cup)
1 can chicken broth (or enough bouillon for 2 cups)
2 cans white beans
1-2 cans black beans (depending on how many people you’re feeding)
1 can red enchilada sauce
white wine (works well in the soup, can sub a very small splash of cider vinegar or white wine vinegar)
cornstarch


Prep session steps (plan on this taking 2-3 hours):

1. Chop lettuce for salad, 2 onions for roast (chunky) and 1 for soup (proper dice). Then chop carrots: about 2-3 cups chunky for roast, 1 cup diced for soup, the rest into sticks for snacking. Wash your baby potatoes.

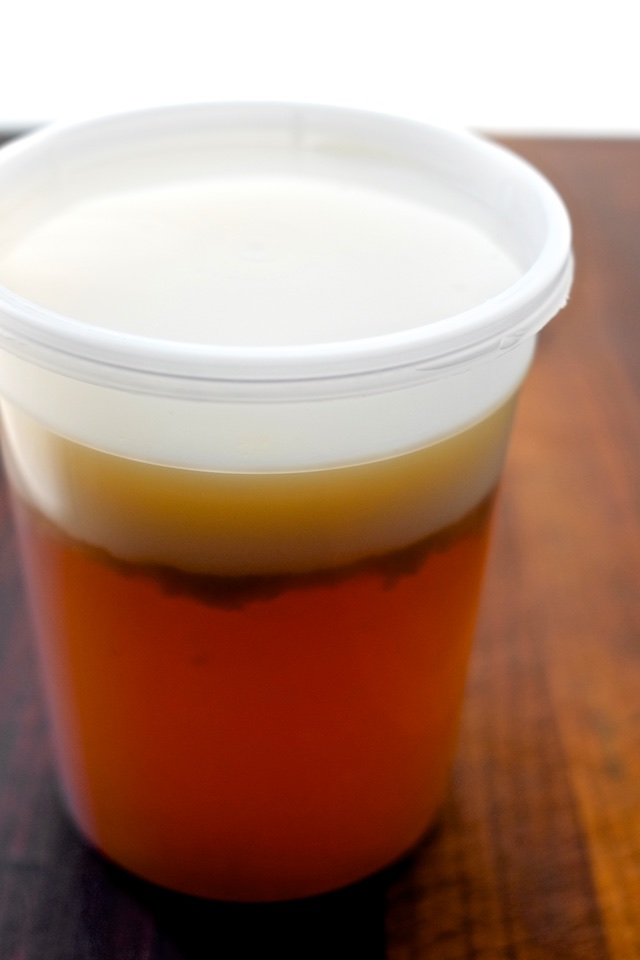
2. Salt and pepper your roast, sear it and put it in the crock of your instant pot or slow cooker. Add 1 cup of beef broth, the chunky onions, carrots, and baby potatoes, and cook at high pressure for 1 hour or in the slow cooker on low for 6-8 hours. If it’s not as tender as you want, it needs more time (full recipe below).

3. Dice 1 cup celery for soup, and cut the rest into sticks for snacking (or save it for another recipe). Dice zucchini for soup, slice peppers for snacks (and burrito bowls), grate cheese for burrito bowls and slice the rest for snacks, then mince your garlic for your soup.

4. Make your soup (recipe below).

5. Boil eggs (for snacks/snack dinner).

6. Make rice or saute your cauliflower rice or drain and rinse your black beans.

7. Cool everything down, pack everything up, and put it in the fridge.

Saturday: So for me, breakfast for dinner means eggs. Depending on how healthy I want to be I’ll saute veggies and spinach to go with them or follow my heart to hash browns. These hashbrowns above were a blend of yukon gold, sweet potato, and carrots from my local grocery’s freezer section. No prep is required for this one – it cooks quickly and the mess should be pretty minimal. If you want to add sausage (me too) or make pancakes instead, do it! But adjust your grocery list first.

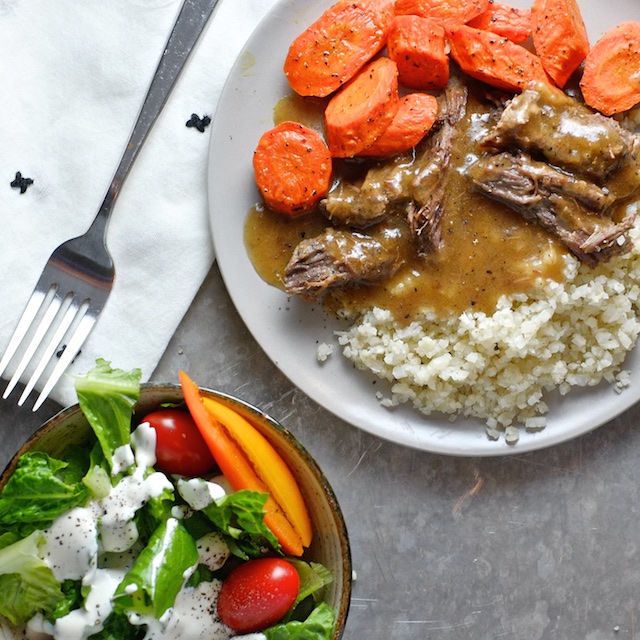
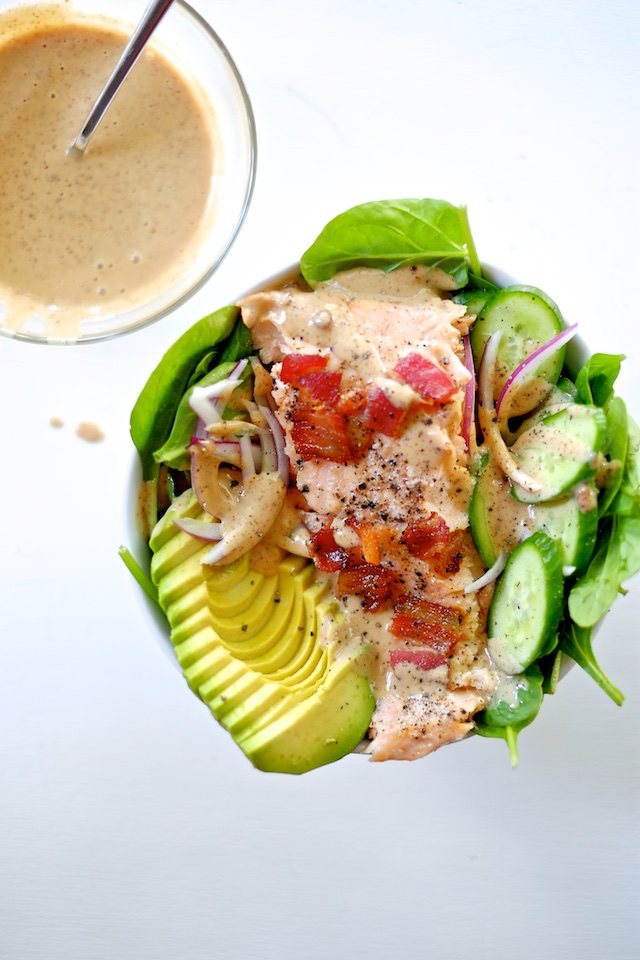
Sunday: Reheat your roast and veggies, whip up a side salad by tearing lettuce with your actual hands.

A Really Basic, Versatile Roast for Instant Pot or a Slow Cooker

Ingredients:
1 2-3 pound chuck roast
salt and pepper (lots)
1 cup beef broth
2-3 cups carrots, cut into 1/2 inch chunks
2 onions, cut into chunks
1 1/2 pounds (or so) of baby potatoes, washed
1 Tbsp cornstarch

Method:

1. Chop all your veggies.

2. Season your roast liberally on all sides with salt and pepper and sear it in your instant pot or in a pan.

3. Nestle your seared roast in the bottom of your instant pot or crock pot and pile in the onions, carrots, and potatoes.

4. Cook in the instant pot on high pressure for one hour with natural release. If you are using a slow cooker, cook for 6-8 hours on low or until desired tenderness is achieved. Not tender enough? Add more time.

5. Remove potatoes, carrots, and roast to a serving dish.

6. Make gravy from the drippings left in the pan with a cornstarch slurry. To make the slurry, combine the cornstarch with 2-3 Tbsp of cold water in a jar. Set your instant pot to “saute”, shake the slurry well and pour into the leftover juices from the roast to make gravy. If you are using a slow cooker that doesn’t have a saute function, you can transfer the drippings to a pan and turn the pan to medium heat before adding the slurry, or you can just serve the roast with drippings instead of gravy (no biggie).

7. RESERVE enough roast for burrito bowls tomorrow.

8. Serve the remaining roast with carrots, potatoes (or rice prepped earlier if that’s what you are doing), and a side salad.

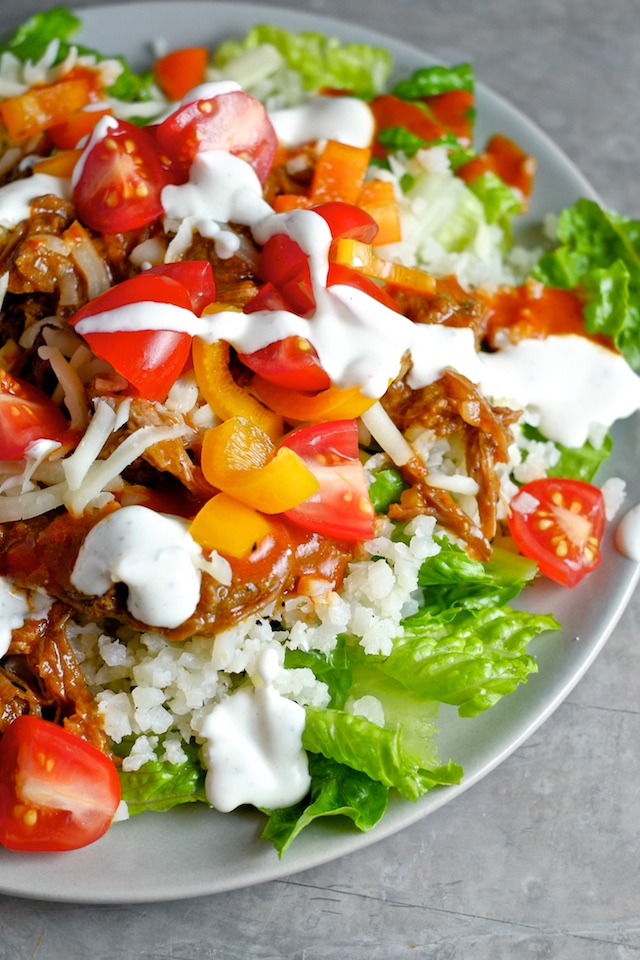
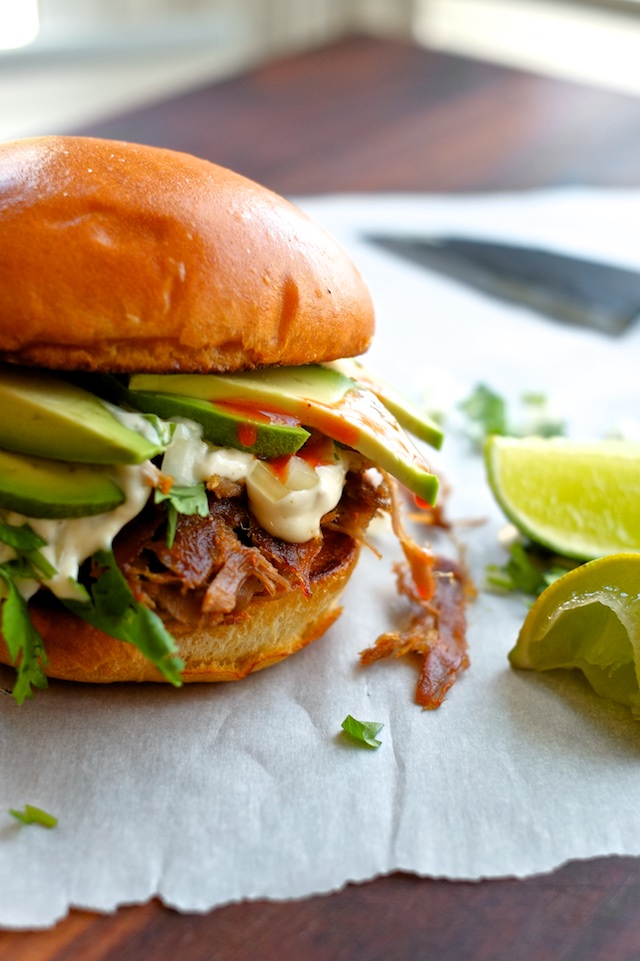
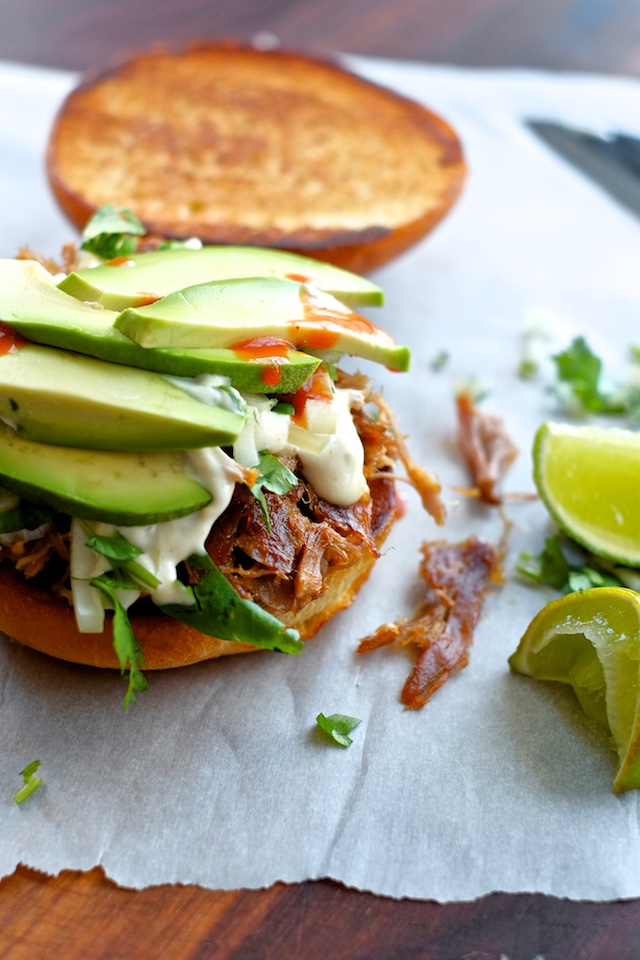
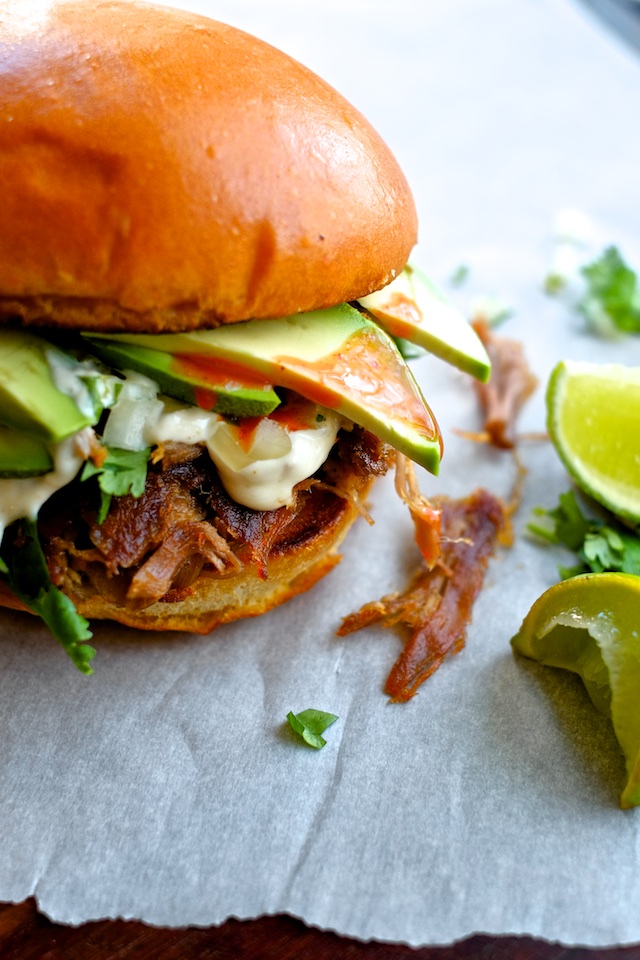
Monday: For burrito bowls, you don’t need a recipe. Just do this:

1. Reheat your leftover roast IN your red enchilada sauce (pour it on top first). Using a pan on the stove or a dish in the oven would be preferable here, but the microwave is fine.

2. Tear up some lettuce and top it with rice or beans, beef, shredded cheese, tomatoes, sliced peppers, and ranch. It’s basic but it ticks all the mandatory flavor boxes IMO.

3. Eat.

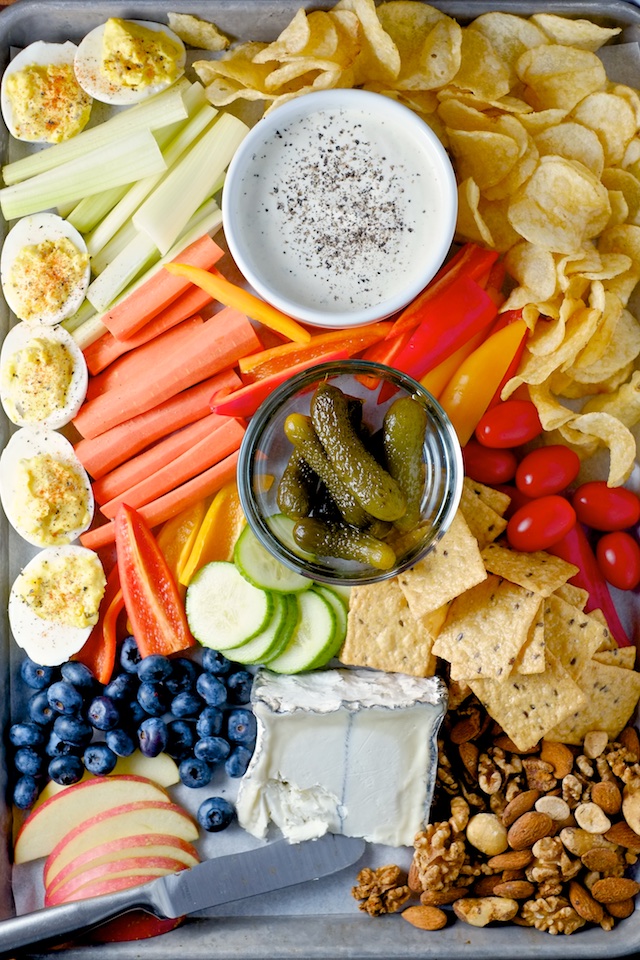
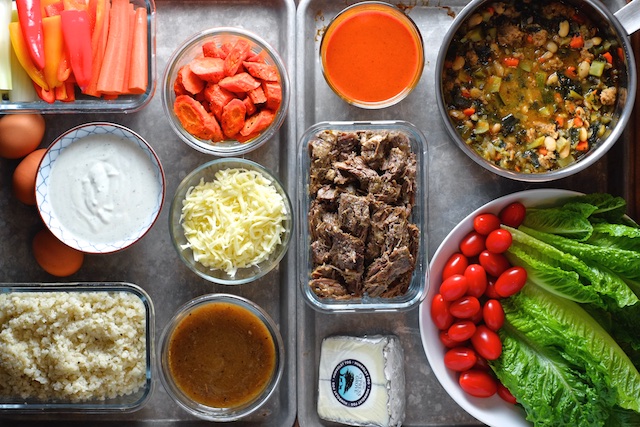
Tuesday: Snack dinner.

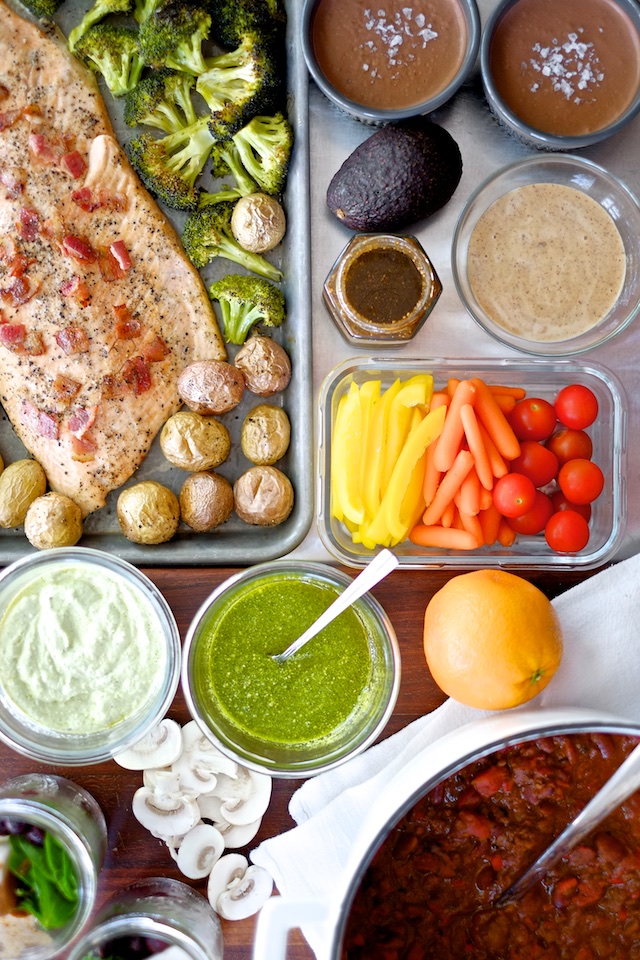
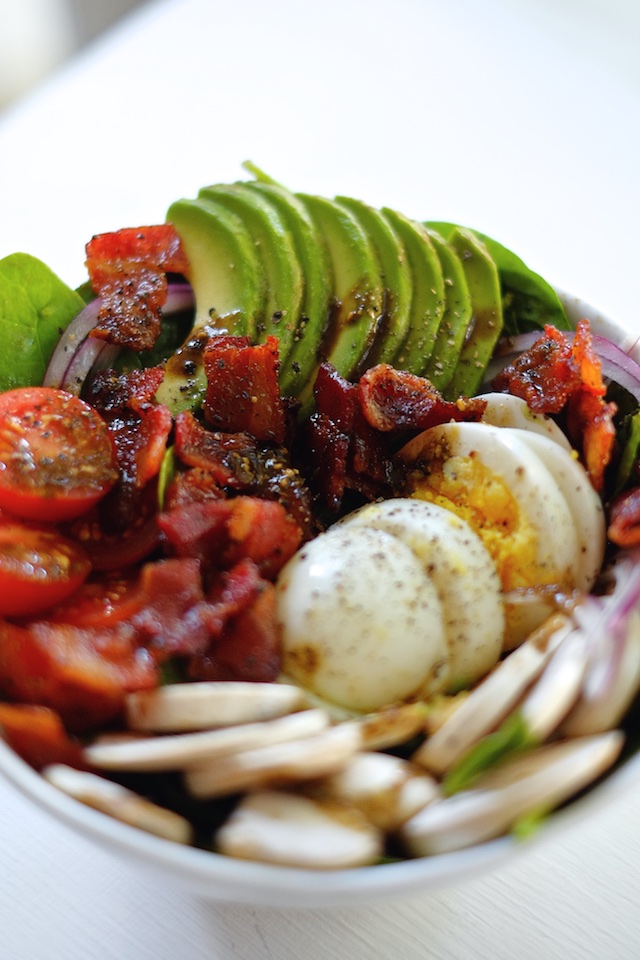
The spirit of snack dinner is to pick one or two things in advance, like a dip and a fancy cheese, or some meatballs or charcuterie, and just put out everything else you find in your fridge and pantry that could possibly qualify as a snack. This tray above is pre-meditated if casual, but yours doesn’t have to be at all. Everything looks better when it’s laid out together on a tray like this, and that jar of olives that’s been sitting in your fridge for a year can finally find a purpose.

If you followed all the prep instructions I laid out, you might have some fancy cheese, some casual cheese (lol), hard boiled eggs, celery, carrot sticks, and bell peppers to play with. I am usually surprised by how abundant my snack situation is when I really start looking. Maybe I’m weird in that regard but I have a feeling I’m not. Think outside the box: popcorn, leftover quesadilla, steamed broccoli revived with a shower of olive oil and parmesan (put toothpicks in them and it’s an appetizer). Clean out your fridge!

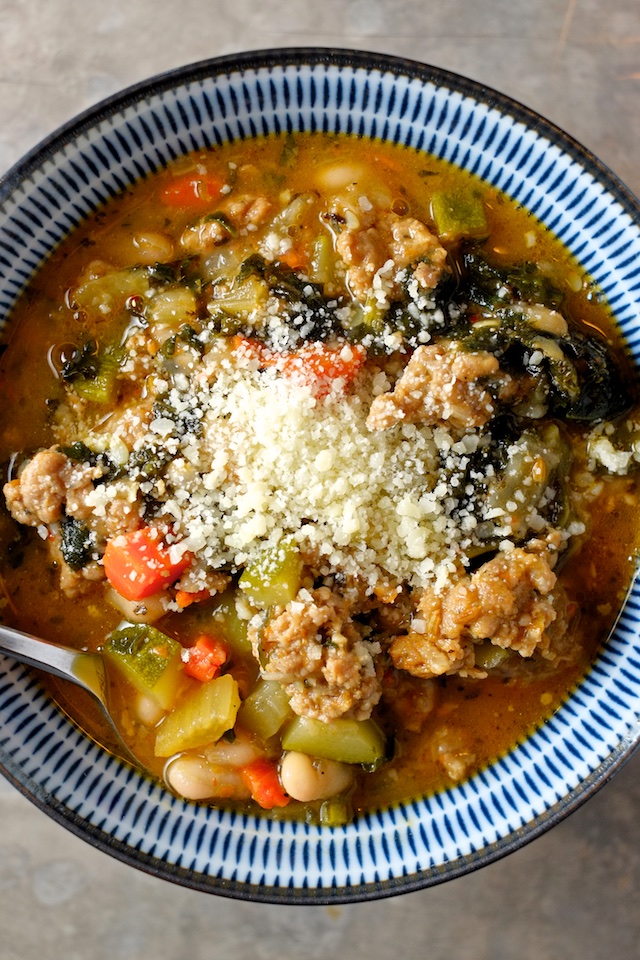
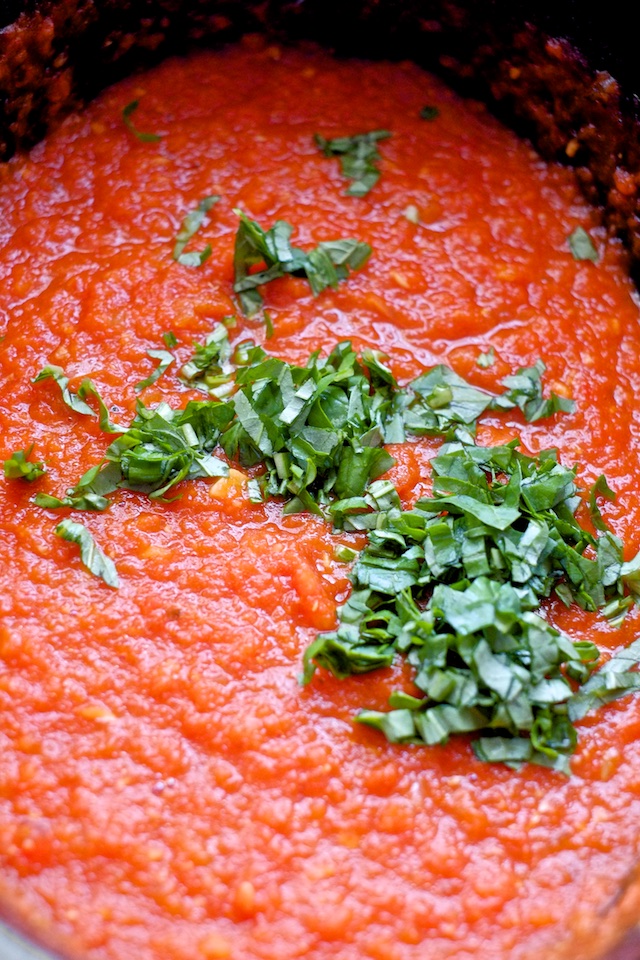
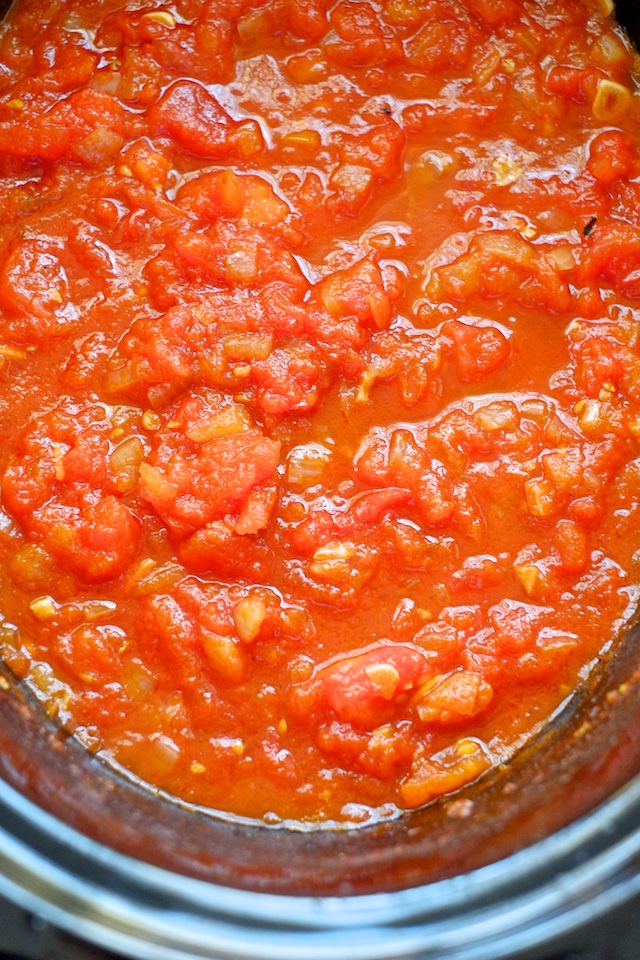
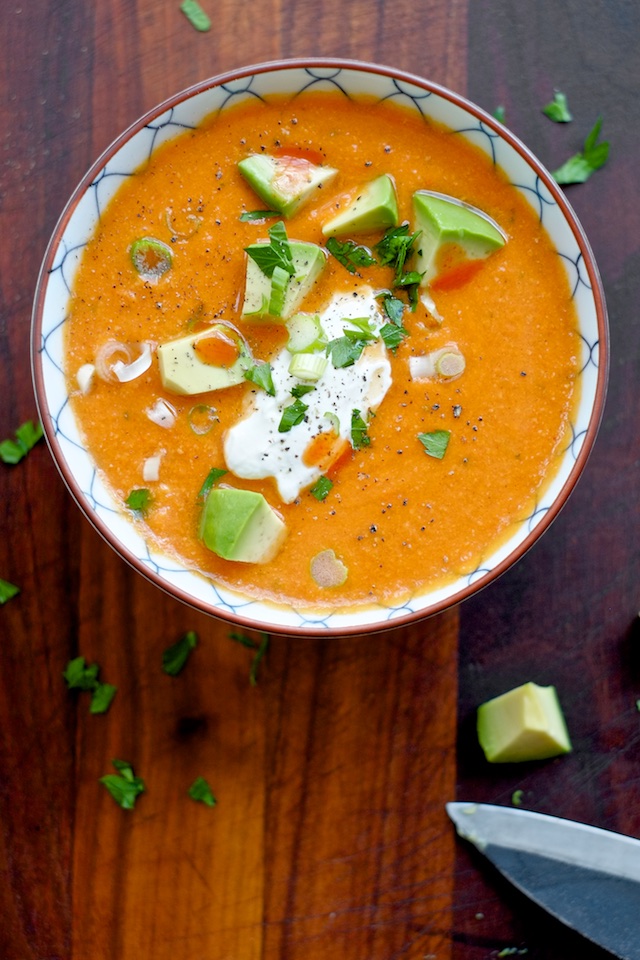
Wednesday: This soup is like a cross between Zuppa Toscana and Minestrone. Like slow-carb (beans are the only carb) minestrone without the tomatoes, or Zuppa Toscana without the cream and potatoes. Anyway it’s delicious, hearty, and kind of actually pretty healthy. What the hell should I call it?

Ingredients:
2-3 Tbsp olive oil
1 cup carrots, diced
1 onion, diced
1 cup celery, diced
1 pound italian sausage
1/2 cup white wine (or about 1 Tbsp cider or white wine vinegar)
2 cups chicken broth
3 cloves garlic, minced
2 zucchini, diced
1 bag frozen kale
2 cans white beans, rinsed and drained
2 tsp italian seasoning or about 1/2 tsp each dried thyme, basil, oregano, and rosemary
salt and pepper to taste
optional: 1/2 tsp red pepper flakes (if you have them around and like spicy)

Method:

1. Saute carrots, onions, and celery in olive oil over medium heat until soft and lightly caramelized.

2. Add italian sausage and break up with a spoon while browning.

3. Add white wine or vinegar, if using wine cook it down by half.

4. Add chicken broth, garlic, zucchini, kale, white beans, and italian seasoning (optional: red pepper flakes). Simmer for 10-15 minutes.

5. Add salt and pepper, taste, add more.

6. Serve with parmesan cheese, maybe a side salad and some bread.

cancel reply

Skin Food Meal Prep

Skin Food Meal Prep

Here it is! The grocery list, guide, and full recipes for all of the skin-healthy dishes I’ve been sharing with Sarah from @theskintervention on Instagram over the last few weeks.

If you want to make this as a one-day prep, it will take about an hour of shopping and 2-3 hours of prepping and cooking. I strongly recommend you read through everything before you begin. If you just want one of the recipes, scroll on down!

First things first: You’ll need groceries! You might have some of these things on hand already.


Produce

3-4 medium avocados
4 bell peppers
Small bag baby carrots
3 medium red onions
Cherry tomatoes
Button mushrooms
Fresh baby spinach
Cucumber
1.5 lbs baby potatoes (or any thin-skinned potatoes, just cube them first if they are big)
Broccoli (enough for 4 cups of florets)

Pantry

2 cans kidney beans
1 28oz can crushed or diced tomatoes
1 8oz can tomato sauce
1 can unsweetened full-fat coconut milk
Avocado oil (or other high-heat neutrally flavored oil)
Toasted sesame oil
Almond butter
Vanilla protein powder
Mayo
3.5 oz dark chocolate bar that you like (4oz would be fine)
Balsamic vinegar
Extra virgin olive oil
Soy sauce
Rice vinegar (you can substitute apple cider or white wine vinegar, just add a 1/4 tsp of honey as well)

Spices

Chili powder
Cumin
Garlic powder
Salt
Pepper

Fridge section

Hummus (or greek yogurt for pesto dip)
Prepared pesto (your favorite)
Eggs
Almond milk

Freezer section

Frozen blueberries

Meat

Full filet of salmon
1 lb ground beef or turkey
1 package bacon (10-12 oz usually)


Guidelines for one-day prep (should take 2-3 hours

1. Chop your veggies: onions and peppers for chili, pepper strips for snacks. Broccoli florets for salmon. Cucumber, mushroom and onion for salads. Set aside avocados for chili and salads.

2. Make the chocolate pudding in a bowl set over a pot of simmering water. Pour into ramekins and refrigerate.

3. Boil eggs in the pot you used to simmer water for the double boiler. Everyone has their own method for hard boiled eggs, but mine is best. Boil your water, add your eggs, set a timer for ten minutes, stop the cooking by running cold water into the pot until the water is entirely cool. Easy to peel, consistent results every time.

4. Make chili through step 4, let it simmer while you…

5. Preheat the oven to 425 for potatoes and broccoli, chop your bacon, unwrap your salmon and get it seasoned with salt and pepper and garlic powder. Get potatoes and broccoli roasting while you…

6. Make pesto dip if you wanna: 3T pesto, ½ cup greek yogurt, salt and pepper to taste. OR just buy some hummus for those veggie sticks.

7. Make balsamic pesto dressing

8. Make sesame dressing

9. Put bacon in the oven followed by salmon 12-14 minutes later. 

10. Assemble smoothie ingredients in jars or tubs (apart from the almond milk that stays liquid)

11. Check on the chili, taste it and salt. Let it cool, pack it up for later, reheat and eat within 3-5 days.

12. Set aside salmon and bacon for salads, have the rest for dinner THAT DAY with potatoes and broccoli and pesto.


Salted dark chocolate coconut milk pudding

1 3.5 oz bar of dark chocolate (go with one you wouldn’t mind eating straight)
1 can full fat coconut milk
Salt, to taste (plus flaky fancy stuff if you have it to decorate the top)
Optional: additional sweetener like stevia or just a teeny bit of plain old sugar

1. Melt chocolate in a bowl set over a small pot of gently simmering water (low heat).

2. Add melted chocolate to coconut milk in a blender or food processor and blend until well incorporated.

3. Taste for sweet/salty balance and divide evenly into 4 cups. Chill in the fridge for at least 4 hours.

4. Top with fancy salt right before serving (if you want).


Blueberry Almond Butter Smoothie

3 oz frozen almond milk (or whatever milk you like, about 4-5 regular cubes – this makes the smoothie thick like a frosty)
⅓ cup frozen blueberries
Small handful fresh spinach
1 T almond butter
1 scoop vanilla protein powder (your favorite)
½ cup almond milk (may need more depending on your blender)
Pinch of salt

1. Blend everything on low speed until incorporated.

2. Stop the blender and scrape everything down.

3. Blend again on higher speed until smooth.


Chili

2 medium onions
2 bell peppers (any color, I had a club pack so I used the red ones)
1-2 T olive oil or avocado oil (or any that is light in flavor, though I’ve used butter before and it’s good too)
2 t cumin
3 T chili powder
½ tsp garlic powder
1 lb ground beef or turkey
28 oz can diced or crushed tomatoes (I usually prefer crushed but used diced for these photos)
8 oz tomato sauce
2 15 oz cans of kidney beans (only lightly drained)
Salt to taste

1. Preheat a dutch oven or large pot over medium heat, saute onions and peppers in oil until translucent and lightly browned.

2. Add cumin, chili powder, garlic powder, and a good pinch of salt (you’ll add more salt at the end).

3. Add ground beef, cook and break up with a spoon until browned.

4. Add both cans of tomatoes and both cans of kidney beans. I like to leave most of the bean liquid in there because it’s magic and makes the chili thicker and more awesome.

5. Reduce the heat to low and simmer for at least an hour or until the chili is thick and reduced by about ¼-⅓. Taste and add salt to your liking.


Salmon with broccoli, potatoes, bacon, and pesto

1 package bacon, diced
1 full filet of salmon
About 1.5 lbs baby potatoes
About 4 cups broccoli florets
Avocado or other high-heat oil
Salt
Pepper
Garlic powder
Pesto

1. Preheat oven to 425F. Lay out baby potatoes on baking sheet and drizzle with oil. Sprinkle with salt and pepper and garlic powder. Roast potatoes 15 minutes.

2. Take the potatoes out of the oven and scoot them to one side of the pan. Add your broccoli to the pan, drizzle with oil, season with salt and pepper and put the baking sheet back in the oven for 20 minutes.

3. On a new baking sheet (or the same one if you’d rather reduce dishes, just put the potatoes and broccoli in a serving bowl) spread your diced bacon out in a single layer and roast for 12-14 minutes (thicker bacon will need a few more minutes).

4. Scoot your bacon to the outside of the pan and lay your salmon in the middle. Drizzle salmon with a tiny bit of oil (or some of that bacon fat) and season with salt, pepper, and garlic powder. Roast for 14-15 minutes for medium, 16-17 for well-done. (If you have a thermometer, 130 is medium and 140 is well done)

5. RESERVE AT LEAST HALF OF THE BACON AND SOME (⅓? reader’s call here) SALMON FOR SALADS (I know it hurts).

6. Serve salmon, potatoes, and broccoli topped with diced bacon and pesto


Sesame salmon salad

Dressing:
¼ cup mayo
2T almond butter
1T soy sauce
1T sesame oil
1T rice vinegar

Salad:
Spinach
Sliced cucumber
Sliced onion
Sliced avocado
Leftover salmon
Leftover bacon

Salmon needs to be eaten the next day after you cook it for it to taste good!

Dress about 3 cups spinach with a bit of sesame dressing. Top with cucumber, onion, salmon (leave cold or reheat in microwave for 30 seconds max), avocado, bacon, and more sesame dressing.


Spinach salad with balsamic pesto dressing

Dressing:
3T pesto
3T balsamic vinegar
2T olive oil
Salt and pepper to taste.

Salad:
Spinach
Sliced avocado
Sliced tomato
Sliced hard boiled egg
Sliced mushrooms
Sliced onion
Leftover crumbled bacon

Dress about 3 cups spinach with pesto dressing, top with avocado, tomato, sliced egg, mushroom, bacon, onion, and more balsamic dressing.


cancel reply

Postpartum Sleep Deprivation

I have something to say. It’s off topic, uncharted waters for this blog, but it is important in my opinion.

So if you wanna know details and you aren’t afraid to get into some feelings, settle in. If not, come back later and we’ll talk about food.

TLDR: Sleep deprivation is dangerous, postpartum anxiety sucks, keep an eye on your loved ones having babies.


Kind of a big deal

So Margot’s birth ended up being one of those sort of eventful ones. I mean, I’ve heard of much worse, but it wasn’t nothing. I ended up having to be induced after about 2 weeks of “prodromal labor” which is where you start getting labor contractions but they go away on their own (usually every night when you lie down). When you’re induced they give you this drug called pitocin which can cause you to have irregular (i.e. hellish) contractions. I was able to make it through about 5 hours of those before I abandoned my hopes for a natural birth and got that sweet sweet epidural.

All this is to say I was pretty damn tired going into the delivery. Which was epic. Most women have to actively push their babies out for about 30-60 minutes (on the long side of things) but Margot had what’s called a “nuchal hand” which just means that her hand was up by her face and she refused to move it even while she was being born, which is ergonomically NOT IDEAL for birthing and which (I assume) is what caused my pushing phase to last THREE AND A HALF HOURS.

After she was out I hemorrhaged, tore, and the placenta didn’t come out in one piece. All of those things are bad, so I was pumped full of various drugs to make sure I stopped bleeding and didn’t get an infection. A couple of hours later I looked and felt like I had been hit by a truck.

The hospital where we delivered (which was wonderful, don’t get me wrong) has a “rooming in” policy which means that babies don’t get carted away to a nursery to sleep, they stay in the hospital room with their parents, which makes a lot of sense for bonding in those first hours. However, it also means that between making attempts to nurse, being checked for bleeding, and trying to keep the baby happy, Cody and I didn’t sleep more than 15 minutes at a time for the three days we were there.

The morning we were to be discharged, the overnight nurses insisted that we make a special exception to the “rooming in” rule because Cody and I were, in their words, “stupid tired” and they fed Margot some formula and took her away so we could sleep for 3 blessed hours. I wanted to stay another week because I was still so exhausted, but that’s not how it’s done here in the US. In fact, for less-eventful births, moms are usually discharged 24 hours after giving birth, which is mind-blowing to me.

So basically, childbirth is like surgery, but one from which the patient (mom) doesn’t get to recover properly. BECAUSE…

Nursing. Everyone agrees nursing is great. It’s free, it’s the best kind of nutrition for babies and helps to build their immune system, which is kind of important! But in order for a new mom to get her milk supply established, she has to nurse her baby and/or pump about every two hours. Which makes sleeping (and hence, recovering) difficult, even if the baby is a great sleeper, and even if latching and milk production are not a problem.


An ouroboros of hunger and unsleep

Margot was not a great sleeper. I assumed she was colicky and did my best to burp her often. For the first two months of her life, I would nurse her for 20 minutes on each side, change her, pat her, and try to get her to sleep over and over and over. At the most, she slept for about 40 minutes at a time. Which meant I didn’t sleep unless Cody was home and could take care of her while I slept. I was not letting Cody help at night during the work week because he was now our sole earner and I had a ton of anxiety about him being able to keep up at work. My choice there.

So I was constantly making difficult choices with my 40 minutes of Margot-sleep time: should I pump to help my pathetic milk supply? Eat something? Try to sleep for 30 minutes? Usually, I would pump for 20 minutes, wash the pump (so it would be dry and ready to use at the next cycle), and use the last 10 minutes to find something to eat. All day. Every day.

As you can probably imagine, I was not sleeping very much. At all. I was averaging about 2 hours total per day, broken into pieces. There were a few days where I got no sleep, and more than a few where I got 30 minutes or less. I thought it was just typical “newborn mom who is having a hard time nursing” stuff, and figured it would get better when I got better at producing enough milk.

You guys, it’s not normal to sleep that little. In fact, it’s dangerous.

I’ve done some reading on the topic, and one kid actually forced himself into a mental hospital after nearly 4 days of intentional sleeplessness. Doctors who specialize in sleep find it unethical to conduct sleep deprivation studies on humans, but rat studies have demonstrated actual death from sleep deprivation. Sleep deprivation is an effective interrogation tactic that was used by the CIA but it was later prohibited for being too severe. According to the handful of articles out there on new parent sleep, the average sleep LOSS is 2-3 hours per night for wakings and feedings. So if the average adult’s night of sleep is 8 hours, getting 5-6 hours (broken up, most likely) in the first months of a baby’s life would be about typical. Still not good, but maybe manageable for the short term.

The awful thing is that in the worst, most sleep-deprived days, I didn’t realize what damage I was doing. I felt overwhelmed and frustrated, couldn’t believe I was still functioning, but surprisingly kind of fine. I could keep my eyes open during the day, I startled wide awake any time Margot made a peep (even sometimes when she didn’t make any sound at all) and I was generally in spaced-out but even-tempered spirits. My body was running on adrenaline and like, microwaved burritos.

At the 2 month doctor appointment, the pediatrician told me Margot needed to eat more, but I was already feeding her around the clock, so I gave up on exclusively nursing and started supplementing with formula. Logically, this was my best option, and making sure a baby is properly fed is what matters, but I still had that irrational mom guilt over it.

Cody sent me to bed that night and Margot, finally stuffed for once (apparently it wasn’t colic, she was just starving), slept for 5 hours straight.


One step forward, two steps back

It wasn’t until I started sleeping more and trying to live like a normal human, shifting out of “survival mode” that depression started creeping in.

I developed postpartum depression and anxiety to the point that I started having repetitive, unwelcome thoughts about accidentally dropping Margot down the stairs. I would hug the opposite wall and carefully tiptoe any time I had to walk past them. I had thoughts about how nice it would be to just die in my sleep just so I could rest, escape, be done. Thankfully, I never got to the point of planning or actively thinking of taking my own life, but the thoughts I had were unsettling. I couldn’t believe that this relentless, menial, exhausting slog was my life now.

I was tired in my bones even after Margot started sleeping well and I could count on a solid 8 hours most nights. For almost the whole first year of Margot’s life, I was desperate for escape. The moment Cody got home from work every day I was in my bed or out the door, and when I returned I felt just as drained. I couldn’t physically or mentally relax when Margot and I were in the same room. I was jittery and SO irritable and waking up from a dead sleep in the middle of the night with my heart racing for no reason.

At the 6 month mark, my wimpy milk supply became unsatisfactory and Margot weaned herself completely. I was again irrationally guilt-ridden, but also glad to have my body back to myself. When my hormones tanked from the lack of nursing and I got even sadder, I realized that I needed to see a doctor for help. I was put on an anti-anxiety/antidepressant medication and referred to a therapist for counseling. Both helped a lot.

In therapy, I came to learn that those first sleepless months with Margot were much more impactful than I realized at the time. I was showing signs of trauma. It’s possible that the difficult birth played a part, but talking about those first sleepless months in therapy would make me feel panicky and this breathless sobbing would sneak up on me every time. My therapist explained that the dread that comes up when I think about what happened is my body’s way of telling me not to let that happen again – a defense mechanism that I did not consciously create.

Just last month I took down an instagram photo of Margot at 2 months old because she was so skinny and looking at it took me back in a way that was too tangible.  I’ve made a lot of progress and I don’t panic when I think about it now, but it’s still uncomfortable.

Margot is two now and I feel so much better. Getting to this place, where I want to DO things again was a lot of work, and I’m lucky I had the support and time to get here. It really wasn’t until the last 6 months that I started to feel like a person again. Wanting to accomplish things beyond showering and doing my hair.

I have more to say about how this whole saga has impacted my sense of self, but I’ll save that for later. My point with this post is to share my experience with sleep deprivation and encourage everyone to take it seriously.


So what can you actually do?


First of all, I just want to acknowledge that everyone is different and while our healthcare situation in the US does have some awareness of postpartum depression, I slipped through the cracks because my depression started later. Also, at no point did any healthcare professionals ask me if I was sleeping enough, or how much.

1. If you know someone who has a newborn, ask them if they are getting enough sleep. They will laugh at you, because they aren’t. “Enough sleep” is probably relative, but I’m going to go out on a limb and say a total 6 hours a day minimum, especially if it has been going on for more than a couple of weeks. If you have the ability to offer to help them for a few hours and insist that they sleep while you are there, do.

2. If you are a new mom flirting with serious sleep deprivation for the sake of your milk supply, consider backing off, at least temporarily. Let someone else feed your kid a bottle while you sleep for a few hours every day (if you can swing a whole night, do it). I understand that nursing is important to a lot of people. I will probably try to nurse again If I have any more kids, but having a baby that is flexible and willing to take a bottle will give you so much freedom. Your milk supply might even improve with a bit of rest.

3. If you are a new parent and people offer to help, try to accept. My mom flew to Maryland and stayed with Cody and me for two weeks after Margot was born, and I was actually able to get more like 4-5 hours of sleep on the days she was here. I was stupid not to keep her longer.

4. If you are a parent, remember that just because you might be “functioning” or not feeling sad or overwhelmed doesn’t mean you aren’t doing damage. When I was sleeping the least, my body compensated with cortisol and adrenaline and I wasn’t very emotional at all. I was tired and I couldn’t believe my body was still working, but I felt kind of fine/numb. I call that “survival mode” and it’s something to be very wary of.

5. If you are pregnant, read up on sleep training options and methods before baby arrives. I wasn’t planning on starting as early or going as hardcore as I ended up going, but Margot and I were both in a bad state of exhaustion. Googling sleep training articles during my precious 40 minute breaks was not my favorite activity, which is why I recommend doing it now. With sleep training, Margot started sleeping 8-10 hours straight per night by about the 4 month mark and 12 hours straight per night pretty predictably by 6 months. With naps during the day. It saved us both.


Obviously, everyone has to do what they are comfortable with and what works for their unique child, but like they say on airplanes, make sure you put your own mask on first.

I want to know what you guys have to say about postpartum sleep deprivation. Bring your stories, experiences, and opinions! I ain’t scared. I know my postpartum experience isn’t totally common but I can’t be the only one who got a taste of CIA-banned torture tactics.

  1. ralph didn't sleep well at all (day or night) until he was 8-9 months old. it was miserable. i was totally thrown for a loop because rhoda was a relatively good sleeper. with her i didn't mind the middle of the night feeding till she was 9 months because it was predictable and she'd just fall back asleep in bed with me. ralph wouldn't even go down to sleep to begin with and every night it was a 2-3 hour process trying to get him to bed (and then another 2-3 hours in the middle of the night trying to get him to go BACK to sleep) and i literally tried every single sleep training tactic. he didn't even sleep when he was in bed with me! at any rate we are out of the woods now with sleep which has helped a lot since i wouldn't be able to deal with his toddler antics if i weren't sleeping. SUPER glad that you sought help and that you're on the other side of things.

    hannah — August 31, 2018
    1. reply
  2. also, my pediatrician questionnaire always included a thinly veiled question about my mental health and i was like... YEAH sure i'm going to have a heart to heart with him about it, haha. though to his credit he is wonderful and sussed out how i was feeling between my wide-eyed, maniacal laughter accompanying my sleeping report at each appointment (though he never said hey, maybe you should go talk to someone about this) and was very compassionate and listened to my rants every time. when ralph finally started sleeping through the night he high fived me and said "you did a lot of hard work to get here and it has paid off." and for whatever reason that remains my favorite compliment i've received to date, haha.

    hannah — August 31, 2018
    1. Hannah I can't even imagine having to deal with sleep issues like that through the 9 month mark - I'd be beyond zombie status. You are a trooper. I'm glad Ralph's pediatrician was at least interested in your mental health enough to ask. Mine asked too, but the questions stopped right before I started feeling really depressed. I think we (womankind, Americans, idk) need more postpartum professionals and advocates to make sure we are thriving like our babies. And sleep training is so hard - I'm glad you are able to get some rest now! Solidarity, mamma.

      courtneybuell — August 31, 2018
    2. reply
cancel reply

Slow-Cooker Summer Tomato Sauce

Slow-Cooker Summer Tomato Sauce

Are you a summer tomato canner? I’m sad to say I didn’t grow up with that tradition, but I do love tomatoes, especially summer ones, so I understand wanting to make the most of the season. Last summer I even bought up 15 pounds of tomatoes from my farmer’s market and set out to make Kenji’s summer tomato sauce. It was a lengthy and involved process, but the end result was delicious.

My only qualm with the whole deal was having to spend so much time inside my hot kitchen with my oven on, reducing tomato juice to paste, and my stove on, reducing tomato pulp to sauce. It was a really good learning experience, and the end product was truly tasty, but I feel like big batches of summer tomato sauce are just logically made for the slow cooker.

Slow-Cooker Summer Tomato Sauce

So I threw together a recipe for tomato sauce using fresh tomatoes and a slow cooker. I think it’s pretty bomb, but I’m neither Italian nor a seasoned summer tomato putter-upper, so if you have a tomato sauce recipe you like better, try it in the slow cooker and tell me what happens.

Slow-Cooker Summer Tomato Sauce


Slow-Cooker Summer Tomato Sauce

Ingredients:
about 4-5 pounds of fresh, ripe summer tomatoes (if your slow cooker is huge, you can probably double this easily)
1/4 cup olive oil
1 large onion, diced
5-6 cloves garlic, sliced thin
salt, to taste
2-3 Tbsp tomato paste
optional: 1/4 cup white wine
optional: a pinch of sugar
about 1/4 cup fresh basil, sliced
your favorite pasta
for finishing: crushed red pepper, parmesan, or pecorino

Method:

1. Set your slow cooker to high and pour in your olive oil with the diced onion and sliced garlic. Let the onion and garlic cook while you prep your tomatoes.

2. If you have a food mill you can simply cut your tomatoes into chunks and run them through the food mill until the skins and seeds are separated from the tomato pulp and juice.

If you don’t have a food mill, you’ll want to blanch your tomatoes after cutting slits in the skins, peel them, seed them, and strain the seeds from their flavorful juice. It’s a bit of a process, but if you have made tomato sauce in the summer before, you get it. What you want is as much of the tomato pulp and juice as possible without the gross seeds or skins. This is a great tomato peeling and seeding tutorial, my only beef with it is that they don’t strain the juice from the tomato seeds and put it back with the tomato pulp because it adds a lot of freshness and flavor to the sauce. So you should do it.

3. When you are finished with the tomatoes, turn your slow cooker to low and add the tomatoes, a healthy pinch of salt, tomato paste, and wine (if using) to the cooker.

4. Cook on low 4-6 hours with the lid cracked to allow steam to escape, or until you reach the consistency and flavor you want. Longer cook times result in a sweeter, more concentrated sauce while shorter cook times preserve a bit more of that ripe tomato freshness. Taste, add salt as necessary and give it a few more hours if you want more sweetness (you can also add a pinch of sugar for extra sweetness if you like).

5. If you didn’t use a food mill to prep your tomatoes, decide if you want to leave your sauce chunky (like the second picture) or if you want to blend it (I sort of half-blended mine for the finished version). Immersion blenders are perfect for this. Finish the sauce with the fresh basil. Serve with your favorite pasta, crushed red pepper flakes, and parmesan or pecorino.

cancel reply

Slow-Cooker Carnitas Tortas

Slow-Cooker Carnitas Torta

Have you ever had a torta? It’s basically all the best things about a traditional Mexican taco but in sandwich form, and with mayo (which means I’m going to be into it, don’t judge me). Tortas can be really simple, with just some carnitas or carne asada, onion, cilantro, jalapeños, and mayo. Or they can be these crazy mile-high amalgamations of breakfast, lunch, and dinner in one with things like beans, eggs, hot dogs, steak, cheese, avocado, salsa, pickled onions, ETC. It can be intense. I’ve loved every torta I’ve been lucky enough to get my hands on, but if I have some freshly cooked pork butt on hand, this simple version is likely the first thing I’m making.

Slow-Cooker Carnitas Torta

I don’t have easy access to a bakery that makes proper torta rolls (bolillos) so I just use a soft-ish sandwich bun and it works. My understanding of carnitas is basically that it’s crispy pulled pork. I’m sure experts will tell me there’s much more to it, but whatever, this is simple and it is delicious.

Slow-Cooker Carnitas Torta


Slow-Cooker Carnitas Tortas
makes two tortas

Ingredients:
about 1 1/2 cups cooked and shredded pork butt (a.k.a. shoulder (prepared in the slow cooker like this))
1-2 Tbsp pork fat (from the slow cooker butt roast)
2 rolls – bolillos if you can find them and want to be authentic, brioche or kaiser if you aren’t up to that (I wasn’t)
salt and pepper
1/4 cup mayo
1/4 tsp cumin
1/2 small clove garlic, grated or minced (or a pinch of garlic powder)
2-3 Tbsp finely diced white or yellow onion
1 Tbsp minced cilantro
avocado
lime wedges
Cholula hot sauce


Method:

1. Make a slow cooker pork butt. It takes time (about 8 hours), but the rewards are incredible. Read about that here.

2. In a sauté pan, heat 1/2 Tbsp pork fat over medium heat. Split and toast your rolls in the fat and set aside.

3. In the same pan, still on medium, add the rest of the pork fat and pile in the shredded pork. Break it up if necessary to heat through, taste and add a pinch of salt if necessary, then spread the pork in an even layer over the pan and leave it for a about 5 minutes to get crispy.

4. While your pork is cooking, mix together mayo, cumin, and garlic with a pinch of salt and pepper and set aside.

5. Dice your onion and mince your cilantro and combine. Slice an avocado and a few lime wedges.

6. Assemble your tortas with the split and toasted buns, a pile of crispy shredded pork, a generous dollop of cumin garlic mayo, a pile of onions and cilantro, some avocado slices, a squeeze of lime, and a few drops of Cholula. Eat.

cancel reply

Easy Immersion-Blender Gazpacho with Almonds and Red Peppers

Easy Immersion-Blender Gazpacho with Almonds and Red Peppers

When you love soup as much as I do, you miss it in the summer. So, you gazpacho. The only problem with gazpacho is that if you do it wrong it tastes like eating a jar of salsa. When it’s good, however, it is it’s own distinct and delicious thing.

This version riffs on the Spanish flavors of romesco sauce (red peppers with almonds and garlic) and combines them with the tomatoey, cucumber-y freshness of gazpacho. I feel like the red peppers and almonds lend richness and sweetness to what can otherwise be an overly acidic dish. Top with avocado and a little sour cream, tear up some crusty bread, and you’re ready for a healthy, light lunch on a sunny patio. Make it with your immersion blender and your mixing bowl can double as your blending bowl and triple as your serving bowl. Fancy.

Easy Immersion-Blender Gazpacho with Almonds and Red Peppers


Easy Immersion Blender Gazpacho With Almonds and Red Peppers
serves 4-6

Ingredients:
1 lb ripe summer tomatoes
1 12 oz jar roasted red peppers, drained
4 inch chunk cucumber
1/2 medium yellow onion
1/2 cup roasted almonds
1-2 cloves garlic, minced
1/2 tsp smoked paprika
2-3 tsp red wine vinegar
1/3 cup olive oil
pinch cayenne pepper
2 tsp salt (plus more, to taste)

for topping:
sliced green onion
chopped fresh parsley
diced avocado
sour cream
hot sauce
black pepper

Method:

1. Dice tomatoes, red peppers, cucumber and onion. Chop almonds and mince garlic. Put everything in a large mixing bowl.

2. Add paprika, red wine vinegar, olive oil, cayenne pepper, and salt.

3. Using your immersion blender, pulse and blend the chopped vegetables and seasonings until smooth. (OBVIOUSLY, a regular blender will also do the trick.)

4. Cover the mixing bowl and refrigerate at least 20 minutes to let the flavors develop, and up to overnight. Before serving, taste the gazpacho and add extra salt, cayenne, or vinegar as necessary.

5. Serve topped with green onion, parsley, avocado, sour cream, hot sauce, and black pepper (or any combination).

cancel reply

Slow-Cooked Butt (of Pork)

Slow-Cooker Pork Butt

Pork butt is the best pork for pulling. And pulled pork dishes are what summer is all about. Pulled pork barbecue, pulled pork tacos, pulled pork carnitas for nachos, if you know how to cook pork butt you open the door to a porcine wonderland of culinary possibilities.

Slow-Cooker Pork Butt

So these butts are technically shoulders, and they tend to be pretty big. I like to make my slow-cooker butts as neutral in flavor as possible because I always end up with so much more meat than can be consumed in one dinner, and pulled pork makes such a fantastic base for a lot of great meals.

In addition to an abundance of pulled pork for freezing and future meals, slow cooking a pork butt leaves you with a fair amount of pork fat and collagen-rich porky liquid for enhancing sauces, soups, or maybe a batch of baked beans. Oh, and the best part: butts are cheap. I got my 7 pounder for just under 12 dollars at my local supermarket, and I will easily get four meals out of it. Butts, man!

Slow-Cooker Pork Butt


Slow Cooker Summer Butt (of Pork)

Ingredients:
a pork butt (a.k.a. shoulder (4-8 pounds, depending on how much you want to make))
salt
sugar
optional: 2-3 tsp liquid smoke

Method:

1. Pat the pork butt dry with paper towels and score the fat side with a sharp knife.

2. Decide on a ratio of salt to sugar. I like 1:2 and can usually comfortably cover a 7-8 pound pork butt with 2 Tbsp salt to 4 Tbsp sugar. A 1:2 ratio of salt to sugar is not very sweet, so if you like a sweeter deal, up the ratio.

3. Cover the pork butt with the salt and sugar mix and set it in the slow cooker, fat side up. If you don’t use all the salt/sugar you made, that’s ok. Just coat the meat in a good layer of the seasoning and toss the rest. If you add more than the meat itself can hold on to, you’ll probably end up with over-salted and useless pork, which would be a waste. Add liquid smoke if you’re using it and cook on low for 7-9 hours or until the meat is falling apart and there is a substantial amount of liquid in the pot. Slow cooker temperature settings are not standardized, so it’s possible yours could take longer. If the meat is not super tender when you stick a fork in it, it needs more time.

4. Remove the ceramic crock from the slow cooker and run it under the broiler of your oven for a few minutes to crisp up the fat on top. If you have a torch, you could also use that to get the fat on top crispy.

5. Allow the meat to cool and tear it up (I like to use gloved hands for this, but forks will also do the trick). Pick through the meat and get rid of the bone, any weird connective tissue-y bits and un-crispy fat.

6. Divide up any meat you want to use immediately (for carnitas tortas perhaps? coming soon!) or put it in freezer containers, label it, and save it for later. Pour all the liquid from the pot into another container and allow the fat to separate to the top. You can save the fat for cooking, or toss it and use the collagen-rich pork cooking liquid to make beans or sauce or extra juicy barbecue.


  1. Tonight!!!

    Amy — August 30, 2016
    1. reply
cancel reply

Slow-Cooker Summer Corn Chowder

Slow-Cooker Summer Corn Chowder

I’ve written about the awesomeness of this corn chowder in the past, because it showcases the sweetness of summer corn in a way that’s rich without being heavy and about as summer-appropriate as a chowder can possibly be. Now that I’m on a “slow cookers for summer” kick, I thought this recipe would be perfect to adapt.

Slow-Cooker Summer Corn Chowder

It’s a surprisingly easy chowder to put together. A bit of chopping, some corn cob scraping, a turn in the slow cooker to extract some liquid from all the summer produce, and milk to finish. I have to say I recommend using yellow tomatoes if you can find them because red tomatoes give the chowder a weird pinkish hue that really bugs me, but if it doesn’t bug you, feel free to go with whatever you can find.

Do not skip the bacon and green onion topping. This chowder is definitely on the sweet side and the bacon and green onion lend sharpness and depth that are really critical to keeping things balanced.

Slow-Cooker Summer Corn Chowder


Slow-Cooker Summer Corn Chowder
adapted from Food 52

Ingredients:
6-10 strips bacon
5-6 ears fresh corn
1 medium onion
1 poblano pepper
1 jalapeño pepper
1 celery rib
3 medium yellow tomatoes
2 medium waxy potatoes
1 tsp salt
1 bay leaf
1 cup half and half
2 cups milk
more salt and black pepper, to taste
optional: cayenne or tabasco
parsley and sliced green onion, for garnish

Method:

1. Start by cooking your bacon. The point of crock pot corn chowder is to keep the kitchen cool, so I recommend using your microwave unless you already have some cooked bacon on hand. I usually start a plate of raw bacon in the microwave for 2 minutes on high, stop and pour any liquid from the plate into the slow cooker, then cook for 30 seconds and check, another 30 and check, two or three times until the bacon is crispy. Pour any remaining fat into the slow cooker. Drain the bacon on paper towels, crumble and set aside.

2. Cut the corn from the cobs into a bowl (it helps to use a small bowl set upside down inside of a large bowl to rest the cobs on while you slice) and use the back of your knife to “milk” the cobs of all the corny goodness. Pick through the corn for any stray silks and add them to the slow cooker.

3. Dice your onion, poblano, jalapeño, celery, tomatoes, and potatoes and pile them in the slow cooker. Add your salt, and bay leaf and black pepper, cover and cook on low for 2 1/2 to 3 hours.

4. When the potatoes are cooked and there is a good amount of liquid in the bottom of the pot, add the milk and half and half. Taste for seasoning. This soup is pretty darn sweet, so a dash of cayenne or tabasco is welcome.

5. Garnish with green onion (super important for flavor balance) and parsley (slightly less important but still tasty) and top with crumbled bacon.

  1. So for your jalapeño do you like to use hot or mild ones? I love corn chowder and also any kind of creamy soup with poblanos in it, i just don't want it to end up being too spicy if i put in a really hot jalapeño. But then the milk. what do you think?

    miranda — July 29, 2016
    1. Honestly, I don't have any idea how to tell the difference between hot and mild jalapenos, so for me it's a crap shoot! What is the secret? I'd use a mild one since the poblanos tend to carry a little heat themselves.

      courtney — August 17, 2016
    2. reply
cancel reply

9 Summer Recipes for the Slow Cooker

Summer Recipes for the Slow Cooker

You guys, I don’t know how I didn’t realize this before, but slow cookers are summer food dream-weavers. Maybe it’s because they’re so commonly associated with stews and soup, which are decidedly un-summer, but if you think about it, the slow cooker’s potential for summer cooking is even more amazing than winter cooking. Seriously: slow cookers don’t heat up the kitchen the way stovetop or oven cooking does (praise be), and they encourage hands-off food prep which means more time outside enjoying the weather for you and your family. Dust ’em off and get cooking! But slowly.

1. I assert that Thai curry is aseasonal. This basil chicken coconut curry from The Food Charlatan looks particularly awesome.

2. Tacos are a summer classic and these poblano honey lime chicken tacos from Cooking for Keeps deserve their own outdoor dinner party with friends.

3. Nachos are appropriate any time of year. How Sweet Eats does a slow-cooked carne asada version that looks like something I need.

4. Or how about some slow-cooker adobo chicken burrito bowls from Creme De La Crumb?

5. Baked beans are a barbecue staple. Don’t make yours on the stove or in the oven this time. Bust out that countertop summer savior and keep the heat outside.

6. Sweet corn is at it’s peak of deliciousness in the summer, take advantage by making some slow-cooker creamed corn with fresh corn.

7. I don’t know about you, but I feel like it’s never too hot for chocolate lava cake. Maybe with a scoop of vanilla ice cream on top. Especially if you can make it in the slow cooker.

8. Pulled pork is a natural fit for slow cooking, and it’s pretty much all anyone wants in the summer anyway.

9. And raise your hand if you had no idea you could make ribs in your crock pot. Changing lives one recipe at a time.

I’ve got a few slow-cooker summer recipes of my own in the works for you over the next weeks, so stay tuned!

cancel reply

Whole-Wheat Pasta Salad with Honey Mustard Greek Yogurt Dressing, Brie, and Bacon

Whole-Wheat Pasta Salad with Honey Mustard Dressing, Brie, and Bacon

Whole grains are good for you. Or at least better for you than their simpler, refined-carb counterparts. But swapping whole wheat pasta for regular pasta in a lot of dishes can be kind of disappointing. Whole wheat pasta has a nuttier, heavier flavor that can overpower lighter tomato sauces and mild cheese sauce, so you can’t just swap it out willy nilly and expect it to taste great every time.

Because of my bout of gestational diabetes I’m all about complex carbs lately, so I wanted to create a sauce that would compliment the flavor of whole wheat pasta rather than fight with it. I know nutty and sweet and spicy flavors are good together, so I went with honey mustard. I also know that pasta salad can get really unhealthy really quickly, so I decided to create a creamy dressing around greek yogurt instead of mayo. The result is maybe my new favorite pasta salad, packed with flavorful ingredients (oh hai bacon, nice to see you brie) and decently nutritious too.

Whole-Wheat Pasta Salad with Honey Mustard Dressing, Brie, and Bacon

Whole Wheat Pasta Salad with Honey Mustard Greek Yogurt Dressing, Brie, and Bacon
serves 6-8

Ingredients:
1 lb box whole wheat fusili or rotini pasta
3/4 cup whole milk greek yogurt
3 Tbsp dijon mustard
3 Tbsp honey
3 Tbsp olive oil
2 small cloves garlic, grated or minced
salt and black pepper
2-3 Tbsp parsley, minced
2-3 Tbsp green onion, sliced
about 1/2 cup diced raw tomato (or more)
about 1/2 cup brie cheese, cubed (or more)
2 small, cooked chicken breasts (grilled is nice, but any will work)
6 strips bacon, cooked and crumbled (or more!)

Method:

1. Cook pasta according to package directions. Don’t forget to salt the pasta water well.

2. Mix up the dressing by combining yogurt, mustard, honey, olive oil, garlic, and salt and pepper. Taste for seasoning and add more salt and pepper as necessary.

3. Mince parsley, slice onions, dice tomato, brie, and chicken, and crumble bacon.

4. Toss cooked pasta with dressing, parsley, onion, tomato, brie, chicken, and bacon. Taste again for seasoning and serve.

cancel reply