Freezing Fundamentals for Foodies

Freezing Fundamentals for Foodies

I think freezers are seriously underrated. Sure, they keep ice cream icy and can make it possible for “busy moms” to prep a month’s worth of dump meals in one afternoon, but they are more.

Foodies tend to regard freezing as a lesser form of food utilization, more suitable for homesteaders and people wanting to liberate themselves from the kitchen rather than revel in it’s sensory possibilities, but I think they misunderstand.

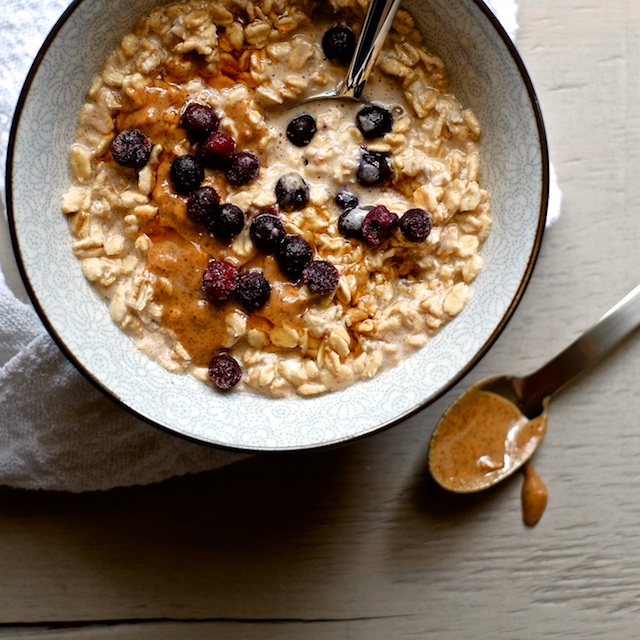
Freezing is practical, yes, but until you have experienced the joy of a fresh tub of scratch-made pesto with real sun-fed summer basil in the middle of December…or the delight of warming a pot of homemade twenty-something-ingredient curry that tastes as good as if someone else made it (because you barely had to lift a finger this time), you don’t really appreciate what freezers are capable of.

I’m a fan of freezing. It’s a less-technical, more versatile method of preserving food than canning, it helps me minimize food waste, and it keeps me well fed on nights when I’m too busy to make proper food. Freezing is giving gifts to future me. With a little knowledge and a few strategical tweaks to your cooking routine, you can turn your freezer from a parking garage for half-eaten ice cream tubs into a treasure box of culinary possibilities and, yes, weeknight liberation too.

Freezing Fundamentals for Foodies

On storage:

Temperatures: the freezer in your house should be at zero degrees Fahrenheit at the highest. Foods you plan to freeze should be brought to room temperature or fridge temperature before being stored in the freezer.

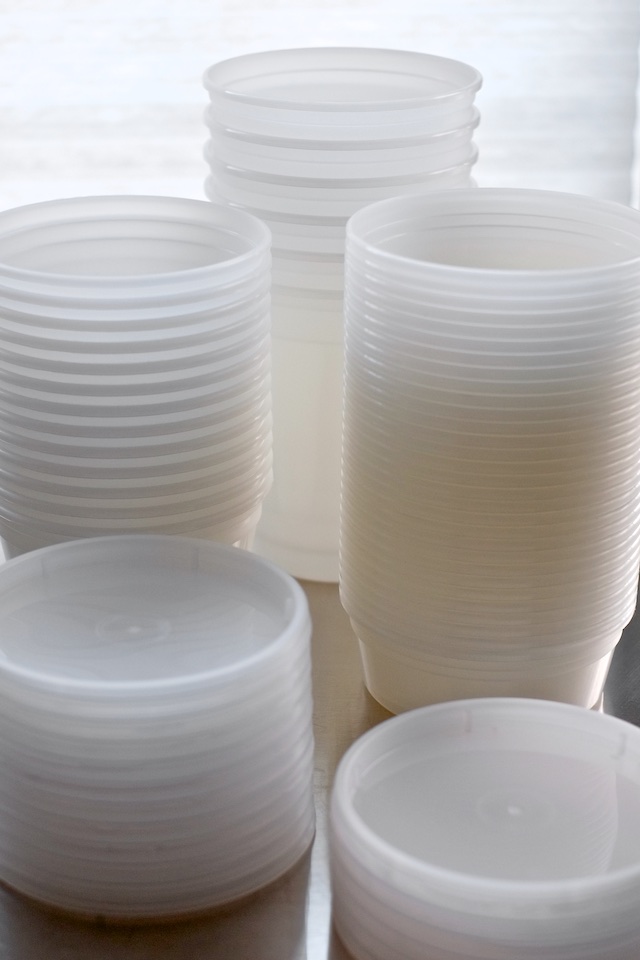
Containers: I threw away all my tupperware and replaced them with these uniform, stackable, one-lid-fits-all containers in cup, pint, and quart sizes. They are dishwasher safe, microwave safe, freezer safe, and recyclable. They come in big packs so I don’t feel bad giving them away or getting rid of them when they get stained. If you don’t feel like you need as many as come in a box, go in with a friend and split the cost. Ziploc brand freezer bags are also totally unbeatable, and can even hold soup or sauce for flat freezing and easy stacking.

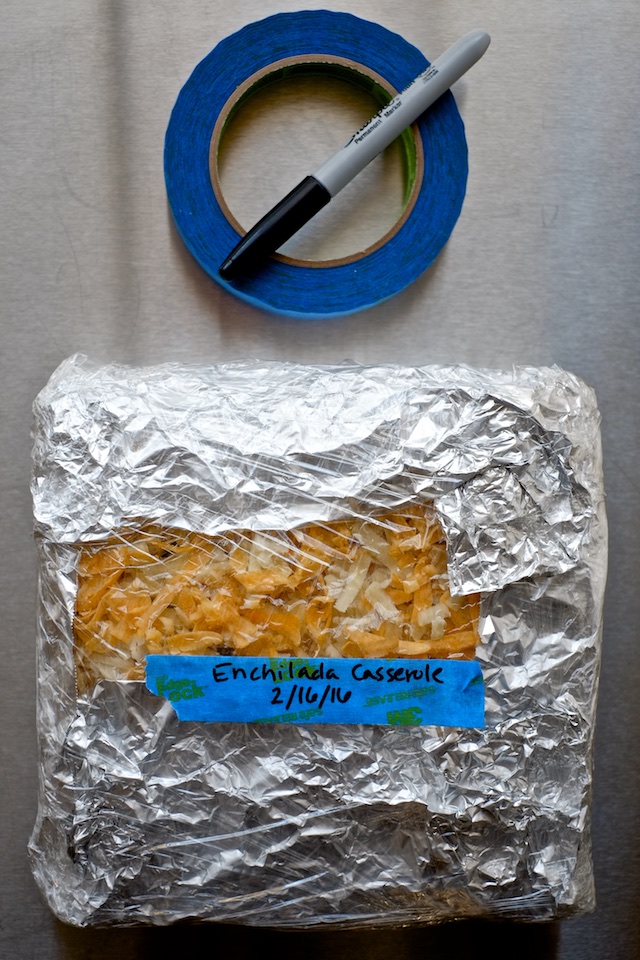
Wrappings: I use heavy duty foil and plastic wrap from Costco (that slidey cutter is amazing). Freezer paper is also a thing, but I haven’t bothered. Educate me if you like.

Labels: You can buy labels or you can get a roll of blue painter’s tape and a sharpie (painters tape is the easiest to remove). You do need to label your food though, because you will forget what it is.

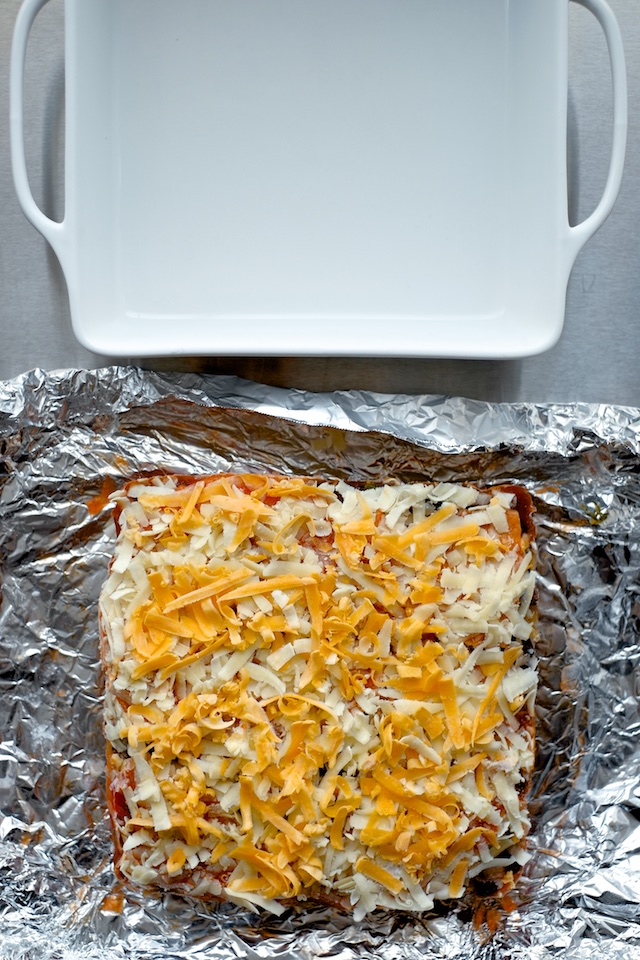
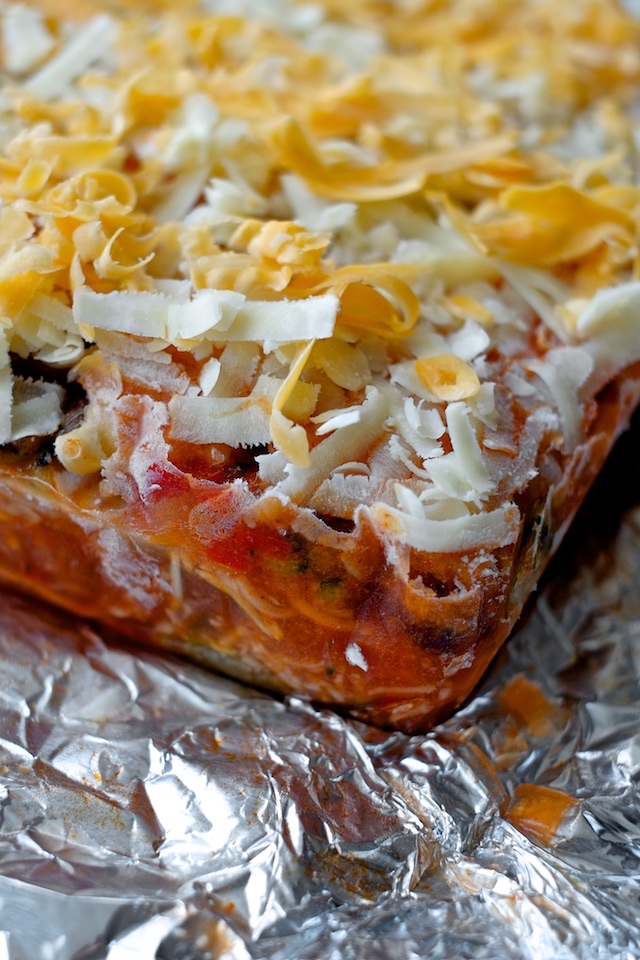
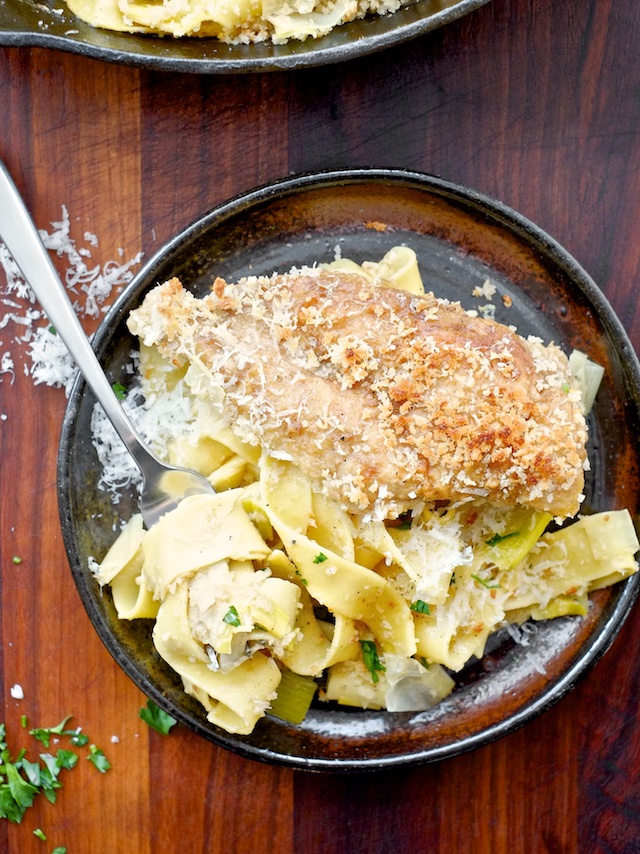
Freezing casseroles: Rather than buy a load of disposable casserole tins, freeze a casserole in your baking dish lined with heavy duty foil. When it’s solid, pop out the casserole in a brick, wrap it up with plastic wrap, label it, and put your clean and unoccupied casserole dish back in the cupboard.

Freezing Fundamentals for Foodies

On re-heating:

Be gentle: Letting frozen food defrost overnight in the fridge is usually best. If you don’t have time for that (and sometimes I don’t), take it out of it’s wrapping and defrost in the microwave (using the actual defrost setting). For chilis and soups you can defrost in a saucepan over low heat.

Don’t panic: Some frozen things look ugly when they first start to thaw, but with some stirring and time getting warm they almost always turn out the way they started.

Mind the temperature: Foodsafety.gov says we should all reheat our foods to 165 Fahrenheit, which is the temperature at which most food borne germs instantly die. It’s pretty good advice but I don’t always follow it exactly (though pregnancy has made me somewhat more cautious than usual). Still, if you don’t have a thermometer yet, you should get one and use it when you reheat things, for educational purposes at least.

Freezing Fundamentals for Foodies

Foods to avoid freezing:

Some foods fare better than others in the freezer. The following foods tend to do poorly:

Watery/juicy fruits and veggies: unless you plan to cook them or put them in a smoothie, don’t bother trying to freeze any produce with a high water content. Cucumbers, lettuces, fresh spinach and fresh tomatoes, for example, would make a rather mushy salad if they were stored in the freezer. Want a spinach smoothie though? Sure.

Soups that contain pasta: Pasta can technically be frozen successfully, but it’s really tricky when that pasta is suspended in a soup. If you don’t mind super mushy pasta I won’t stop you, but I will maybe judge you. Freeze soup without the pasta and add pasta right before you eat.

Unstable eggy things: Homemade mayo, meringue, hollandaise, sabayon – don’t try to freeze them. They are so delicate to begin with, freezing them will end in runny, splitty, greasy sadness.


Foods to be careful freezing:

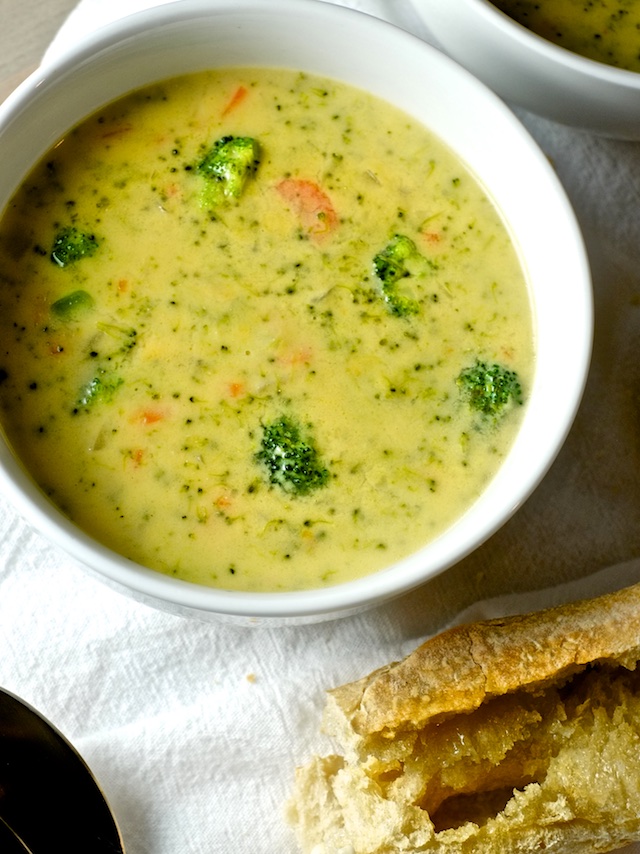
Cheesy things: I hear mixed reports about freezing cream cheese, but I keep a batch of frozen cream-cheesy crab dip around for emergencies and it always bakes up nicely. Cheese sauces can be pretty delicate, so if you try to freeze them, reheat them gently. I have had success freezing and reheating potato leek and cheddar soup, but I had to stir it for a while to make it nice and smooth.

Starch thickened soups and sauces: Just be gentle with these. They will almost invariably look fugly when they begin to defrost, but time, gentle heat, and stirring will set them right.

Potatoes: Chunks of cooked potato tend to re-heat with kind of a different texture, but I find that hash brown potatoes do well and mashes only need to be resuscitated with a bit of extra milk or broth.


Strategy:

So now that you know some basics, here are my favorite tips for incorporating freezing into your cooking.

Big Batches: If I’m going to the trouble of making something labor intensive like lasagna or Japanese curry or stew, I always make at LEAST double. That means I can eat it again (and maybe even a few more times) without putting in the work again. It’s like someone else cooked for me which makes it taste even better the second time around.

Strip it Down: What I mean here is that if you are freezing something, freeze it in the most versatile possible format. When I make curry, for example, I will make a huge batch of the sauce by itself. That way I can use the same sauce in the future for chicken curry, pork curry, veggie curry, or whatever I feel like at the time. If you make chili, make a meat-only version so you have the option to use it on chili dogs or add beans and eat it by the bowl.

Focus on Favorites: Most people (especially foodies) have a bit of a mental block about pulling anonymous bags and tubs out of the freezer and trusting them to become dinner. If you freeze foods you didn’t totally love the first time around, I guarantee the leftovers will fall victim to the oubliette effect and be forgotten for eternity. Freeze foods you crave on the reg and don’t waste space on things you “might get around” to “eventually” because you won’t.

Consult Often: Before you plan your meals for the week, check the contents of your freezer for things that have been sitting for a few months and use them for inspiration. Feel yourself reaching for the takeout menus? Check the freezer first.


The most awesome things to freeze:

Cookie dough – pre-portioned into individual balls and bagged so you can have a fresh baked cookie whenever you want.

Pucks of homemade curry paste – freeze them on a piece of parchment paper, uncovered, and pop them into a bag once frozen.

Homemade pesto – I use my one-cup tubs.

Beef stew – freeze it without the potatoes and simmer a spud or two after it’s thawed and reheated.

Lasagna – Brick it and wrap it up.

Hummus – Pint tubs, straight to the fridge.

Tomato sauce made with fresh summer tomatoes – Nothing fresher.

Bolognese – So much work, make it count!

Pie dough – Again with the work, but homemade is definitely better. Might as well make extra.

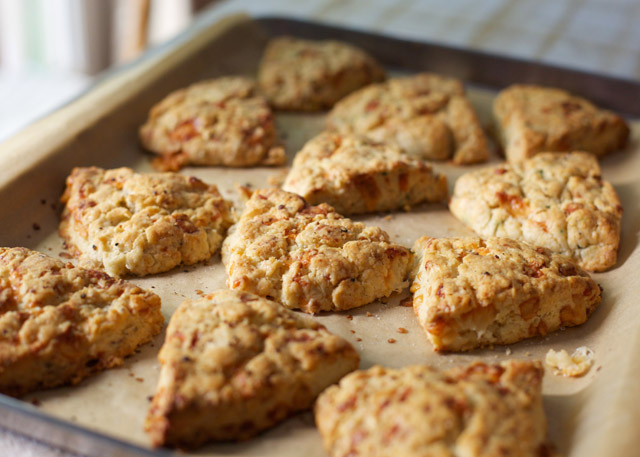
Scones – Like cookies, you can bake these straight from frozen with a few extra minutes in the oven.

Black bean soup – reheats perfectly.

  1. […] ingredients for, I recommend making a gigantic batch and freezing the sauce for future dinners (freezing is smart!). I swear, it tastes even better when you have time to forget making […]

    The Ultimate Japanese Curry | Sweet Salty Tart — February 24, 2016
    1. reply
  2. […] Cover with plastic and freeze for up to 3 months (brick style is smart!), or bake immediately for 30 minutes in a 350F […]

    Real Food Chicken Divan | Sweet Salty Tart — March 18, 2016
    1. reply
cancel reply

Broiled Oysters With Mignonette Butter

Broiled Oysters with Mignonette Butter

It’s Valentine’s Day weekend! Does that make you happy, or sad? I’m a happily married lady so I should be into Valentine’s Day, but it’s never been my thing. Somehow it feels like a test and I resent being tested arbitrarily. Cody and I are very chill most years, and this one is no exception, but I’ve learned that I need to plan a little or I will feel like an absolute deadbeat wife. So we’re making a slightly fancy breakfast and dinner at home this year (because we don’t like overly crowded restaurants) and probably heading to a matinee, so popcorn for lunch.

Broiled Oysters with Mignonette Butter

If I were not pregnant, and if Cody liked oysters, these delectable little gems would be a feature at our homemade dinner. Are you an oyster eater? I get that they can be intimidating little meat-rocks, especially for the home cook, but I shucked my first oyster moments before taking these photos, and it wasn’t a massacre. My advice is to get an oyster knife (about 5 bucks), buy your oysters from the store with the best looking and smelling seafood section in your area, and watch a good oyster shucking youtube video before you start. Maybe have a little cocktail sauce on standby so you can eat the evidence if your first couple end up ugly.

Broiled Oysters with Mignonette Butter

These oysters are quickly broiled, so they are a bit more approachable than a straight raw oyster, and they are basically bathing in butter, so even if your Valentine’s target is apprehensive, you may be able to convert them to the way of oysters.

Broiled Oysters with Mignonette Butter

Other advice: use some crumpled foil on your baking pan to hold the oysters upright and keep the liquor from sloshing out the sides (that stuff is tasty). Use a high-quality unsalted butter if you can, but any unsalted butter will do. Oysters are really salty on their own, so salted butter would be a huge mistake.

Broiled Oysters with Mignonette Butter

So, mignonette sauce is this old school vinegar and shallot sauce that you will be familiar with if you have ever ordered oysters before at a fancy restaurant. I’ve used the same red wine vinegar and shallot and black pepper combo to make this butter, and added a little parsley for aesthetics (and I guess flavor, sure). Obviously this butter version is better than regular mignonette, because of the butter.

Broiled Oysters with Mignonette Butter

I think these oysters look really impressive, deceptively impressive even. Make some butter, shuck some oysters, pop them under the broiler, and you are suddenly some kind of culinary wizard.

Boost your ego, treat yourself, and maybe even impress a date with some butter bathed broiled oysters.

Broiled Oysters with Mignonette Butter


Broiled Oysters with Mignonette Butter
makes 1 dozen oysters

Ingredients:

-12 oysters
-1/2 cup unsalted high-quality butter (Kerrygold or Plugra are two of my favorites for this)
-1 shallot, minced
-1 Tbsp red wine vinegar (rice vinegar is also really good)
-1/2 tsp black pepper
-1 Tbsp minced parsley

Method:

1. Soften butter to room temperature and use a whisk to combine butter with shallot, vinegar, pepper, and parsley. Set butter aside. You might be tempted to add salt. DON’T.

2. Prepare a baking sheet with crumpled aluminum foil (or if you have it, a thick layer of coarse sea salt, which looks very pretty) to hold the oysters in place and upright while they broil.

3. Preheat the broiler of your oven on high while you shuck the oysters. I recommend watching a youtube video like this before you begin, and definitely procure an oyster knife before you attempt to shuck. Keep as much of the oyster liquor as you can inside the shell.

4. Arrange the oysters so each is level and nestled securely in the foil (or salt). Top each oyster with 1/12 of the mignonette butter.

5. Broil the oysters for 2 1/2 to 3 minutes, or until the butter is melted and the oysters are heated through and just barely cooked.

6. Serve with crusty bread to soak up all the butter.

cancel reply

Crunchy Panko-Topped Braised Chicken and Leeks with Creamy Parmesan Pasta

Braised Chicken and Leeks with Crunchy Panko Parmesan Pasta

I created a new Pinterest board today entitled “Let’s Freak Out About Babies” and it pretty much sums up my state of mind lately. I’m swiftly approaching my third trimester and I have bought approximately none of the things I will be needing. I have goals to paint large swaths of my house and decorate and Kon Mari all my possessions before she arrives, but WE SHALL SEE. Anyway, I am feeling like I really want someone to brush my hair and speak to me in hushed, reassuring tones while I make practical lists and eat large bowls of comfort food.

And this is what I mean by comfort food – softly cooked leeks with creamy pasta, tender chicken, a generous handful of parmesan, and some crunch to keep it interesting. It’s also relatively simple to put together and makes really good leftovers the next day.

Braised Chicken and Leeks with Crunchy Panko Parmesan Pasta

The chicken in this recipe is braised, which means it’s slowly cooked partially submerged in flavorful liquid (chicken broth in this case). I like braising for this dish because it produces chicken that’s gently past done, bordering on shred-able, in a really good way. You could also certainly use boneless, skinless thighs or even bone-in, skin-on chicken thighs or breasts in place of the boneless, skinless breasts I use here (most of my family are bone haters, so I do boneless most often). I’d omit the flour dredge if you use skin-on chicken and focus on browning the skin side before braising. They should cook in about the same amount of time, but test a piece with a fork before you add pasta and panko.

Braised Chicken and Leeks with Crunchy Panko Parmesan Pasta


Crunchy Panko-Topped Braised Chicken and Leeks with Creamy Parmesan Pasta
serves 3-4

Ingredients:
-1 lb package chicken breast, cut into 3 or 4 even portions
-1/2 cup all purpose flour
-1 tsp kosher salt
-1/2 tsp white pepper (black pepper is good too if you don’t have white)
-1/4 tsp cayenne
-3 Tbsp butter plus 1 extra for panko topping
-1-2 cloves garlic, minced or grated
-1/2 cup white wine (optional, alternately you can use more chicken stock and add a splash of lemon or vinegar for brightness and acidity)
-1 1/2 cups chicken broth
-4 cups leeks, chopped and washed
-1/2 cup heavy cream
-1 cup parmesan, divided (2/3 for sauce, 1/3 for topping)
-8oz bag pappardelle pasta
– more salt and pepper, to taste
-optional: parsley for garnish


Method:

1. In a wide bowl or pie plate, combine flour, salt, pepper, and cayenne. Mix well and dredge chicken pieces one by one, making sure they are evenly coated in flour.

2. In a large oven-safe skillet (meaning it doesn’t have any plastic bits or meltable handles), melt butter over medium heat and brown the chicken on both sides. When the chicken is browned but not necessarily cooked through, remove it to a plate and set it aside.

3. In the same pan with the butter and leftover chicken drippings, sauté garlic quickly (until fragrant) and deglaze the pan by pouring in the 1/2 cup of wine. Allow the wine to reduce by half it’s volume.

4. Add the chicken broth to the skillet along with the chopped and washed leeks, and nestle the chicken back into the pan. Reduce the heat to low and allow the chicken to simmer 30-40 minutes or until cooked through and tenderized.

5. Remove the chicken to a fresh plate and (if necessary) turn the heat up to medium/medium-high and allow the broth with the leeks to reduce until it holds a line for a split second when you swipe a spoon across the bottom of the pan (the thickness of the sauce is somewhat a matter of personal preference, so don’t worry too much about it). When the broth is reduced to your liking, turn off the heat, add the cream and 2/3 of the parmesan, taste it and add salt and pepper if necessary.

6. In a separate pot, boil pappardelle according to package directions. Don’t forget to salt the water. While the pasta boils, preheat your broiler on high.

7. In a small microwave safe bowl, melt reserved Tbsp of butter. Add panko breadcrumbs and reserved 1/3 cup of parmesan and mix well.

8. When the pasta is al dente, add it to the pan with the leeks and sauce. Toss the pasta to coat it well in the sauce, and taste. Add salt, pepper, a splash of cream, more cheese, or a squeeze of lemon to finish the pasta as you like. Nestle the chicken back into the pan with the pasta and leeks, top with the breadcrumb/parmesan topping, and broil it until the top is nicely browned. Garnish with parsley if you like.

cancel reply

The Easiest One-Pot Broccoli Cheese Soup

The Easiest One Pot Broccoli Cheese Soup

Every home cook needs a good broccoli cheese soup recipe in their collection. And while there are a lot of good recipes out there, I have to admit that I have a problem with most of them. Because most of them call for making a roux or béchamel sauce in a separate pan AND THEN adding it to the bubbling pot of broccoli and broth to thicken up. That’s two dirty pots for one soup. I believe soup should be easier than this.

The Easiest One Pot Broccoli Cheese Soup

And this soup is kind of stupidly easy. It takes all of 20 minutes to make start to finish, it dirties exactly one pot, and it tastes better than ninety-nine percent of the restaurant versions I’ve tried.

I remove the need for an extra pan by using a flour slurry to thicken the soup instead of making a roux. Slurries thicken just as well in my opinion, and if you pass it through a little strainer on it’s way into the soup, there won’t be any lumping issues.

Also, you should know that while I like to use 100% sharp cheddar in my broccoli cheese, you can certainly feel free to mix your cheeses, use up whatever is in your fridge, or even add (gasp) American cheese if you want it to taste extra rich (and Panara-ey).

The Easiest One-Pot Broccoli Cheese Soup
makes 6-8 servings

Ingredients:
-1 medium white or yellow onion, diced
-2-3 tablespoons butter
-2-3 carrots, diced small or coarsely grated
-1-2 cloves garlic, grated or minced
-6 cups chicken broth (or vegetable broth), with 1/2 cup reserved for the slurry
-1 lb bag frozen broccoli
-6 tbsp flour
-1/4 tsp mustard powder
-pinch of cayenne pepper (or more if you’re feeling feisty)
-1/2 cup heavy cream (or you can omit the cream and replace 2 cups of broth with regular milk)
-1 8oz brick sharp cheddar cheese, grated
-salt and white or black pepper, to taste

Method:

1. In a large soup pot, sweat onion and carrot in butter over medium low heat. Add garlic and cook until fragrant.

2. Add chicken broth and entire bag of broccoli. Simmer over medium heat until the broccoli is tender.

3. In a bowl with a whisk (or a small container with a lid) combine flour with reserved broth and whisk or shake until very, very well mixed (this is the slurry).

4. While the soup is bubbling, whisk the flour and broth into the soup. If the slurry is even a little bit lumpy, you can strain the slurry into the soup and prevent ending up with a lumpy soup. Stir in the slurry, bring the soup back to a bubble, and allow it to thicken for a couple of minutes. If you’d like your soup thicker, you can add another 1-2 tablespoons of flour using the same method (cold broth, mixed well, strained into the soup).

5. Add mustard powder, cayenne, and salt and pepper to taste, keeping in mind that the cheese will add a bit of salt to the soup too.

6. Stir in your cream and let the soup come back up to a bubble, then turn off the heat.

7. A handful at a time, whisk in the shredded cheese (off the heat to prevent curdling the cheese) until the cheese is melted and the soup is smooth. Taste the soup and add salt, pepper, or cayenne as you like.

  1. Made this today and it was delicious! I just used fresh instead of frozen broccoli.

    Suzanne Carroll — January 31, 2016
    1. reply
cancel reply

Winter Salad with Citrus and Avocado

Winter Salad With Citrus and Avocado

I am waiting on a blizzard. My little corner of the country is expected to get about a foot of snow (maybe more, maybe less) over the next two days. I ran out for some batteries and chipotle last night (last chance to not cook for who knows how long) and the traffic itself was grumpy and panicked. I got my fill of people for the next few days, and I’m stocked and ready to hole up with hot beverages and maybe a billion bowls of pasta. I also have plenty of clementines to stave off scurvy for as long as necessary. I’m ready.

This is my favorite salad to serve with dinner in the winter. It’s so bright and pretty and seasonal and the opposite of a blizzard. I’ve done almost the exact same flavor combination before, in a pretty ombre citrus salad without greens, but I feel like I need to remind people that it is a thing: citrus with onions and toasted almonds (and salt and pepper). It’s probably the weirdest flavor combination ever created but I tell you, it mystically and gorgeously works.

Winter Salad With Citrus and Avocado

I didn’t come up with it myself either. My grandma has been serving green salad with orange supremes, onion, and slivered toasted almonds (and sometimes a dash of dill) to me almost my entire life. Maybe it’s one of those vintage flavor combinations that have somehow been forgotten along the way, but I’ve been enjoying it since I can remember, and I want YOU to enjoy it too.

Winter Salad With Citrus and Avocado

I miss tomatoes this time of year, especially in salads. Don’t you?? They bring a juicy, acidic heft to green salads that winter tomatoes just can’t muster. So how ’bout listening to the seasons and swapping dry and mealy winter tomatoes for tart hunks of citrus?

And grapefruits! Did you know that salt works to magically counter-act the bitterness in grapefruits? I’m telling you, grapefruit never tasted as amazing as it does when you throw it in this savory salad. I don’t even usually like fruit in salads AT ALL, but citrus plays with the savory flavors here really really well. I promise. Indulge me and try it.

And also cross your fingers that I don’t lose power in this blizzard so I can still make hot foods (and watch netflix…and not freeze to death). K thx.

Winter Salad With Citrus and Avocado


Winter Salad with Citrus and Avocado
Makes 3-4 servings

Ingredients:
1 Tbsp white wine or champagne vinegar
1 Tbsp olive oil
2 tsp honey
salt and black pepper to taste
1 grapefruit (or sub any citrus you like)
2-3 clementines (feel free to sub your favorite)
about 1/4 cup thinly sliced red onion
1 avocado
about 1/4 cup almonds, toasted (whole, sliced, slivered, all are good)
about 4 cups or 1 bag of your favorite salad greens (you can stretch this to feed more people with a bit more greens)

Method:

1. In a large bowl, whisk together vinegar, olive oil, honey, and a good pinch of salt with a generous grind of pepper. This is a small amount of dressing for a pretty voluminous salad, but the dressing is STRONG (note the 1:1 ratio of vinegar to oil) and will be mellowed out by the liquid the citrus gives off.

2. Thinly slice your onion and let it sit in the bottom of the bowl with the dressing to marinate and soften while you do the rest of the chopping and slicing.

3. If your almonds aren’t already toasted, put them in a small glass bowl in the microwave for a minute. Stir and microwave for another minute. Continue stirring and microwaving in 30-60 second bursts until the almonds are lightly browned and fragrant. Allow to cool and chop roughly.

4. Remove the outer peels from the grapefruit and clementines (or whatever citrus you chose) and slice into rounds or remove each section from the fruit with a knife.

5. Add your greens to the salad bowl and toss to coat with dressing. If the greens you are using are of the soft and fluffy variety (spinach, spring mix, baby kale, arugula) consider squishing the greens a little bit while you toss them. This mellows out the flavors a bit, causes the greens to wilt, and makes it easier to eat a heaping ton of greens, which is good. If you are using romaine or iceberg, skip this step. I like to use a mix of both soft and crunchy lettuce, massaging the soft greens and then gently tossing in the crunchy lettuce (pictured is a crispy butter lettuce and radicchio mix with some massaged baby kale).

6. Peel and slice your avocado into chunky wedges. Add to the salad bowl along with the citrus and gently toss together until everything is lightly coated in dressing.

7. Taste the salad and add salt and pepper if necessary. Serve and top with toasted almonds.

cancel reply

Quinoa Power Bowls with Avocado, Hummus and Smoked Paprika Vinaigrette

Vegan Quinoa Power Bowls with Avocado and Smoked Paprika Vinaigrette

So this bowl is vegan by accident. When I decided I wanted to make a veggie-centric hearty yet healthy power bowl, I chose the components that I thought would make it as delicious as possible. Turns out, sometimes maximum deliciousness doesn’t involve meat or cheese (or French fries) at all. Who knew?

Vegan Quinoa Power Bowls with Avocado and Smoked Paprika Vinaigrette

Also, have you ever had hummus warm? And as a component of a dinner rather than a dip? If not, I recommend that you do. It’s really delicious and richly comforting. Homemade hummus is my favorite (by far) but if you don’t have it on hand and there’s a store bought hummus you like, use it (and tell me which one it is because I need a fix for lazy days). I don’t recommend trying to make hummus from scratch on the same night as you make these bowls. You could, but it feels ambitious to me, and I think if anything healthy eating needs to be brought down to earth. Leave your ambitions at work or the gym or someplace more glamorous than your kitchen.

Vegan Quinoa Power Bowls with Avocado and Smoked Paprika Vinaigrette

It looks like there is a lot going on in here, but the prep for the recipe is pretty simple. Especially if you have a Trader Joe’s near you where you can pick up a bag of pre-chopped butternut squash and a box of frozen quinoa (removing as many roadblocks as possible makes weeknight cooking less daunting). From there it’s just about slicing an avocado, chopping an onion and some peppers, timing the roasted veggies, and zapping a few things in the microwave.

Vegan Quinoa Power Bowls with Avocado and Smoked Paprika Vinaigrette

Pretty colors, huh? This recipe takes about an hour to put together, with 15 minutes of that time actually actively cooking. It’s filling, comforting, rainbow-licious (??(sure)), amazingly flavorful, and somehow magically vegan.

Vegan Quinoa Power Bowls with Avocado and Smoked Paprika Vinaigrette

Quinoa Power Bowls with Avocado, Hummus, and Smoked Paprika Vinaigrette
Makes 2 big bowls

Ingredients:

1 small butternut squash, peeled and diced into about 1″ cubes (or get some pre-diced from TJ’s or Wegmans or wherever)
1 medium red onion
1 yellow, orange, or red bell pepper (or a handful of mixed baby peppers like I used here)
2 cups quinoa, cooked (or a bag of frozen quinoa)
4 cups fresh arugula, spinach, or baby kale
1 small avocado
1 cup of your favorite hummus
olive oil, for roasting
salt and pepper
chopped parsley, for garnish

Smoked Paprika Vinaigrette:
2 Tbsp olive oil
1 clove garlic, minced or grated
1/2 tsp smoked paprika
2 tsp honey
2 Tbsp red wine vinegar
1/2 tsp kosher salt
black pepper to taste

Method:
1. Start by preheating your oven to 400F. On a rimmed baking sheet, toss the diced butternut squash in a drizzle of olive oil, sprinkle with salt and pepper, and roast in the oven for 30 minutes (it will take a full hour for it to get nice and caramelized and delicious, but the squash needs a head start on the peppers and onions).

2. While the squash roasts, roughly dice peppers, cut onion into chunky wedges, and set aside.

3. If you are cooking quinoa from scratch, start the pot now. Follow the directions on the bag to end up with two cups of cooked quinoa, and don’t forget to add salt. If you are cooking quinoa from frozen, wait until assembly time.

4. In a large, microwave-safe mixing bowl (big enough to toss your baby greens of choice in) make your vinaigrette. Mix together olive oil, garlic, and smoked paprika and microwave for 30 seconds. When the paprika and garlic are warm and fragrant, add honey, vinegar, salt, and pepper. Take out 2-3 tablespoons of the vinaigrette for topping finished bowls, and pile your 4 cups of greens in the large bowl, but wait to toss them until you are ready to plate.

5. When the butternut squash has roasted for 30 minutes, take the pan out of the oven, toss the squash around and scoot it all to one side of the pan. Lay out your peppers and onion wedges on the other side, add salt and pepper, and return the pan to the oven for another 30 minutes.

6. When the vegetables are tender and nicely caramelized, you’re ready to start assembling bowls. Start by microwaving your frozen quinoa (if that’s what you are using). Then load about a half cup of hummus in each bowl and microwave them for 45 seconds each. Add a scoop of quinoa next to the hummus.

7. Toss the greens in their bowl with the paprika vinaigrette. I like to squish the greens a bit for this, so they soften and wilt. You get a lot more greens on your plate that way, plus they are easier to eat (and more delicious in my opinion).

8. Pile the roasted veggies on top of the bed of hummus/quinoa/greens you just made. Then finish the bowls by slicing up your avocado and arranging on top, drizzling everything with the reserved vinaigrette, and topping with a bit of chopped parsley (if you’re into that).

  1. […] next: Power bowls with quinoa, avocado, hummus, and smoked paprika vinaigrette. Stay […]

    Smoked Paprika Vinaigrette | Sweet Salty Tart — January 18, 2016
    1. reply
  2. That looks really good! Shortcuts are so helpful when you can't spend too much time in the kitchen. Frozen diced onion is my favorite shortcut.

    Amy — January 18, 2016
    1. reply
  3. […] bowl with smoked paprika vinaigrette // HERE // […]

    Easy and Delicious: Buddha Bowls - Nibs & Bits — July 11, 2016
    1. reply
  4. […] Es ist wirklich das schönste Gefühl dann nach ein paar Tagen Dreh nach Hause zu kommen und sich erstmal wieder etwas Schönes zu Kochen oder zu Backen. Für mich ist „Comfort Food“ ein richtig schöner Salat mit Avocado, Hummus, Quinoa oder Hirse, Spinat, Roter Bete, Kürbis und einem heißem Paprika-Dressing … hach  ( – wer sowas mal ausprobieren und nachkochen mag, hier gibt es meine beiden Lieblingsrezepte: The Vegan Buddha Bowl und Quinoa Power Bowl) […]

    Aber bitte ohne Sahne! ⋆ Kleine graue Wolke — December 2, 2016
    1. reply
cancel reply

Smoked Paprika Vinaigrette

Smoked Paprika Vinaigrette
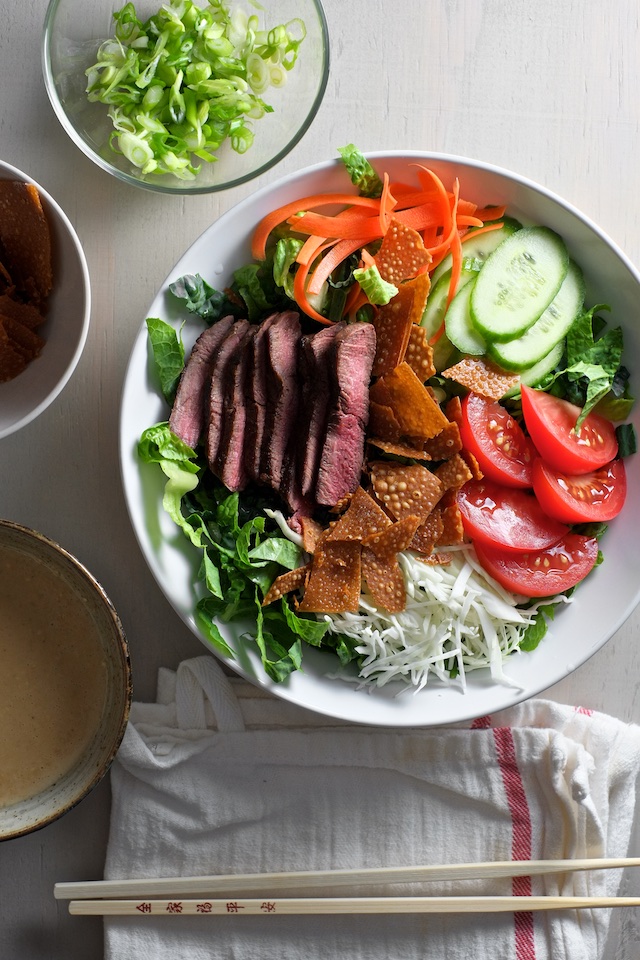
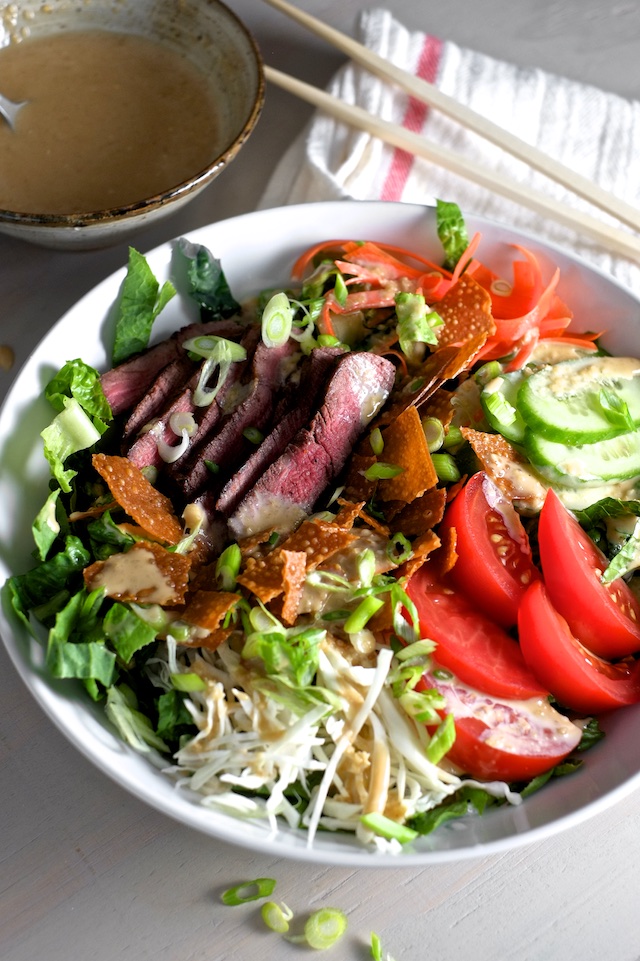
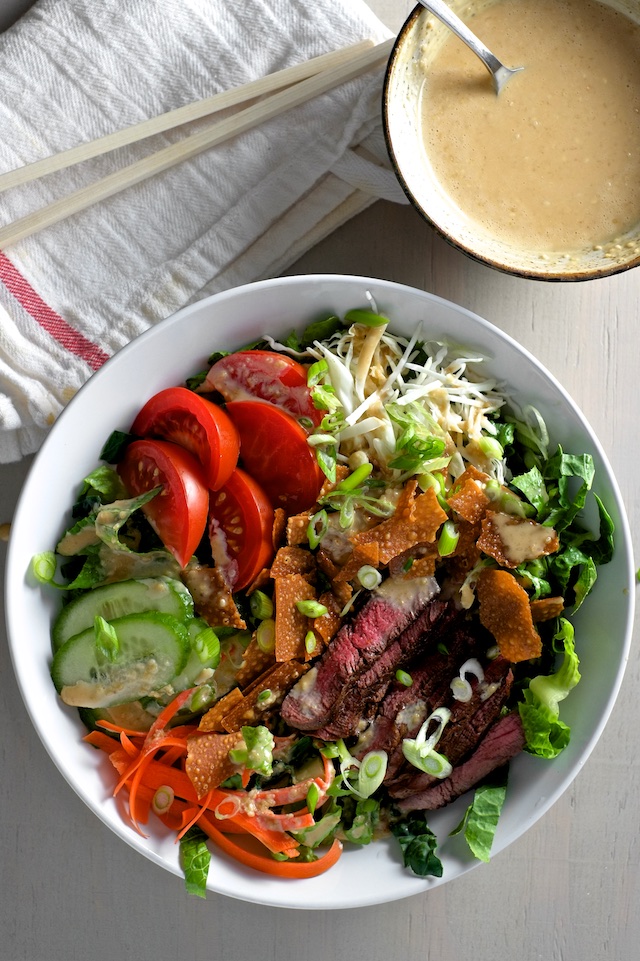
I’m in California! We are visiting Cody’s family, and eating lots of good food, and I have instagrammed exactly one photo of my travels because family distracts me better than anything. But this vinaigrette is important, so here I am blogging for you.

Smoked paprika is almost kind of trendy I think. Reminds me of tapas at restaurants where the plates are deceptively cheap (only 8 dollars per plate!) but the servers recommend 3-4 per person. So I’m inclined to be annoyed by the association, but smoked paprika is legitimately good. It has kind of an in-your-face flavor that pairs well with other in-your face flavors, like garlic and vinegar. So we naturally come to this vinaigrette, which is very good on many things and also happily vegan. Honestly it is rare for a vinaigrette to not be vegan, but the smoke in this paprika reads deceptively rich and maybe almost meaty? Without the mouth coating fattiness of actual smoked meat.

Smoked Paprika Vinaigrette
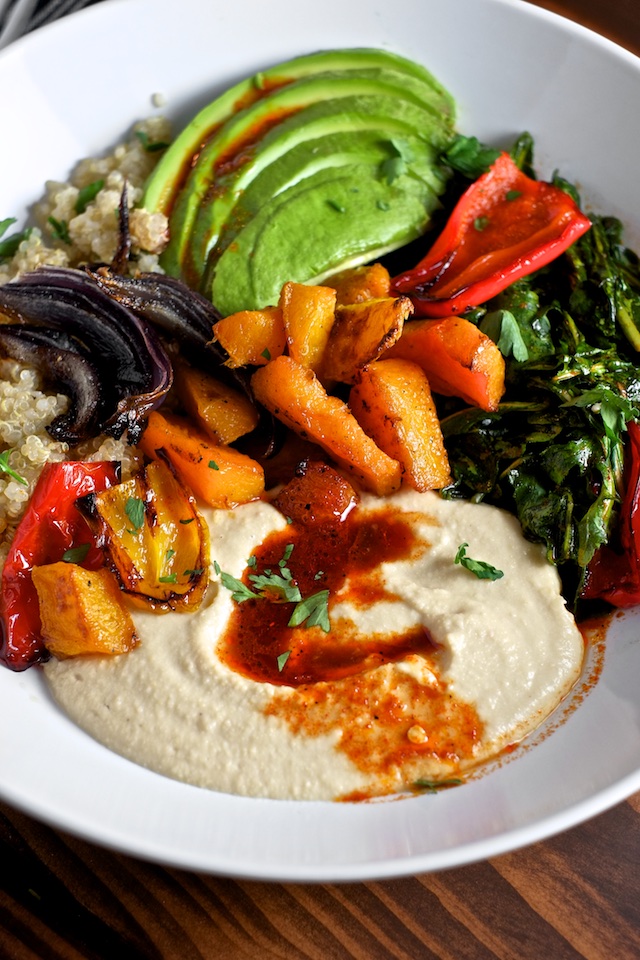
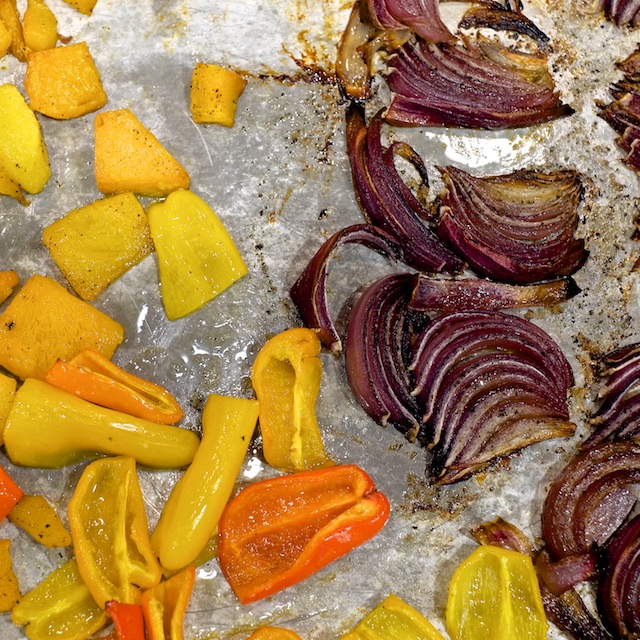
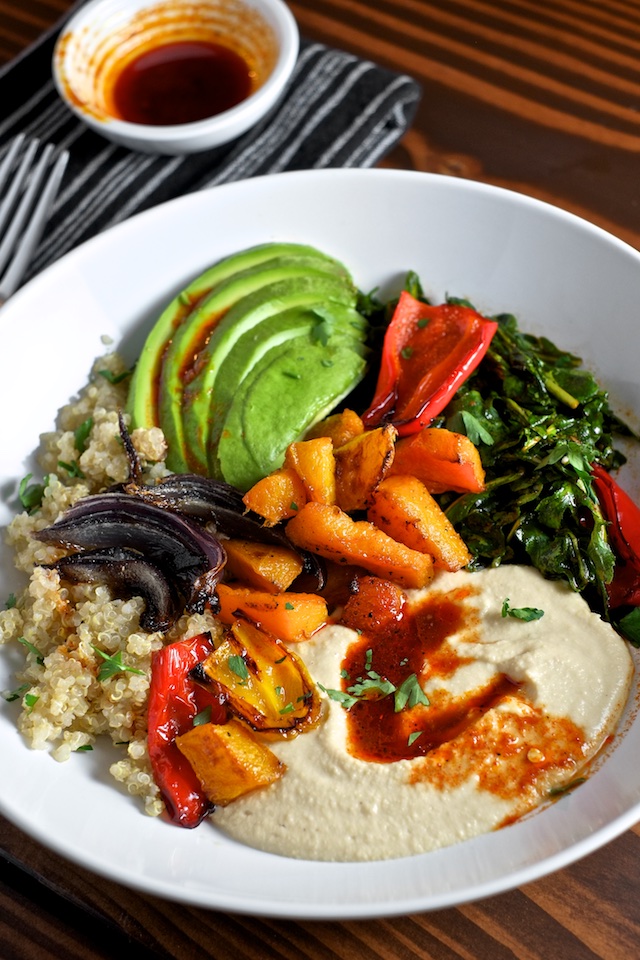
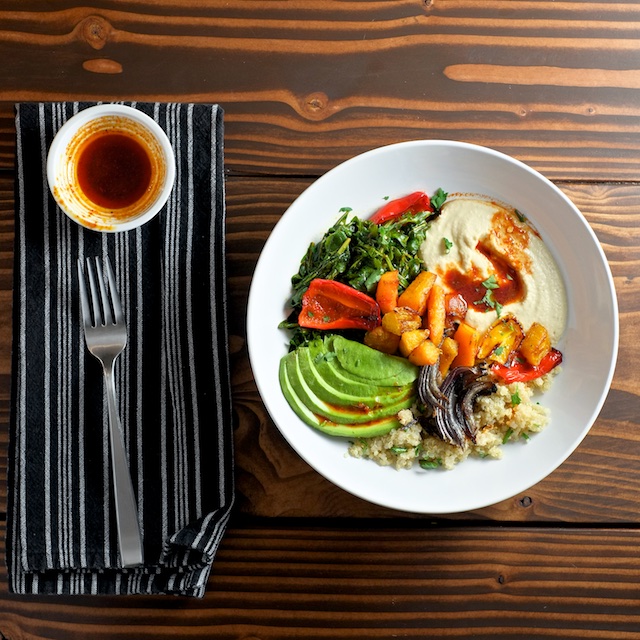
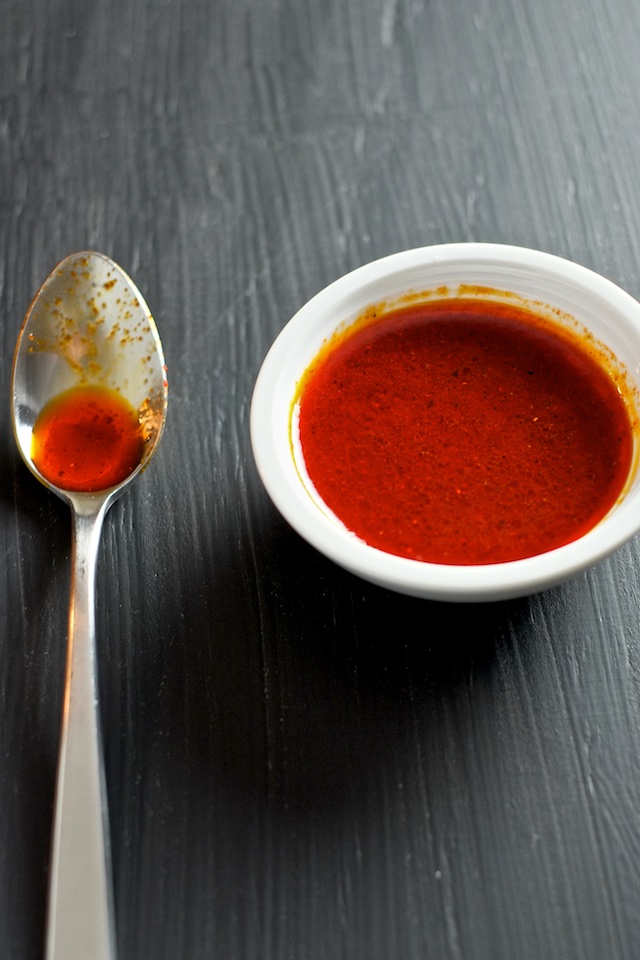
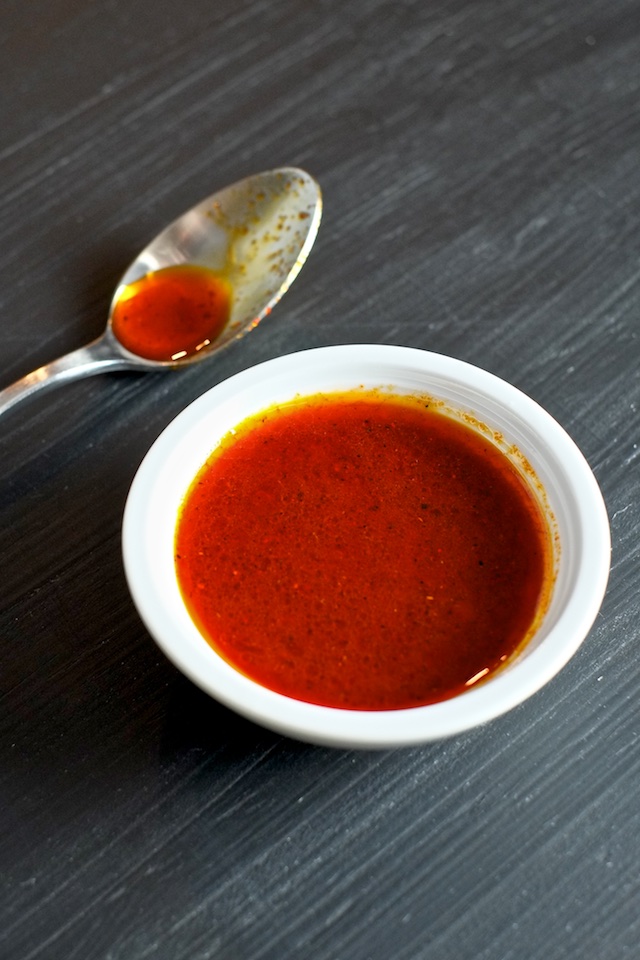
I made this vinaigrette specifically for a really awesome power bowl that will be coming at you very soon (like probably tomorrow) and it completely makes the bowl. I was inspired to create it as sort of a Nando’s Piri Piri hummus with paprika drizzle tribute (spoiler: the power bowl has hummus). So it goes awesomely with hummus, but also with greens of all kinds, avocado, and roasted winter squashes. So I recommend making a batch and using it liberally.


Smoked Paprika Vinaigrette

Makes enough for 2 power bowls or one big salad

Ingredients:

2 Tbsp olive oil

1 clove garlic, minced or grated

1/2 tsp smoked paprika (more is ok if you are a smoked paprika freak, just taste before you go crazy)

2 tsp honey

2 Tbsp red wine vinegar (or sherry vinegar)

1/2 tsp kosher salt

black pepper to taste

Method:

1. In a small glass bowl, combine olive oil, paprika, and garlic.

2. Microwave the olive oil, paprika, and garlic for 30 seconds to bring out the flavors in the paprika and garlic.

3. Add honey, red wine vinegar, salt, pepper, and whisk well to combine.

4. Use as a salad dressing, hummus topping, or marinade for grilled or roasted veggies or meat.

Up next: Power bowls with quinoa, avocado, hummus, and smoked paprika vinaigrette. Stay tuned!

  1. […] Smoked Paprika Vinaigrette: 2 Tbsp olive oil 1 clove garlic, minced or grated 1/2 tsp smoked paprika 2 tsp honey 2 Tbsp red wine vinegar 1/2 tsp kosher salt black pepper to taste […]

    Quinoa Power Bowls with Avocado, Hummus and Smoked Paprika Vinaigrette | Sweet Salty Tart — January 18, 2016
    1. reply
  2. yum! I crave that drizzle on the hummus at nando's. totally making this!

    emily — January 23, 2016
    1. reply
cancel reply

Millionaire Shortbread Bars – UPDATED!

Millionaire Shortbread Bars - Updated

Millionaire Shortbread Bars with Maldon sea salt: the homemade (by me!) favors for my little sister’s wedding.

Before I dive into this, I just want to say that having a cold while pregnant is real lame. I miss sleep. Also, not being allowed a proper adult amount of caffeine to compensate for the lack of sleep is…inconvenient. And then add to that the fact that I normally require amphetamines to organize my thoughts well enough to be helpful and coherent (prescription, because I have ADD) and drugless pregnant brain slugs. My brain is slugs. Writing this post feels like climbing a mountain with Murdock on my back. While pregnant.

But I have something to say and it feels important because it contains updates and corrections and I feel guilty because it means the information I previously provided is flawed.

My sister got married after Christmas and I made the wedding favors. 200 bags of these bars. Have you ever made a recipe dozens of times without any problems and then one day they go wrong? It pulls the rug out, shatters the confidence, but as a silver lining learns us a thing or two. That’s what happened to me with these “easy millionaire shortbread bars” that I had previously written about. And while they are probably still easy by most standards, I’ve come out with a newfound respect for them and some tips for success. So here you go.

Millionaire Shortbread Bars - Updated

First of all, I don’t see any point making a normal sized batch of these anymore. If you are going to saddle up and make a mess in the kitchen, make a double batch using a half sheet or jelly roll pan. Take extras to work, stick them in the fridge for later, or give them out as gifts. Everyone will love you.

Always line the pan thoroughly with aluminum foil. Heavy duty or nonstick are my favorites. Make sure the foil extends around the edges of the pan too, so you can lift the bars out easily.

For the shortbread: add more butter than I suggested in the original recipe. It makes it easier to work with and ever so slightly less crumbly. If you have a food processor make the shortbread with it. And lastly, bake the crust until it’s solidly golden brown (at least 20 minutes, possibly 30)

On the caramel: I experimented with shortcuts and long cuts (like letting it sit in a crock pot for hours on end) and there’s just no nice way to do it. Get ready to stir for a solid 30 minutes, and wear rubber gloves because getting spit on by hot molten sugar and fat hurts like the dickens. Don’t wait to melt the butter into the caramel until the end (like I originally suggested), add it at the beginning.

Cook the caramel over medium-low instead of medium (it will spit at you less but take slightly longer to finish), stirring occasionally until it starts to brown, then stir constantly until it’s nice and brown and thick (see below). You want the texture to be sticky and ribbony with slowly popping bubbles. If you are a candy maker, the mid pot temperature range is between 219-222 F (that’s kind of between firm and hard ball) and the bottom of the pot is around 240 F (that’s soft crack stage). I’m guessing that means the finished product is some kind of hard ball soft crack hybrid, but I don’t know candy, so someone tell me please. Salt the caramel well and taste it (carefully!) before you pour it over the shortbread.

Millionaire Shortbread Bars - Updated

For chocolate: Use chips. Chips contain stabilizers and because I’m not a chocolate expert and I don’t want to bother with tempering, I need the extra help. The biggest failed experiment I had was when I used bar chocolate instead of chips and the chocolate had this awful crumbly sandy texture and I still don’t understand why. Melt the chocolate gently in a glass bowl over a small pot of water on medium low heat, making sure the bottom of the bowl isn’t touching the water below. Set the bowl on a towel before pouring it over the caramel (getting water in melted chocolate will cause it to break and get grainy almost immediately). Then allow the chocolate to set a bit at room temperature before you stick the whole slab of bars in the fridge. I salted the bars for the wedding with Maldon salt before letting them cool, and it tasted good and looked pretty but I think I was tempting fate by possibly drawing moisture out of the chocolate? So salt the chocolate at your own risk (it was delicious though).

So have I scared you out of making these? I really don’t mean to! Honestly even the batches I considered “failures” were gobbled up by my family. I’ve literally only screwed these up badly once (the crockpot caramel and crumbly chocolate incident which was not served to wedding guests), and it was because I was over thinking them. It’s hard to truly fail with a recipe that contains this much butter. The bars pictured were even the messiest, cracked-chocolate-est bars of wedding batches bunch (some were actually pretty) and they were delicious and everyone loved them. I think I’ve just become a bit better attuned to the nuances of texture and flavor after making so many of these bars, so I’m pickier than I used to be. THE MORE YOU KNOW (picture rainbow and book logo here).

Millionaire Shortbread Bars - Updated

So you guys, if anyone makes these and has feedback for me, pretty please let me know. As you can see, I’m open to criticism and making improvements as often as necessary.

NEW AND IMPROVED Millionaire Shortbread Bars

Ingredients:

For the shortbread:
2 1/2 cups all purpose flour
1/2 cup sugar
1/2 tsp salt
2 1/2 sticks salted butter, cut into small cubes

For the caramel:
2 cans sweetened condensed milk
1 cup sugar
6 Tbsp light corn syrup (use a 1/4 cup measure and fill it one and a half times)
2 sticks salted butter, cubed
more salt to taste (I used at least an extra 1/2 teaspoon)

For the chocolate:
2 cups of your favorite chocolate chips (I like a blend of Ghirardelli bittersweet and semi sweet)

Method:

1. Start by making the shortbread. If you have a food processor, add all the ingredients to the bowl and pulse until well combined and all the butter looks evenly sandy. If you don’t have a food processor, stir together the flour, sugar, and salt, and cut in the butter with a pastry cutter.

2. Line your half sheet or jellyroll pan with aluminum foil (making sure all the edges are well covered) and press in the shortbread mixture. Bake at 350F for 20-30 minutes or until solidly golden brown.

3. Put on some gloves. In a 2 quart sauce pan over medium-low heat, combine ingredients for caramel. Whisk occasionally until the mixture starts to brown, then whisk constantly until the caramel is thickened substantially, is sticky and ribbony when you lift your whisk and bubbles that show up pop slowly. This process will take about 30 minutes, but I promise it’s worth it.

4. Pull out a spoonful of caramel, let it cool, and taste it. Add salt if necessary (you want the caramel to be the main sweet/salty component). Pour the finished caramel over the baked shortbread and spread it evenly with a rubber spatula or knife.

5. Rinse out the saucepan you used for the caramel and add an inch of water to the bottom (resourceful!). Set a glass mixing bowl on top of the pan with your two cups of chocolate chips. Stir the chocolate until it is melted. Remove the bowl to a towel to dry the bottom.

6. Pour the melted chocolate over the caramel and spread it evenly. I find it helpful to shake the pan back and forth or drop it on the counter from about six inches in the air to help work the bubbles out of the chocolate. Allow the chocolate to come to room temperature before chilling in the fridge. If you have time, you can let the bars cool entirely at room temperature and skip the fridge.

7. After the bars are set, remove them from the fridge (if that’s where you put them) and let them come to room temperature for 20-30 minutes (this makes the chocolate less likely to crack during cutting, though frankly who cares?). Cut into bars and serve them up!


  1. These bars are phenomenal. Thank you for going the extra mile for your sister's wedding and perfecting the recipe for the rest of us in the process. <3

    Carrie — January 6, 2016
    1. reply
  2. […] UPDATE: This recipe has been updated here! […]

    Easy Millionaire Shortbread | Sweet Salty Tart — January 6, 2016
    1. reply
cancel reply

Six Make-Ahead Recipes for Christmas Morning

The Last Bread Pudding Recipe You'll Ever Need

Christmas is work for cooks. As much as I love Christmas (SLASH my birthday) I haven’t made it through one since I hit my twenties without being heavily involved in the washing of dishes and preparation of large meals. It’s kind of a drag but I will not have it any other way. Christmas without a festive breakfast and dinner is sad, which means someone has to cook. But because I also want to enjoy my birthday I will plan ahead and do as much prep beforehand as possible. To you I submit: make-ahead breakfasts for Christmas morning. Pop them in the oven, set a timer, and go rifle through your stocking for chocolates.

1. The Last Bread Pudding Recipe You’ll Ever Need. Did you know that most breakfast casseroles are just bread pudding in disguise (frequently named strata)? I love strata and bread pudding because you can make them savory or sweet, they are festive and filling, and they really benefit from an overnight rest in the fridge. I made a sausage and spinach version with gruyere using this method and it turned out pretty great.

Overnight Blueberry Almond Oatmeal

2. Overnight oatmeal. This recipe I wrote for lazy and rushed college kids, but who doesn’t want to sleep in on Christmas morning and do as little work as humanly possible? This version is healthy (so you can save your sins for dinner) and makes use of frozen blueberries, but you can use the oat to milk ratio as a guide and customize it with roasted apple, pumpkin, cinnamon, etc. And as good as this oatmeal is cold, a quick spin in the microwave makes it a lot more like traditional oatmeal.

freshly baked scones

3. The Last Scone Recipe You’ll Ever Need. These scones are bananas and completely customizable too, so you can take them savory or sweet, cheesy or fruity, and it’s all the same process. Make the dough the night before, stash it in the fridge over night, and bake them in the morning.

4. Cinnamon Rolls. Yeasted breads require a bit more baking confidence than I can typically muster, but these rolls from The Candid Appetite are so gorgeous I might leave my comfort zone for them. Bake them the day before, reheat the morning of, and bathe them in cream cheese frosting.

5. Classic Quiche. I have already signed up to bring quiches to my grandma’s house this Christmas. I’ll bake them the day before and reheat them in the oven before we eat. This version with leeks, bacon, and spinach by Foodiecrush is gorgeous and looks just different enough from my typical quiche lorraine to be inspiring.

6. Australian Sausage Roll. So I’ve never had a sausage roll, but I’m imagining that some spicy breakfast sausage would be just as at home in a blanket of puff pastry as the lamb and Italian sausage in this version from Spoon Fork Bacon. I would assemble the rolls, keep them in the fridge over night, then egg wash and bake them in the morning.

Do you have a Christmas morning food strategy? Spill. We all need ideas!

  1. Thanks for the ideas. Think I'm going with the Quiche. Although the scones looks delicious. Merry Christmas!

    Lisa — December 23, 2015
    1. reply
cancel reply

Steak Salad with Creamy Sesame Dressing

Steak Salad With Creamy Sesame Dressing

Sesame and steak! What could possibly be wrong with that? I’ll tell you what’s wrong: I forgot to add the sliced avocado, and it’s making me furious! This is a really good salad even without the avocado, and honestly I didn’t notice the lack of it until I saw the lonely avocado sitting on my kitchen counter the next day, but I MEANT for there to be avocado because it just makes so much sense! A good blogger probably would have re-shot the whole thing but, to be honest, photography is not my favorite part of this whole blog process. Cooking I love, writing is fine, but photos stress me out. So you get avocado-free photos and a really snarky post intro.

Steak Salad With Creamy Sesame Dressing

But this is a delicious dish. A healthy and satisfying meal in a bowl that works perfectly with that sesame dressing. I am proud of it. I will make it again. And next time I will not forget the avocado.

If you have chopsticks in your house, you should use them. Salad is somehow easier to eat with chopsticks than with a fork.

Steak Salad With Creamy Sesame Dressing


Steak Salad With Creamy Sesame Dressing
makes 2 servings

Ingredients:
-4-6 raw wonton wrappers (or you can use store bought crispy wonton strips)
-2 Tbsp neutral flavored oil, divided (like sunflower or canola)
-1 steak of your choice
-about 4 cups shredded romaine
-about 2 cups shredded lacinato kale
-about 1 cup shredded cabbage (green or red)
-1 carrot
-about half a small cucumber
-1 tomato
-3-4 scallions
-1 avocado (do not forget)
-1/4 to 1/3 cup sesame dressing

Method:

1. Prep your dressing if necessary using this recipe (don’t worry it’s super easy).

2. Start by preheating your oven to 350F. On a baking sheet lay out your wonton wrappers and brush each side with oil (you’ll use about 1 Tbsp total). When the oven is preheated, bake the wonton wrappers for 15-20 minutes or until they are golden brown and crispy. Drain the baked wonton wrappers on paper towels, crush them up, and set aside.

3. Prep your steak for cooking by setting it on a plate a room temperature, adding generous salt and pepper to both sides, and coating the surface in the second tablespoon of neutral oil. Set the plate aside until you are ready to assemble your salads.

4. Slice and wash the kale, romaine, and cabbage and set aside (if you have a salad spinner, use it to dry the greens).

5. Peel the carrot and grate it or use peeler to create thin strips of carrot and cut them to the desired length. Slice cucumber, tomato, and scallions and set aside.

6. Lay romaine, kale and cabbage in your serving bowls. Pile cucumber, carrot, and tomato on top.

7. Preheat a nonstick or cast iron skillet over medium heat for about 3 minutes. When the pan is hot, lay your seasoned and oiled steak in the pan and let it sear until it’s brown and crusty on one side (about 3-4 minutes). Flip the steak and let it cook until you reach your desired doneness (read this here for more information about pan seared steak and here about temperatures). Remove the steak from the pan and let it rest on a cutting board.

8. While the steak rests, slice your very important avocado and divide it between the salads.

9. After the steak has rested for 5 minutes, slice it, divide it, and lay it on the salads. Top the salad with the sesame dressing, crushed wonton wrappers, and scallions. Serve immediately.

  1. After eating a dozen cookies today this salad is exactly what I should have for dinner tonight, but where's the avocado?? just kidding ;)

    April @ Girl Gone Gourmet — December 17, 2015
    1. reply
  2. Bahaha! But what are the holidays for if not playing cookie monster? Also, DON'T FORGET THE AVOCADO.

    courtney — December 23, 2015
    1. reply
cancel reply