Sauce Series in Practice – Bechamél and Cheese Sauce

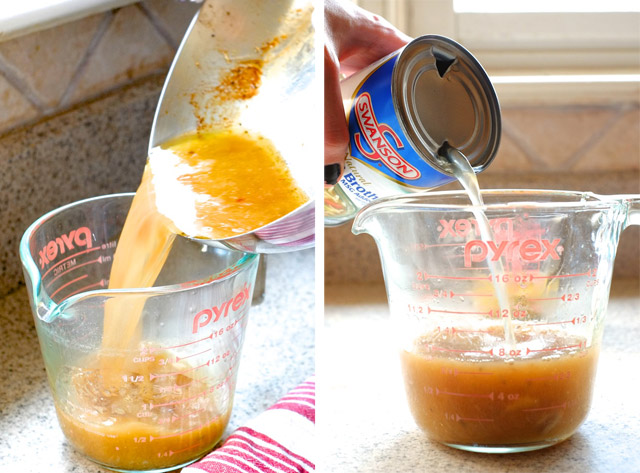
Bechamél sauce is probably the most versatile sauce I’ve ever learned to make. It is essentially milk thickened with roux, which creates a sauce that blankets food like nothing else. But it almost never ends there. With egg and nutmeg it becomes the custardy topping for moussaka, with cheese it’s just the thing for mac, and thinned with a little broth it transforms into creamy soup (goodbye cream-of-whatever).

sauce series bechamel and cheese sauce

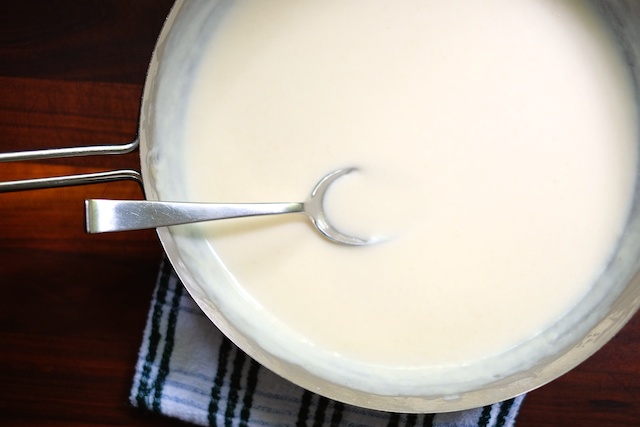
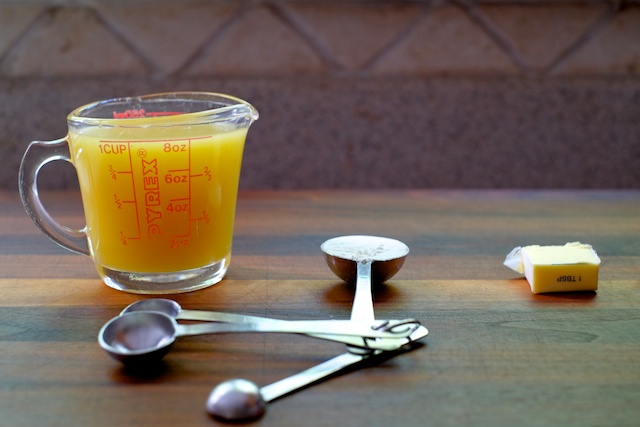
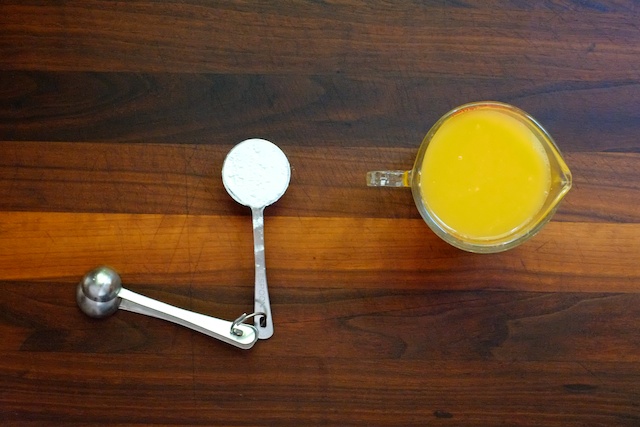
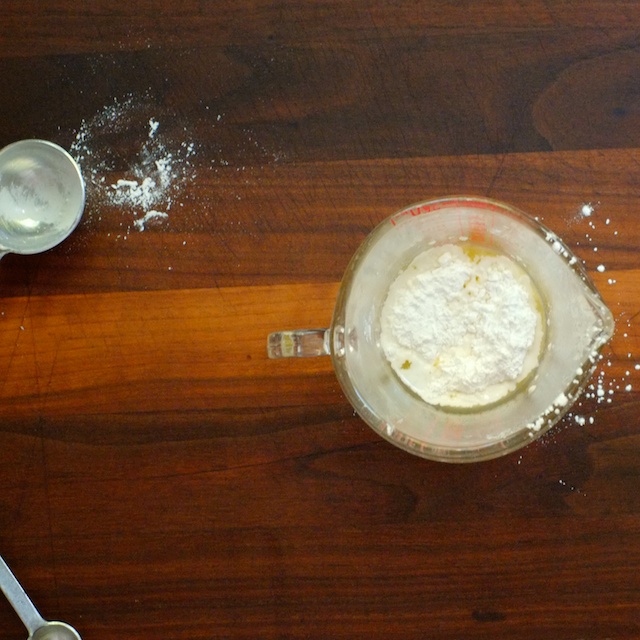
I made a batch with 3 tablespoons each of flour and butter, and two cups of whole milk. Whole is my preference, but two or even one percent will also work. Skim milk bechamél would be a mistake IMO.

sauce series bechamel and cheese sauce

Mornay sauce is made with gruyere and parmesan cheese melted into bechamél sauce. I like to add a dollop of dijon or dry mustard for flavor almost every time I’m making cheese sauce. Somehow mustard makes cheese sauce taste cheesier. I made a variation on classic mornay here with gruyere (no parm) but bechamél is my go-to base for cheddar cheese sauce, blue cheese sauce, fontina cheese sauce, you name it.

sauce series bechamel and cheese sauce

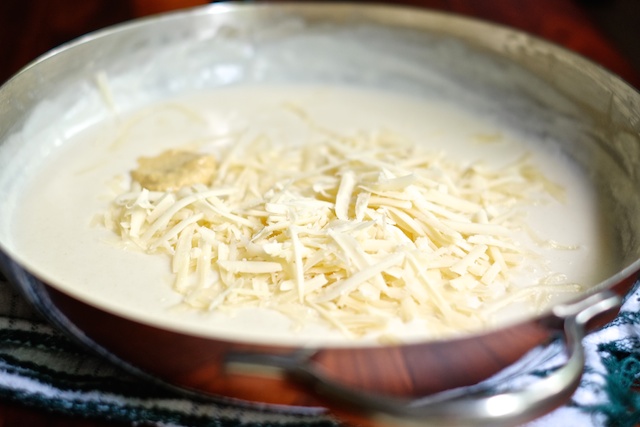
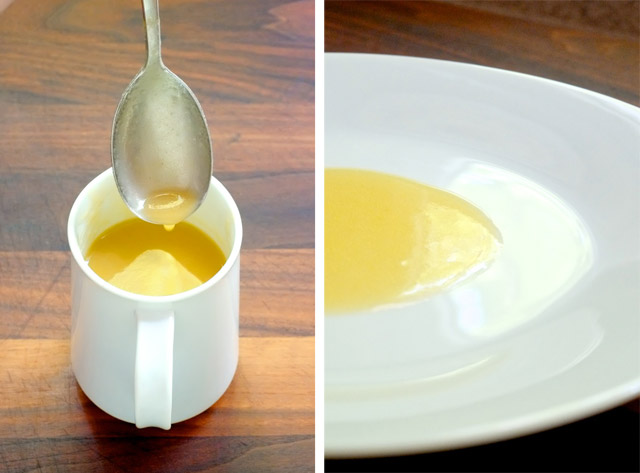
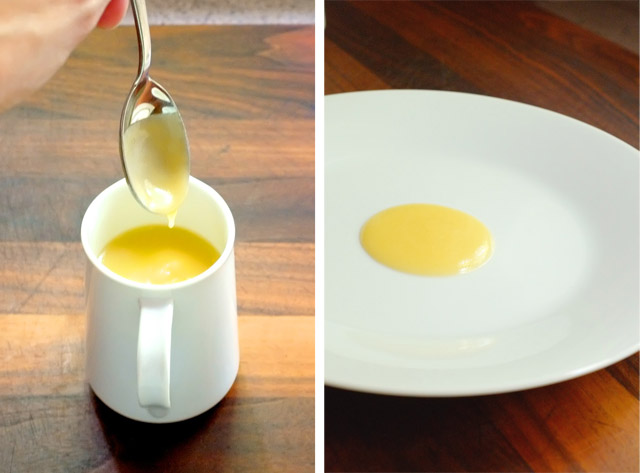
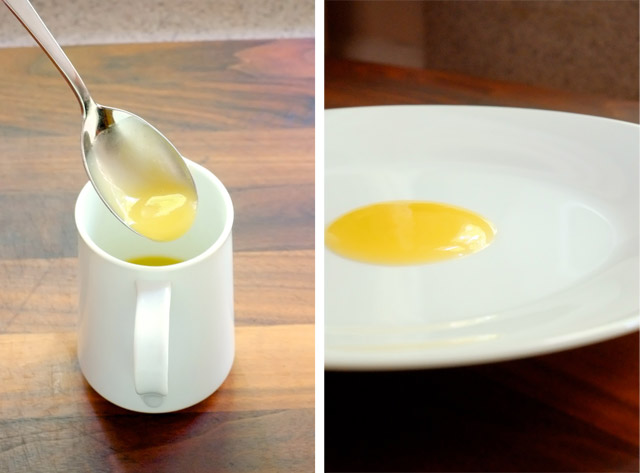
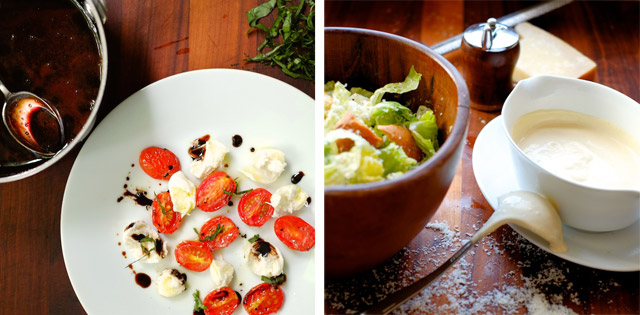
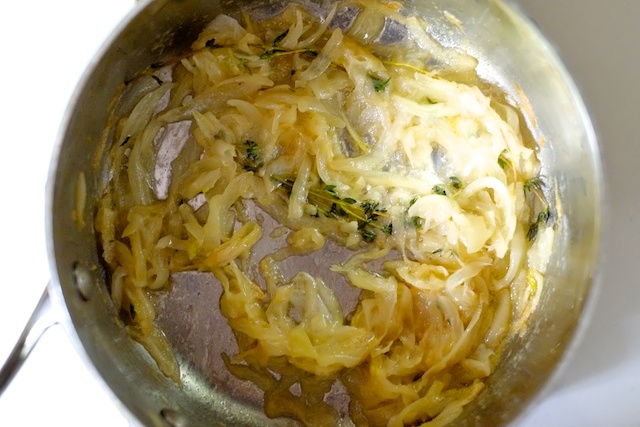
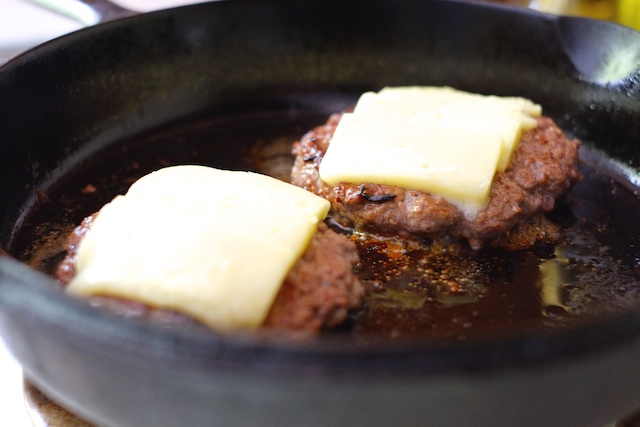
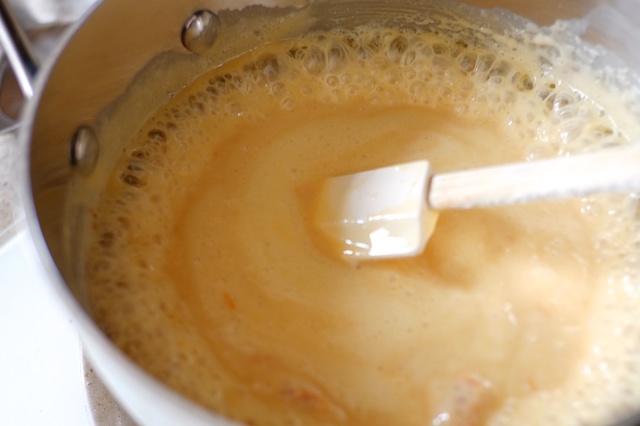
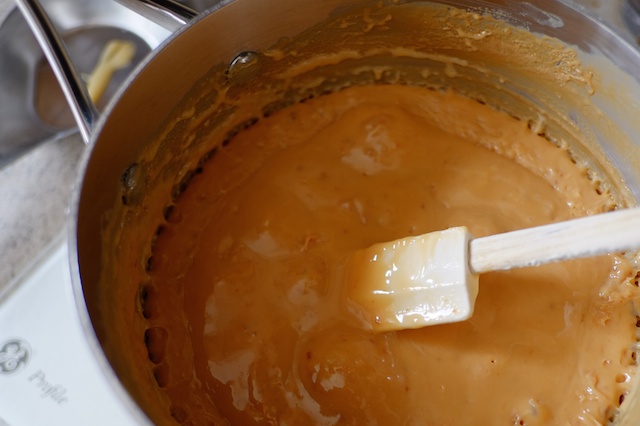
The most important piece of advice I can give you for making cheese sauce is to grate your cheese and add it to your sauce OFF THE HEAT. If you allow cheese sauce to bubble, the cheese will curdle and make your sauce grainy. Higher-fat milk in your bechamél will help guard against this happening, but it’s best to keep cheese away from direct heat and allow the residual heat in the bechamél to do the melting.

sauce series bechamel and cheese sauce

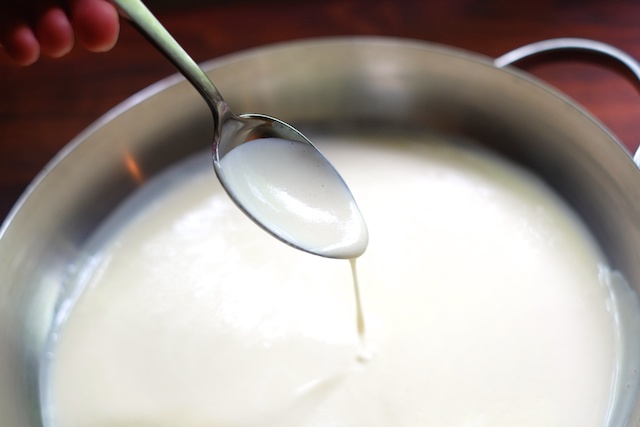
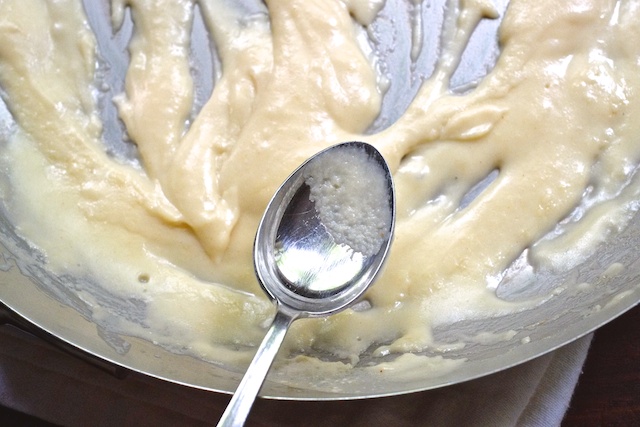
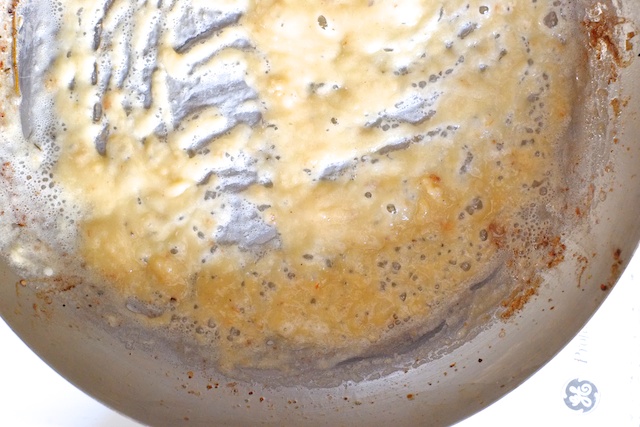
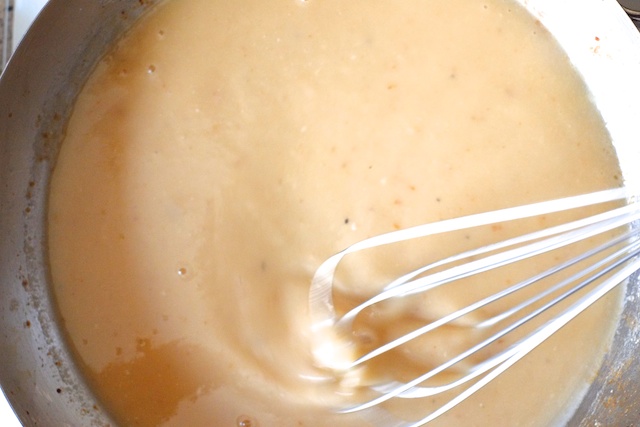
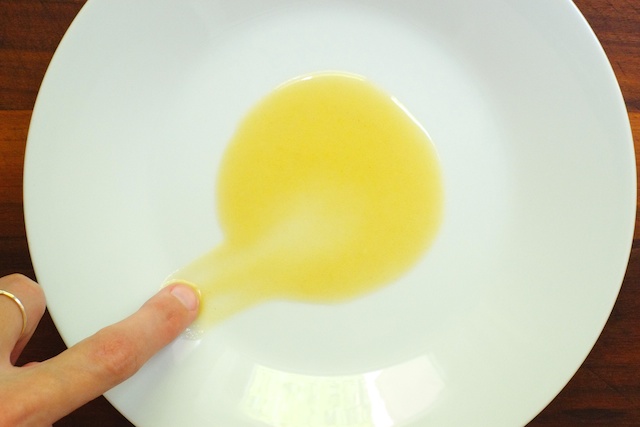
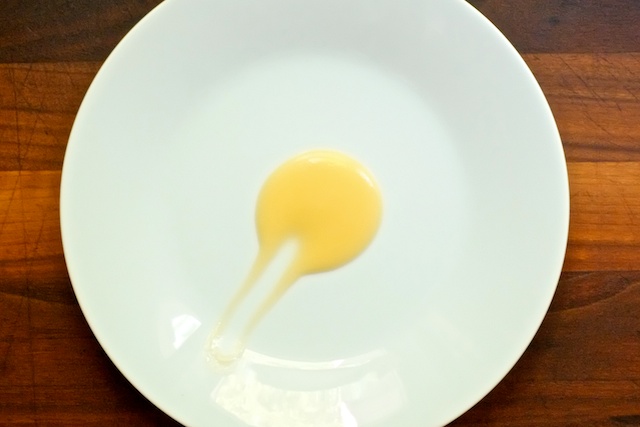
Above is a cheese sauce with properly melted cheese and a nice, smooth consistency. The sauce below was left on the heat, and now has a visibly grainy texture.

sauce series bechamel and cheese sauce

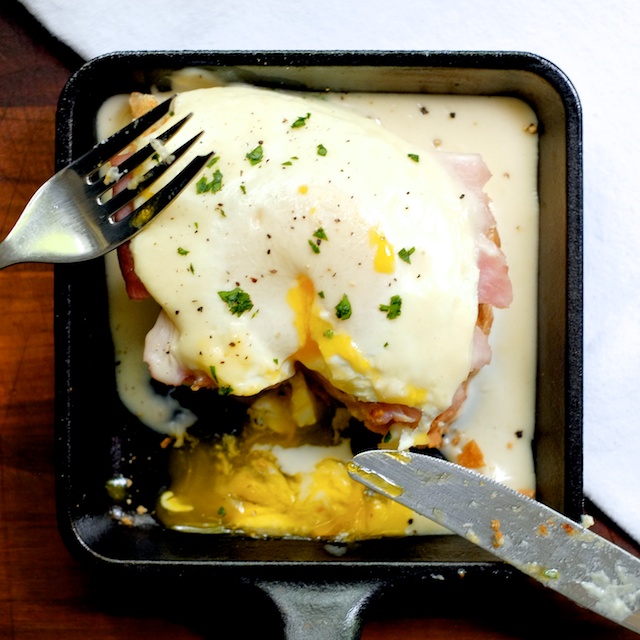
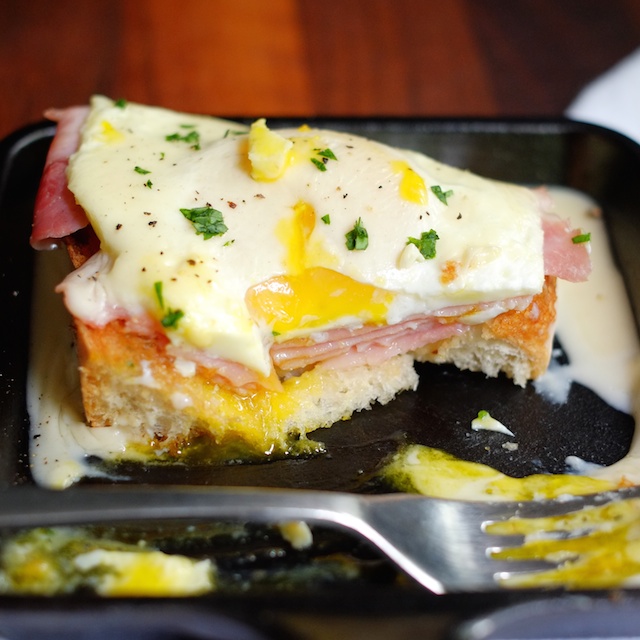
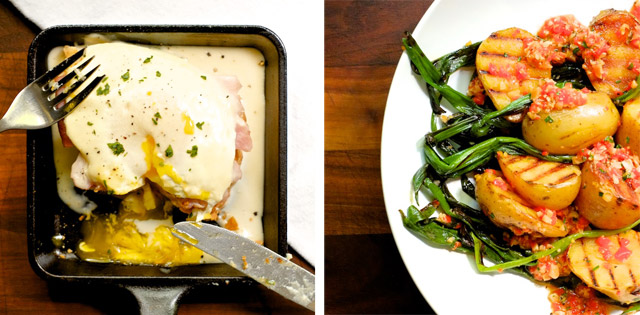
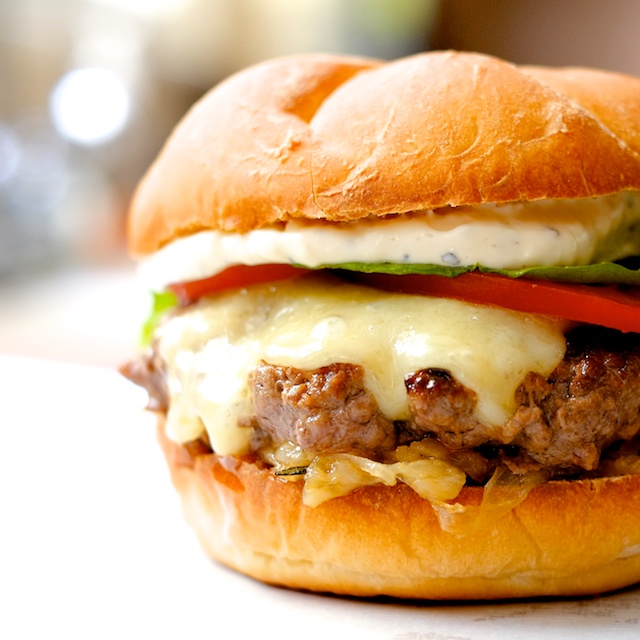
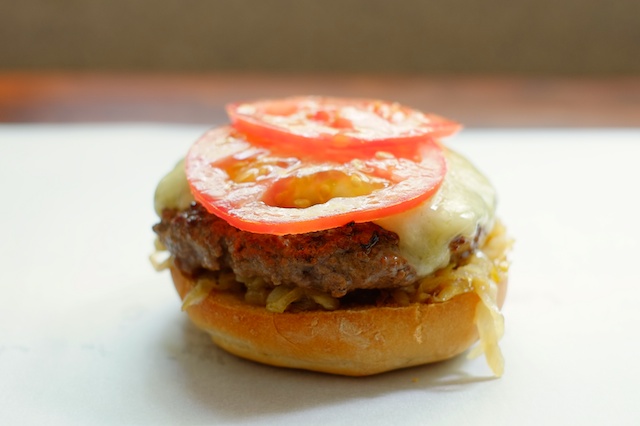
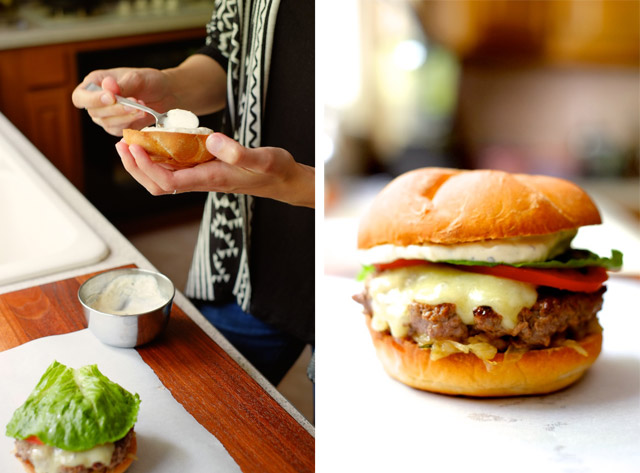
What you do with your cheese sauce is up to you. I made an open-faced croque madame, which is like eggs benedict but with mornay instead of hollandaise and a fried egg instead of poached. Proper madames have two slices of bread, ham and swiss between and nicely broiled mornay on top with the egg added last. I was too impatient to wait for proper broiling. It was delicious anyway.

sauce series bechamel and cheese sauce

sauce series bechamel and cheese sauce

The breakdown of my formula for bechamél and cheese sauce:

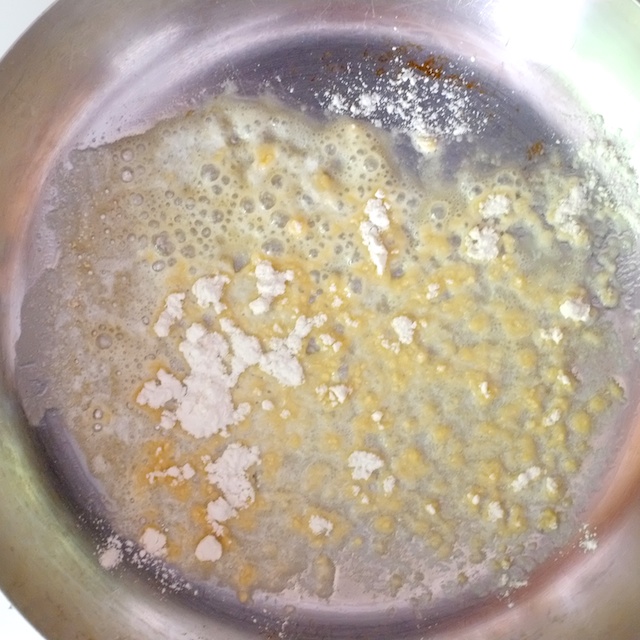
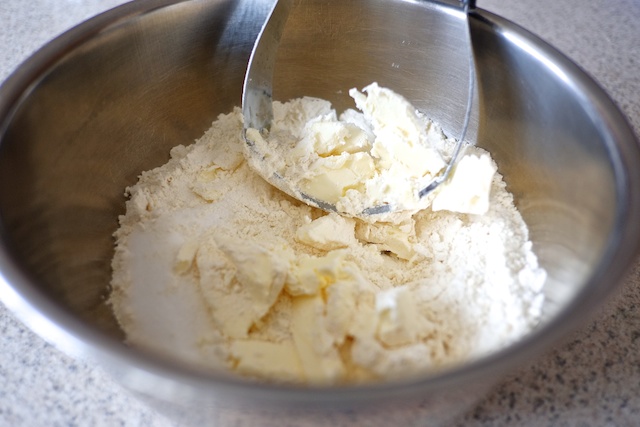
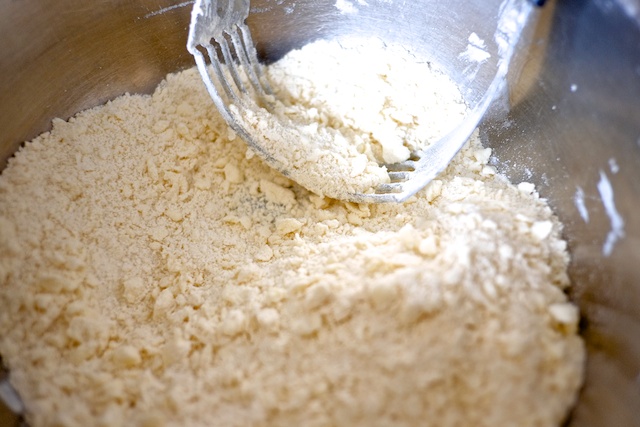
1. Make roux with 1 1/2 to 2 tablespoons each of flour and butter per cup of milk, depending on how thick you’d like your sauce to be. 1 1/2 tablespoons of flour and butter per cup will make a thinner sauce, 2 tablespoons of flour and butter per cup will make thicker sauce.

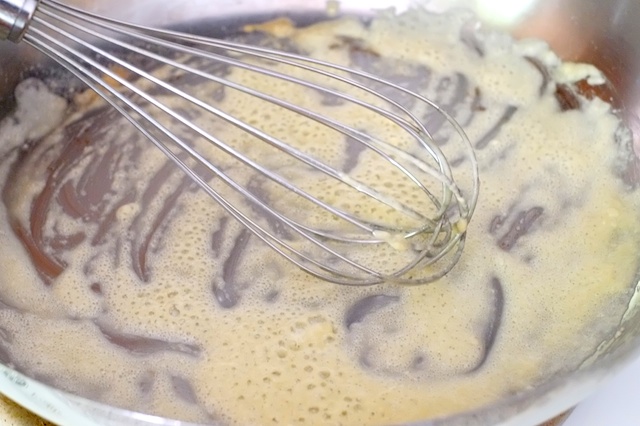
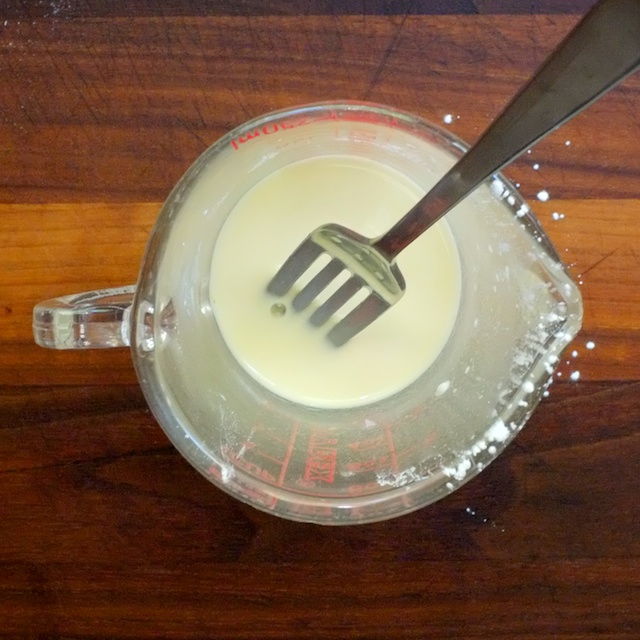
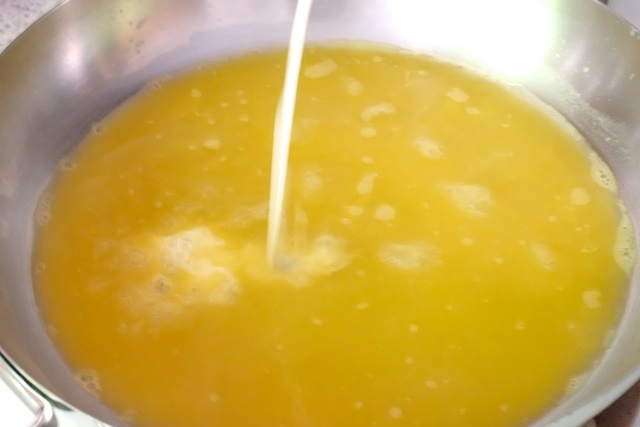
2. Add milk to roux while whisking. Bring mixture to a simmer over medium heat and allow to bubble for a few minutes until sauce is nicely thickened. This is plain bechamél. Season now if you intend to use it plain (white pepper and the tiniest pinch of nutmeg are traditional but not mandatory).

3. To make bechamél into cheese sauce, remove it from the heat and stir in grated cheese. If the residual heat from your bechamél isn’t enough to melt your cheese, return the pan to the stove over very low heat. Stir the sauce until it’s melted and smooth. You can add as much or as little cheese to your sauce as you like. The amount needed will vary depending on the strength of your cheese’s flavor (blue, for example, requires a lot less). For mac and cheese, I like to use almost a cup of grated cheese for each cup of bechamél, but a little less than that is ok. For the mornay above I used more like 1/2 cup of cheese for each cup of bechamél. It’s hard to go wrong.

4. Taste your cheese sauce before adding seasoning. Cheese can be quite salty on its own. Make any necessary adjustments by adding salt or pepper, more cheese, or even more milk if your sauce is too salty and it can stand some thinning (but remember sauce should be a little salty – you aren’t eating it straight). Consider adding mustard or hot sauce for brightness and punch.

  1. this is so super helpful. i use cream of chicken for a lot of things, but keep thinking, i would love to not be feeding my family MSG. what is MSG? i have no idea. but i heard it's bad. mono sodium glutamate? https://www.youtube.com/watch?v=AdJFE1sp4Fw thanks for educating me!

    miranda — June 5, 2014
    1. Oh man. I love that jimmy kimmel clip. The coughing guy with the eyebrow is so bad. I have a clip for you about msg. http://m.youtube.com/watch?v=k1oR0EYaOHY&feature=kp and as for making a good cream of chicken swap, I'd make an extra thick chicken gravy and add milk, so it's like a half bechamel half gravy. For cream of mushroom I'd do all bechamel and just add mushrooms. Fun stuff to play with huh!

      courtney — June 5, 2014
    2. reply
  2. Mmmmmmm! I make a low carb cheat: dab o butter or oil - a tablespoon of sour cream and the swiss cheese.

    Amy — June 14, 2014
    1. reply
  3. […] -white bread -leftover stuffing -leftover turkey -leftover cranberry sauce -bacon -one recipe bechamél sauce with a cup of shredded gruyere cheese to melt into every cup of sauce (plus a small handful of […]

    Thanksgiving Sandwich Showdown | Sweet Salty Tart — November 24, 2015
    1. reply
cancel reply

Sauce Series in Practice – Perfect Gravy

Roasts need gravy – beef, bird, and swine alike. Especially if there are mashed potatoes involved. A hunk of meat and a pile of potatoes, laced together with good gravy become something more than the sum of their parts – a meal that feeds both body and soul. Gravy is easy enough for anyone to make and essential enough that everyone should.

roast chicken with gravy

So let’s say you’ve roasted a bird. A process which deserves it’s own post, but for which I’ll offer one bit of advice here: use a thermometer. I like Ina’s method as well as this straightforward recipe from Food 52 which makes nice, crispy chicken skin inevitable. Anyway, there will be drippings. Pour them into a measuring container and skim off the fat with a ladle. Have a look at how much liquid you end up with – that’s how much gravy you will get. If you want to have more gravy than there are drippings, supplement them with some broth. A good rule of thumb is to make 1/2 cup of gravy per person, which should be enough for some leftovers.

roast chicken with gravy

I like to make gravy in the same pan I use for roasting. Which means if whatever I’m roasting will fit in a regular skillet that’s what’s happening. In addition to drippings, roasts will leave you with some fond, which is the caramelized crusty brown stuff stuck to the bottom and sides of the pan and which taste like golden essence of truth and unicorn giggles. Take advantage if you can, but drippings should give you enough of the same if you can’t.

roast chicken with gravy

I wanted one and a half cups of pretty thick gravy, so I used three tablespoons of butter and three tablespoons of flour for a roux.

roast chicken with gravy

Add the liquid and whisk away.

roast chicken with gravy

It’s best to save seasoning until the gravy is finished. If you’ve seasoned your roast well, the drippings will be quite salty, so taste the finished product before you add any additional salt.  If you want a really smooth and elegant looking gravy, strain it, but I like a few rustic flecks of fond and black pepper, so I usually don’t.

roast chicken with gravy

I like green onions in my mashed potatoes. And lots and lots of gravy.

roast chicken with gravy

Gravy can be made with cornstarch if that’s what you prefer. Heat your liquid alone in the pan and use about one tablespoon of cornstarch in a slurry per cup of liquid.

roast chicken with gravy

The breakdown of my formula for perfect gravy:

1. Pour drippings from your roast into a measuring cup and skim off any fat.

2. Supplement drippings with broth until you get enough liquid to make 1/2 cup per person

3. Make a roux (in your roasting pan if possible) with two tablespoons of butter and flour per cup of liquid.

4. Add liquid, whisk and simmer over medium heat until thickened. Taste, season if necessary, and serve.

Herbs like sage, thyme, and rosemary do really well in hearty gravies, and a squeeze of lemon at the end or even a glug of wine (added to the liquid at the beginning) can really brighten the flavor of your sauce. Gravies reward creativity, so feel free to experiment!

cancel reply

Sauce Series Part 1 – Starch Thickened Sauces

Three of the classic french “mother” sauces use starch as the primary mode of thickening. It’s that big of a deal. Flour and cornstarch are the most commonly used thickeners, but arrowroot and potato starch have their devotees.


Flour and Fat:

I almost always use flour in a roux when I’m making a gravy. Roux is comprised of equal parts flour and fat, heated to cook out the raw flour taste, and then whisked into hot liquid. After a few minutes of bubbling, the sauce is complete.

To illustrate, I made a gravy with 1 tablespoon flour, 1 tablespoon butter, and 1 cup chicken broth.

sauce series - starch thickened sauces

Start by heating the fat in a pan, (butter is traditional but you can use any oil) once it’s melted, sprinkle on your flour.

sauce series - starch thickened sauces

Whisk the flour and fat together until it’s foamy. This is the texture you want to aim for with your roux – any thicker and it can be difficult to work out lumps once the liquid is added. Getting familiar with this texture will make measuring unnecessary. Knob of butter, shake of flour, adjust as needed.

sauce series - starch thickened sauces

Cook the roux with the liquid over medium to medium-high heat until it bubbles, then let it continue to simmer for a few minutes to give the flour time to reach its full thickening power.

sauce series - starch thickened sauces

The 1 tablespoon flour/butter with 1 cup of broth combo turns out a pretty thin sauce.

sauce series - starch thickened sauces

I made a second batch of gravy with a doubled roux: 2 tablespoons butter, 2 tablespoons flour, and 1 cup broth. The result is much thicker. I usually use between 1 1/2-2 tablespoons for each cup of liquid, but it’s really about personal preference and the specific application.

sauce series - starch thickened sauces

Gravy thickened with roux has a rich flavor, especially if you use butter. Roux is my go-to, I like the texture and heft it brings to a sauce, and even the slightly toasty flavor.

sauce series - starch thickened sauces


Cornstarch:

To use cornstarch, you need to make a slurry. Slurry is cornstarch mixed with liquid. You can use water, or you can use some of whatever liquid you are trying to thicken (and thereby avoid watering-down the flavor).

sauce series - starch thickened sauces

I used one tablespoon of cornstarch with one cup of chicken broth for this batch.

sauce series - starch thickened sauces

sauce series - starch thickened sauces

Add your cornstarch slurry to your broth while whisking, and as soon as it bubbles it’s pretty much as thick as it will get. Cornstarch is quick.

sauce series - starch thickened sauces

Cornstarch-thickened sauces are glossy and have a cleaner flavor than roux-thickened sauces. Cornstarch is also a lot stronger than flour. See how one tablespoon of cornstarch made a much thicker sauce than one tablespoon of flour.

sauce series - starch thickened sauces


sauce series - starch thickened sauces

Troubleshooting:

Roux is too thick or dry: add more fat

Gravy is too thick: add more liquid

Gravy is too thin: consider cooking until the liquid reduces, or adding a cornstarch slurry (not recommended for milk sauces)

Gravy is lumpy: pass it through a strainer


It’s really easy to make adjustments with these types of sauces, so there’s no reason to be intimidated. Roux is more traditionally used in European cooking where cornstarch is more popular in Asian cooking. You can theoretically thicken any liquid you want with a roux, but the ones I find myself turning to most are meat drippings and broth for gravy and milk for béchamel or cheese sauce.

  1. I love the photos! They are both helpful and beautiful!

    Carrie — May 24, 2014
    1. Thank you! I'm glad you approve.

      courtney — May 29, 2014
    2. reply
  2. PINNED that. now i wanna go roast a chicken…and it's almost midnight.

    Miranda — May 29, 2014
    1. Thanks Mir! I get inspired to cook at impractical hours too.

      courtney — May 29, 2014
    2. reply
cancel reply

Introducing: The Sauce Series

Nothing has made me feel more confident and liberated as a cook than learning the basic components and techniques for making sauces. It’s a big category, to be fair, but the techniques that apply to sauces can be extrapolated and applied elsewhere in the kitchen. Bang-for-buck-wise, learning sauce is probably the best way to take your skills as a cook to the next level.

In old-school French cooking, there are five “mother sauces” from which almost every sauce you can imagine is derived, by making small additions. The five are béchamel (milk sauce), velouté (light gravy), espagnole (dark gravy made from roasted bone stock), hollandaise, and tomato sauce. By adding cheese to béchamel, you make mornay sauce, by adding shallots and tarragon to hollandaise you make béarnaise, etc. A lot of sauce derivatives you’ve never heard of, because they’ve fallen out of fashion (ever heard of aurora or choron sauce? didn’t think so!). But these concepts were canonized back in the day when France was the most authoritative voice in our culinary landscape and, frankly, things have changed.

sauce series intro

I’ve spent a lot of time thinking about the most common sauces used and eaten today, and breaking down the skills required to make them. With no disrespect to the old way of doing things, I’ve sort of reached my own conclusion about how they should be organized, and it’s completely different. My not-mother (father?) sauce categories go like this: starch-thickened sauces, reduced sauces, chopped sauces, and emulsified sauces. Most of the sauces I can think of fall into one of these categories, and understanding how to create even one sauce from each category will set you up to understand a plethora of other concepts and dishes (like soup! it’s basically just sauce with chunks of stuff in it).

sauce series intro

Not only does understanding sauce make you a better cook, it frees you from a lot of the processed crutches that reside in the center-aisles of the supermarket. Bottled dressing, cream of whatever soup, gravy in a packet – all these are rendered unnecessary and even undesirable once you’ve had the real versions, and once you see how easy they are to execute.

sauce series intro

Over the next couple of weeks I’ll be breaking down each sauce-making technique and providing a few basic formulas and recipes to get you started taking control of your cooking. I really want this series to be helpful and I’ve put a lot of work into making it so, but it’s impossible for me to consider every angle. So, if you have a question or see an issue, tell me – pretty please, so I can make this thing as awesome as it is in my head. And away we go.

  1. HOLLANDAISE! NOW! :)

    Caroline — May 20, 2014
    1. I'm actually panicking because that photo that looks like eggs benedict is supposed to be a croque madame! But I didn't broil the cheese sauce long enough because I was worried about over-cooking the egg yolk and waaaaaaah. Maybe I should re-shoot...

      courtney — May 20, 2014
    2. reply
cancel reply

Parks and Recreation, Tanegashima Style

tanegashima

For as small a place as Tanegashima, there is an impressive array of parks and public spaces. We visited museums dedicated to the first Japanese guns (which were introduced to Japan through Tanegashima) as well as a red rice museum and a full-on bus tour for the space center.

tanegashima rocks

There are also a lot of temples and statues and tributes to old legends. This giant rope suspended between two rocks was done in remembrance of a famous love story, I don’t remember the details but dragons were involved. It’s like a local fairy tale.

tanegashima drive safe

And instead of billboards reminding drivers to “buckle up” they built this beautiful statue as a sort of public prayer for safe driving. The island speed limit is 35 mph, so a big billboard isn’t as necessary.

tanegashima playground

We found this gorgeous playground that reminded me of the kinds of playgrounds I used to play on as a kid, but which have since been deemed unsafe and mostly done away with in the U.S. Too many metal bits? Chipping paint? Whatever. They may as well have done away with the entire concept of childhood fun.

tanegashima playground

And in true Japanese style, everything is made as cute as possible. I was dreaming of grabbing a bento at the kombini, parking myself at one of the picnic tables, and watching my imaginary kids run amok here.

tanegashima panda

BEST OF ALL, this particular playground was adjacent to a free and utterly unsupervised petting zoo, which had a big box full of cabbage leaves and lettuce and carrot pieces for guests to feed the animals. Great for kids and also me.

tanegashima petting zoo

tanegashima petting zoo

If you’re on Tanegashima at the right time of year, you might catch some sea-turtle nesting at one of their beaches. I’ve mentioned that Tanegashima has fantastic beaches but I haven’t posted many pictures of them.

tanegashima beach

Parks, gorgeous beaches, amazing food, musicians, thriving local agriculture and arts and crafts – this is a place I could happily lose myself. Missing it today. A lot.

tanegashima beach

  1. Tanegashima is a little dream world.

    Carrie — May 15, 2014
    1. That it is!

      courtney — May 15, 2014
    2. reply
  2. I want to see the zoo! I want a print if that chicken and bunny in my kitchen.

    Caroline — May 16, 2014
    1. Cody has tons more photos from the petting zoo! I can send you some.

      courtney — May 16, 2014
    2. reply
cancel reply

Cheeseburgers With Thyme Caramelized Onions and Garlic Mayo

It’s finally kind of hot outside. Eighty-four degrees in my neck of the woods, and as long as the humidity stays in check, I’m pretty pleased with it. This time of year is one of my favorites because you can make use of the grill or, if you’d rather, you can cook inside and not have to deal with an uncomfortable house for the rest of the day. Indulgent food doesn’t make you feel like you need a shower after. It’s manageable. It’s burger season.

There’s also a day, right around the corner, that for me and my friends means a very specific type of burger. On May 17th we eat Virg burgers. WTF is a Virg burger? It all started in high school, when my two best friends and I got on a seriously weird World War II movie kick. Something about the combination of 40’s culture, cute actors in military uniforms, and heightened drama. We watched a lot of movies, but our favorite was Memphis Belle, about the final mission of the famous B-17 bomber. It featured vintage (1990) Sean Astin, Harry Connick Jr, Billy Zane, Matthew Modine and a whole lot of bro-bonding and banter.

One particularly charming character named Virgil (who is given the unfortunate nickname of Virg (pronounced like verge) by his crew because he also happens to be a virgin) has hopes of opening a burger restaurant after the war. He waxes poetic about his burgers, even going as far as to describe his recipe to a girl who’s trying to chat him up. It’s pretty cute. And I like any excuse to eat a burger. So in honor of Memphis Belle day 2014 (which also happens to be my twin sisters’ birthday – hey my little dweezils) I give you, the Virg burger:

virge burgers

Virg’s “recipe” only mentions three things, which he works into the patty: worcestershire, garlic, and thyme. I personally can’t bring myself to put garlic and thyme in a burger patty without feeling like I’m making meatballs. This is a burger, and this is America. So I’ll add worcestershire to the meat (beef and worcestershire just go) and put the thyme in some caramelized onions and the garlic in the mayo.

caramelized onions with thyme

Slowly cook a thinly sliced onion in a tablespoon of butter, and add thyme and salt to taste. This will take a while over low heat, but it’s worth the wait. They get really sweet and melty. I like to add a tiny splash of white or red wine vinegar at the end to brighten up the flavor, but it’s not mandatory.

burgers

For the burger patties I used 80/20 beef which is my absolute favorite because it’s just deliciously fatty and forgiving of overcooking. If you want to go leaner, first of all, why? This is a cheeseburger. Second, if you insist on going leaner you should really aim for medium or medium rare doneness or the patty will be dry and nasty. Add worcestershire sauce and salt to the meat and form the burgers into a shape a little wider than the bun you are using, because they will shrink in the pan. I always cook up a tiny tester bite to check for seasoning, and once I’m happy I’ll put the whole patties in. Cook them in a dry pan over medium-high heat until they are browned on one side, then flip them once and add cheese to the cooked side. Cook them do the doneness level you like.

I used havarti cheese for this because, if I’m honest, I love the richness of American cheese, but I wanted something a little more upscale without losing the creaminess. Havarti is perfect.

burger assembly

You make garlic mayo by stirring raw garlic into some mayo. I used this on my grilled cheese a couple of weeks ago, and I used it with my fried crispy potatoes as dip. So I’m an addict I guess. Assemblage goes like this: toasted bun bottom, caramelized thyme onions, patty with melted cheese, tomato, lettuce, garlic mayo, top bun. The end.

virge burgers

This burger is all about sweet slow-cooked caramelized onions with the pungent garlic mayo and the richness of the beef and cheese. Tomato and lettuce are mostly for texture and freshness. Really, Virg was on to something with this flavor combo. Happy Memphis Belle Day!

Cheeseburgers with Thyme Caramelized Onions and Garlic Mayo (aka Virg Burgers)

Ingredients:
80/20 ground beef – 1/4 to 1/3 pound per person
worcestershire sauce – 1 or 2 teaspoons per pound of beef
mayo – enough for 2 tablespoons per burger
garlic, grated (for mayo, to taste – I do about one clove per 1/2 cup of mayo)
thinly sliced onion – 1/2 an onion per person (they cook down a lot)
thyme – a few sprigs
butter – for cooking onions, 2-3 tablespoons
havarti cheese – enough to cover each patty
lettuce and tomato for topping the burgers
burger buns
salt and pepper

Method:
1. Cook your onions in the butter, in a saucepan over low heat. Throw your thyme sprigs in whole and let them cook with the onions until they are soft and golden. It may take an hour or so. Season to taste with salt and a splash of vinegar (if you want).
2. Make your mayo  – add a grated (or very finely minced) clove of garlic to your favorite mayo, and season to taste with salt and lots of pepper. If you’re worried about the garlic being too strong, use half a clove.
3. Prep your beef by breaking it up with your hands in a bowl, add worcestershire and about 1/2 teaspoon of salt per pound of beef. Form the beef into patties and set them aside, leaving a tiny piece out to cook and taste later.
4. Prep your lettuce, tomato, burger buns, and cheese. Set them aside
5. Heat your pan or grill over medium-high to high heat. Fry up your tester bite of burger, adjust seasoning if necessary. Get your burgers in the pan and let them cook until half-done on the first side. Flip them once, and add your cheese to the other side. Cook to desired doneness.
6. Assemble burgers – bun on the bottom, followed by onions, patty with melted cheese, tomato, lettuce, garlic mayo, and finally the top bun. Remember: if you don’t do it in that order I won’t know or care.

  1. pretty sure i'm gonna have to watch this movie. what an all-star cast!!

    hannah — May 13, 2014
    1. You totally should! It's really fun seeing them all 20 years younger.

      courtney — May 13, 2014
    2. reply
  2. Is there anything better than a good burger? I really doubt it. And this one looks uh-mazing!!

    Alida Ryder — May 15, 2014
    1. Thanks Alida! It's probably my favorite burger I've made in a long time. Love your blog by the way!

      courtney — May 15, 2014
    2. reply
cancel reply

A Tip For Crispy Potatoes

Potatoes and me – we are a thing. I don’t care if it’s flabby steak fries or plain bakers, I want them. My love for spuds has led me to experience both the highs and lows of which the humble root vegetable is capable. And it turns out I have a favorite – fried crispy outside and fluffy inside, no skin, aioli instead of ketchup (or in addition to…).

I dislike deep-frying at home, and basically stopped a few years ago because I hate how it makes my house smell. Besides, fries at a decent restaurant usually turn out better than what I can achieve at home. But these were so good, I’m re-thinking my prejudice.

fried potatoes

The trick is pre-boiling the potatoes. I got the idea from Cody, who used to live in England and got to watch a few families make their Sunday roast dinners. They made these perfectly crispy potatoes that were boiled, smashed up (to rough up the surface of the potatoes), and then roasted with lots of oil. I hated the idea of adding another step to the process of cooking potatoes so it took me eight years of prodding from Cody to actually give it a try. I also saw this Jamie Oliver roast potato recipe where he calls the step “chuffing up” the potatoes and the idea was suddenly, adorably irresistible. The fact that the potatoes are cooked in two phases makes achieving a crispy outside with a fluffy inside pretty impossible to screw up, so the extra step worth it to me.

I fried my potatoes because I felt ambitious at the time, but I’m going to try roasting next, with Jamie’s video as a guide.

To make these, I boiled my potatoes until they were almost all the way cooked before cutting them up (which is longer than you should boil them if you’re going to roast them in the oven). Then just heat 3-4 inches of oil in a dutch oven or deep pot over medium heat until a piece of potato dropped in bubbles pretty violently. Pull them out when they’re golden brown and salt them immediately. You can turn regular mayo into aioli by adding garlic. Seriously, aioli is garlic mayo. Nothing else to it really.

english style fried potatoes

Chuffed.

cancel reply

Pots & Rock

It almost feels cliche telling you more about how raw and old-school Tanegashima is, but it’s hard to hold back when my memories are peppered with romance: a 90-year-old man riding a homemade scooter with a fishing pole strapped to his back or grandma in a dress and bonnet picking her way across a rocky beach at low tide for clams. I actually saw those things. I wonder if it’s like that any time you go way off the beaten path. And here’s one more for the collection: a real potter who digs his own clay out of the side of a Tanegashima mountain, fires his pottery in a hand-made kiln, and uses his store as a night time music venue.

pottery

The workshop is right on the beach – you could walk ten steps from the front door and fall into the ocean if you wanted. It’s at the end of a dirt road and it looks basically like most of the houses on Tanegashima. When we walked in, the owner (Sogi-san) was covered in clay and working at the wheel. But he welcomed us in and showed us around.

tanegashima pottery

That’s the giant kiln – it takes him a week to load it by hand, crawling in and out with pots.

tanegashima pottery

He told us he loses about 30% of his pottery to cracking and warping in the kiln.

tanegashima pottery

The main thing that told us this building was a pottery workshop – the stacks and stacks of wood for the kiln.

tanegashima pottery

Tanegashima pottery is really unique. Sogi-san doesn’t use glazes at all – the shine comes from the clay itself and the changes that happen in the kiln. I don’t really get it, but it’s pretty stuff with kind of a metallic sheen that ranges in color from grassy green to dusty pink. My favorite ones have chunks of ash permanently stuck in spots. It’s so gorgeously rough and rustic. Cody and I had to bring a few pieces home.

tanegashima pottery

Sogi-san is a really good guitarist and every other weekend his shop turns into a little venue. There are a number of musicians among the NASA crew, so we were invited to take part in sort of a jam-session/open mic night.

tanegashima singing

I sang some Beatles and a few others played guitar. There was some Clapton in there too. Lots of classics.

tanegashima singing

tanegashima singing

tanegashima singing

tanegashima singing

tanegashima singing

I got dragged up on stage by some of Tanegashima’s really good singers to help with singing “Stand By Me” at the end of the night. It was fun, but I’m theee most awkward stage-person, especially when I’m caught off-guard. BUT who could say no to singing classic rock with talented Japanese musicians in a pottery shop by the beach on a remote island in the East China sea? Not me.

  1. Love this post! It's so fun to go somewhere so different and fall in love with it.

    Carrie — May 8, 2014
    1. Thanks ma! It was such a cool experience. Couldn't have done it without you watching my baby!

      courtney — May 8, 2014
    2. reply
cancel reply

Easy Millionaire Shortbread

UPDATE: This recipe has been updated here!

Serious bakers and confectioners spend a looong time perfecting the art of working with sugar. Caramel, for example, is basically browned and melted sugar – and that’s really all it has to be, but temperatures and added fats can turn burned sugar to anything from a sauce to a brittle. Chocolate can also strike fear in the hearts of cooks, with words like tempering and the threat of seizing. Millionaire shortbread is made of a layer of shortbread, a layer of caramel, and a layer of chocolate. So, basically, it has the potential to be one of the fussiest treats you can make.

I happened upon a version of this recipe while I was working as a cook. I didn’t realize at the time what a foolproof gem I’d found, I just followed the recipe as well as I could between mixing cookie dough and checking on cakes. It worked, and I had no reason to believe it shouldn’t. We sold them and they were eaten and all was right in our little cafe. Now that I’ve lived a little more I know what a disaster it should have been. No candy thermometer, no tempering chocolate, just some stirring and pouring and ta-da: candy bars.

millionaire shortbread

You start by making shortbread with flour, sugar, cold butter and a pinch of salt. That’s it. Then cut cut cut with a pastry cutter or squish with your hands until the whole mess looks like lumpy sand. If you use your hands I’d recommend cutting the butter into chunks before working it into the flour, or you’re in for a lot of squishing.

butter and flour

cutting butter into flour

shortbread texture

It looks too dry to possibly work, but dump it into a lined 9×13 and press it into an even layer. It will happen. And it will transform in the oven. You won’t recognize it.

shortbread pressed into pan

The caramel for this recipe is really more of a stiff dulce de leche, because the first ingredient is sweetened condensed milk. I LOVE dulce de leche, but if you are into making caramel, I’m sure a more traditional caramel will work. Actually, if you’ve tried making these with traditional caramel you should tell me how it was. I’m interested.

condensed milk

Condensed milk, sugar, and a little corn syrup (I know, I know – but it’s necessary for texture) and cook it on medium heat until it bubbles. You need to hang around for this part and stir. A lot.

boiling caramel

After a few minutes of stirring it will look like this.

dulce de leche caramel

When you are happy with the color, take it off the heat and stir in the butter. Then SALT it and taste it. Try not to burn your tongue, but you probably will. Make sure it’s nice and balanced and salted enough that you can taste the butter. Pour it over the shortbread and spread it evenly.

caramel on shortbread

Then get some of your favorite chocolate and put it in a double boiler, which is just a bowl on top of a pot of simmering water. The double boiler takes all of the guesswork out of melting chocolate, which can be disastrous if you try to do it over the stove. It will take a few minutes to melt, but it’s worth the wait. When it’s smooth and pourable, spread it over the shortbread and caramel, and put the whole thing in the fridge for an hour.

chocolate

When it’s set (you’ll know when the melty shine of the chocolate fades into a soft luster) cut it into bars. Use a ruler if you have the patience. I never do, and my bars are always uneven. But I don’t care.

millionaire shortbread

Sooo my awesome graphic designer sister Caroline made a pretty version of the recipe for you all! She’s a photoshop whiz and she’s way better at organizing information than me. So, without further ado, the fruit of her labor:

Easy Millionaire Shortbread

  1. These bars look great and I especially love the angles of all your photos!

    Mallory @ Because I Like Chocolate — May 7, 2014
    1. Hey Mallory! Thanks for stopping by, and for the compliment. Now I'm going to check your blog - the title intrigues me :)

      courtney — May 7, 2014
    2. reply
  2. […] but as a silver lining learns us a thing or two. That’s what happened to me with these “easy millionaire shortbread bars” that I had previously written about. And while they are probably still easy by most […]

    Millionaire Shortbread Bars – UPDATED! | Sweet Salty Tart — January 6, 2016
    1. reply
cancel reply

Meal Plan Recap

I’m a bit of a meal planning evangelist. For me, it’s just too easy to waste food and money and fall into ruts if I don’t plan things out. And it probably makes me a freak, but figuring out a plan based on what I’ve got that needs using, what my budget is, and what I’m craving is like the best kind of puzzle to me.

garlic fried brown rice with kale

I like doing my shopping on Fridays, because it helps to have fresh ideas and a well stocked fridge before the weekend hits if we don’t want to end up ordering pizza and eating sad scraps around the house. This week I had some left over pork shoulder from two weeks ago that I’d frozen, a few pints of homemade chicken stock, and a couple of tuna steaks. I was also interested in keeping things pretty simple. My plan ended up like this:

-Congee with mushrooms, pork shoulder, green onions, and sriracha

-Pork shoulder with mashed cauliflower, roasted asparagus, and mushrooms

-Crispy black bean tacos with lime slaw, feta, salsa, and guacamole

-Seared tuna and garlic fried brown rice with kale

-Tuna poached in olive oil with boiled potatoes, green peas, and dill sauce

The week turned out like this:

Saturday: I made the congee Friday night and we had some left overs for lunch. Congee is basically rice cooked to death (smooth, silky, delicious death) in too much water or broth, until it makes kind of a soupy, savory porridge. I used this recipe and my homemade broth. It was my first time making congee and it was pretty great. I saved the fat from my pork shoulder and used it to cook my mushrooms, which were also awesome. Friday night we had the congee with pork shoulder, Saturday we had it with soft boiled egg. I’ll definitely make it again. At dinner time I was feeling exceptionally lazy and we ordered pizza. I planned and it happened anyway. Plus we just wanted it.

Sunday: Was pretty shameful. I ate leftover pizza for breakfast and experimented with frying potatoes in the afternoon. Caaaarbs all day long. I don’t even remember dinner.

Monday: Cody’s and my anniversary, so we had dinner out at Ray’s the Steaks. I tried this cut I’d never had before that was basically just the outside portion of a ribeye (the BEST part) and it was everything. I love that restaurant.

Tuesday: I made black bean tacos from smitten kitchen’s recipe (with my own twists of course) but Cody worked unexpectedly late and the tacos refused to stay crisp in the oven. Tasty, just not super crisp. The slaw was great though – absolute must.

Wednesday: This meal was just a lazy way to use up the last of my pork shoulder. I had only attempted mashed cauliflower once before and it turned out way too watery, so I decided to roast it this time instead of boiling it. After roasting, the cauliflower didn’t want to mash so I busted out the immersion blender and it was perfect. Mushrooms and asparagus were roasted and lovely.

Thursday: The garlic fried brown rice with kale was pretty good, and I might work up a version for the blog after I get it perfect. The tuna was just meh – working from frozen kind of ruins the texture for “proper” seared and rare tuna, so I had to cook it further which changes the flavor in a way I don’t love. Lesson learned – if you want seared tuna buy it super fresh and probably cook it right away.

Friday: I poached my tuna on Thursday because it takes almost no effort and they come in packs of two and I only used one for the seared tuna. Poaching is easier than re-packaging raw tuna. Just put the fish in a small dish, cover it with olive oil, throw in a couple of whole garlic cloves and a thyme sprig and pop it in a low oven until it’s cooked through. I kept this in it’s oil for overnight storage and re-heated it briefly in the oven. The flavor was excellent – tuna can really stand up to the strong flavors of garlic and thyme. I boiled potatoes and blanched some peas to go with and stirred up some sauce with fresh dill, dijon, sour cream and mayo. Yum.

Overall a decent week in my opinion, with a few learning moments. Should I post my shopping list next time? Or would that just be ridiculous?

  1. what you should do is just post your shopping list and meal plans and recipes a week ahead of schedule so i can copy you. thanks.

    miranda — May 6, 2014
    1. ha! Thanks! That could work too, but then you wouldn't get to see what worked and what didn't. Maybe most people don't care so much about that? For me it's more about seeing the "strategy" that goes into it than what was actually made, but I'm weird.

      courtney — May 6, 2014
    2. reply
cancel reply